

Version 07/11 - Page 8
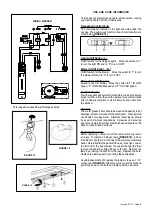
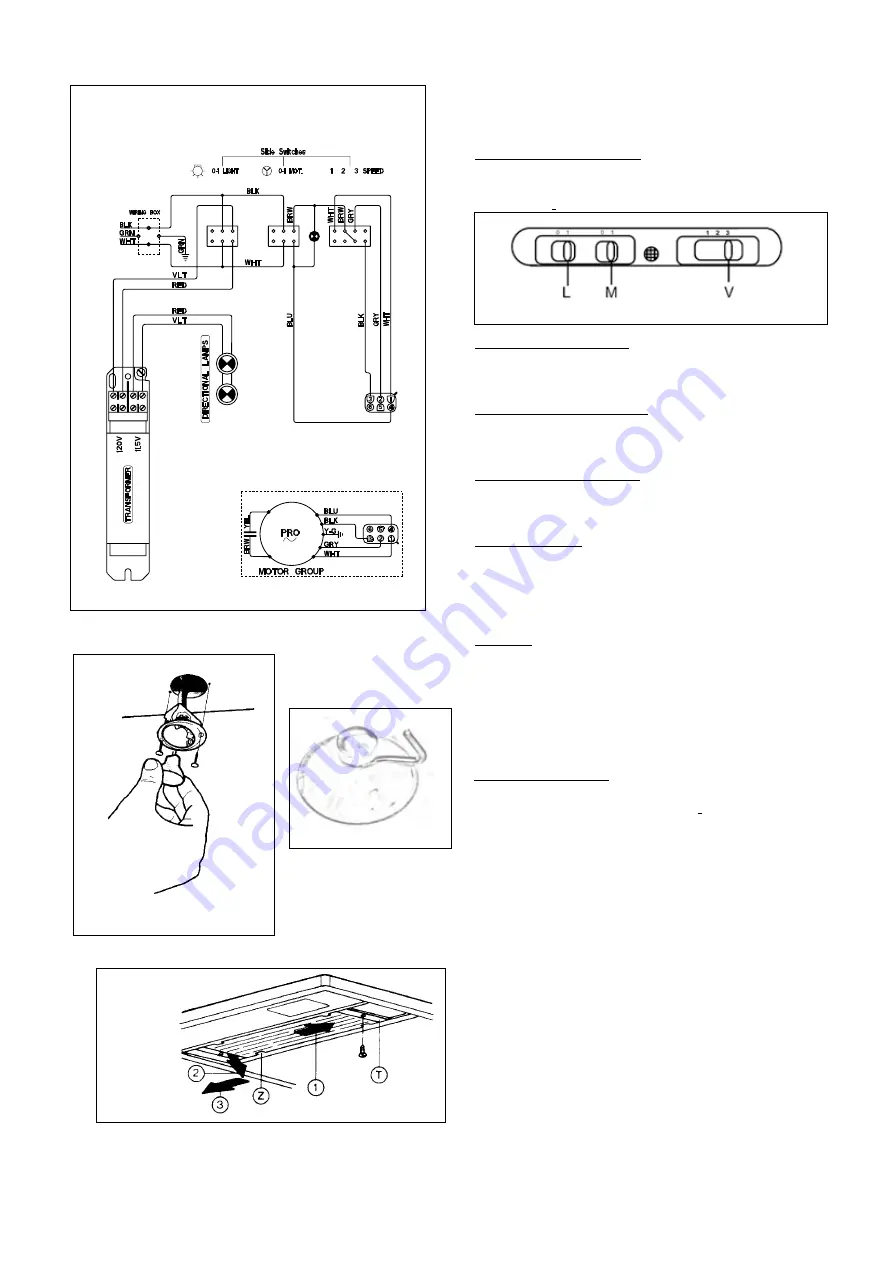
Light On/Off Button ( L )
On/Off switch for the halogen lights. Move the switch to "1"
to turn the light ON and to "0" to turn it OFF.
Blower On/Off Button ( M )
On/Off switch for the blower. Move the switch to "1" to turn
the blower ON and to "0" to turn it OFF.
Blower Speed Button ( V )
Speed control for blower. Move the switch to"1" for LOW
speed, "2" for MEDIUM speed and "3" for HIGH speed.
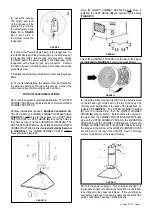
For Best Results
Start the rangehood several minutes before cooking to develop
proper airflow. Allow the unit to operate for several minutes
after cooking is complete to clear all smoke and odors from
the kitchen.
Cleaning
The metal grease filters should be cleaned frequently in hot
detergent solution or washed in the dishwasher. Clean painted
hoods with hot soapy water. Stainless steel cleaner should
be used on stainless rangehoods. Abrasives and scouring
agents can scratch stainless steel finishes and should not be
used to clean finished surfaces
USE AND CARE INFORMATION
This rangehood system is designed to remove smoke, cooking
vapors and odors from the cooktop area.
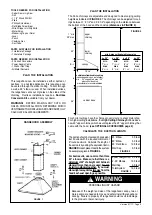
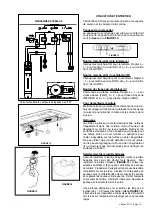
Rangehood Control Panel
The control panel, located on the right-hand side under the
canopy. The position and function of each control button are
noted below
(
FIGURE 14)
.
FIGURE 14
WIRING DIAGRAM
• This rangehood uses 20 watt Halogen Lamps.
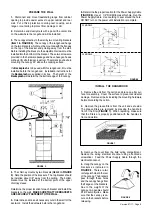
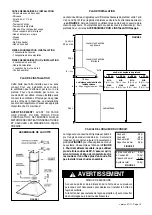
Replacing the Lamps
Before replacing a lamp, turn off the lamp switch to prevent
an injury. To replace a halogen lamp
(FIGURE 15)
, remove
the diffuser clips
(T)
on both ends of the stainless steel lamp
panel. Carefully slide the panel all the way to the right. Lower
the left end of the panel below the support flange
(Z)
, then
remove the panel by sliding it back to the left. Remove the
lamp by pressing the bulb from the rear. Replace the bulb.
Replace the lamp panel by reversing these directions.
An alternative method to replace the lamps is to use a 1 1/4"
suction cup (
FIGURE 16
). Attach the suction cup to the bulb and
pull firmly down on the bulb and replace with a new lamp.
FIGURE 15
FIGURE 14
FIGURE 16


