
Version 12/04 - Page 6
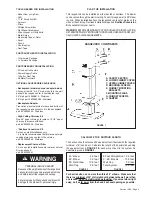
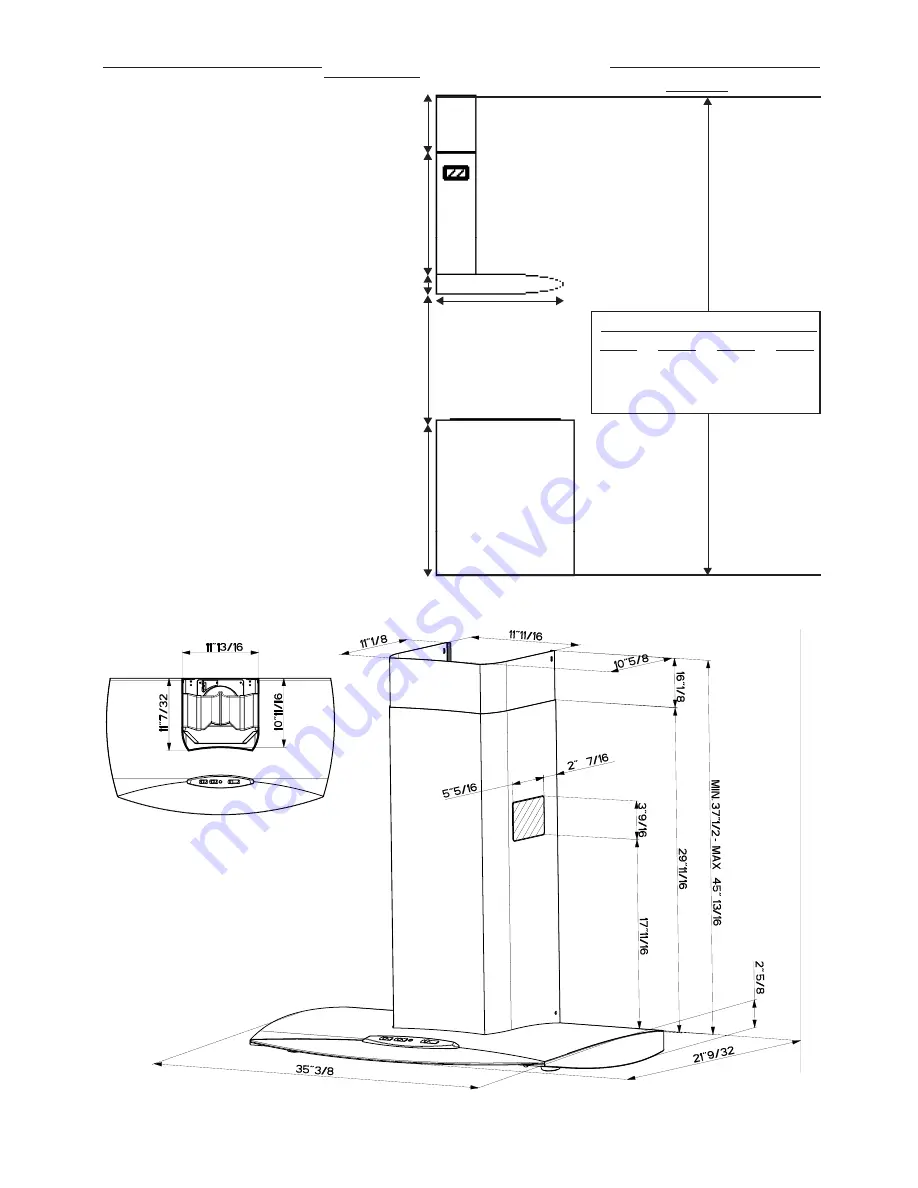
DUCTLESS
INSTALLATION DIMENSIONS
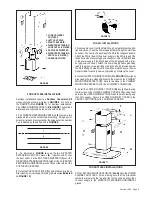
The Axia Plus chimneys are adjustable and
designed to meet varying ceiling heights
as indicated in
FIGURE 5
. For ductless
installations, the chimneys can be adjusted
for ceilings between 8' 4 1/8" and 9' 6 7/16"
depending on the distance between the
bottom of the hood and the cooktop
(distance
x)
. For shorter ceilings, have the chimney
cover(s) cut at a sheet metal shop. For
higher ceilings, the
High Ceiling Chimney
Kit
includes a new 40” upper chimney which
would replace the 16 1/8” upper chimney that
came with the hood.
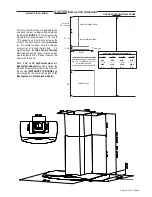
Note: If
24" or 30" High Backsplash
and
Backsplash Adapter
are being installed, the
distance between the bottom of the hood and
the cooktop
(DISTANCE X IN FIGURE 4)
is
determined by the combined height of the
Backsplash
and
Backsplash Adapter.
upper chimney cover
ductless lower chimney cover
canopy
x = distance from hood to cooktop
(varies depending on installation)
min - 24”, suggested max - 30”
cabinet base
7
13/16”
min
16
1/8”
max
29
11/16”
2
5/8”
36”
FIGURE 5
DUCTLESS
INSTALLATIONS
21
9/32”
x
also consult cooktop
manufacturer's recommendation
(not vented to the outside)
min & max ceiling height examples
x = 30"
min
8'
10 1/8"
max
9'
6 7/16"
x = 28"
min
8'
8 1/8"
max
9'
4 7/16"
x = 26"
min
8'
6 1/8"
max
9'
2 7/16"
x = 24"
min
8'
4 1/8"
max
9'
7/16"


