16
11
12
13
10
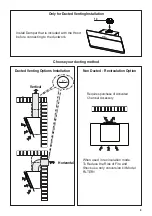
Vertical or Horizontal
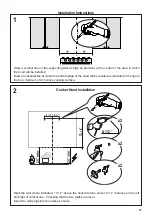
Ducting Installation
Fix the bracket
7.2.1 using the
screws 12a
supplied.
L = 4x
12a
If installed,
unfasten the four
screws as shown
and remove filter
cover.
Use the four
screws removed
previously to
secure the angle
bracket included
with Optional Tele-
scopic Chimney
Kit.
Install Roof or Wall
Cap purchased
separately. Con-
nect the 6" metal
ductwork to the
Roof or Wall Cap
and then attach
ductwork.
14
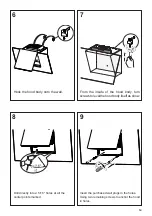
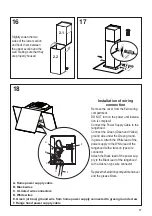
Slightly widen
the two sides
of the upper
chimney and
hook them
behind the
brackets 7.2.1,
making sure
that they are
well seated.
Secure the sides to the brackets by using the 4
screws 12b.
15
N = 4x
2.1
Summary of Contents for CTAL31BK300-B
Page 5: ...5 RANGEHOOD DIMENSIONS ELECTRICAL CONNECTION KNOCKOUT...
Page 6: ...6 Min 21 3 16 Min 24...
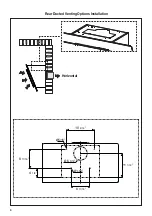
Page 9: ...9 Rear Ducted Venting Options Installation Horizontal...
Page 21: ...21 Wiring Diagram...
Page 26: ...26 DIMENSIONS DE LA HOTTE DIMENSION L ENTR E LECTRIQUE D FON ABLE...
Page 27: ...27 Min 24 Min 24...
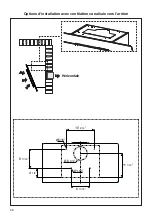
Page 30: ...30 Horizontale Options d installation avec ventilation canalis e vers l arri re...
Page 42: ...42 Sch ma de c blage...


