background image

Wireless induction charge

CENTER

1. The Cooking area is equipped with two wireless phone charger.

2. For correct charging activation, the telephone device (Android or Apple) must 

be correctly placed in the center of the wireless symbol, screen-printed on the 

cooking surface, (otherwise the recharge does not activate and / or does not work 

properly).

3. Wireless charging takes place with predisposed devices (integrated wireless 

charging).

4.  Charging is done with QI technology:

IRRADIATE POWER

5 W

INPUT

DC 5V/1A, max 2A

OUTLET

5V/1000 mA

Standard QI

YES

ENGLISH

21

Summary of Contents for SOCIALE

Page 1: ...Cooking area Surface de cuisson rea de cocci n EN Use and installation manual 2 FR Manuel d installation et d utilisation 22 ES Manual de instalaci n y uso 42...

Page 2: ...lock 14 Special programs Melt Simmer Power Boost Automatic warm up 15 Safety switch 16 Bridge Flexible cooking zones 17 Troubleshooting 18 Protecting the environment 20 Disposal of your old appliance...

Page 3: ...t away from the cooking surface unless they are under constant supervision Children 8 years and older must only be allowed to use the cooking surface if they have been given supervision or instruction...

Page 4: ...qualified electrician If the supply cord is damaged it must be replaced by the manufacturer its service agent or similarly qualified persons in order to avoid a hazard Before installation maintenance...

Page 5: ...flammable items in the drawer If there is a cutlery tray below the cooking area it must be made of heat resistant material Never heat empty cookware or an empty pot This can damage the glass ceramic s...

Page 6: ...surface The appliance is not intended to be operated by means of an external timer or separate remote control system For users who wear a pacemaker When the cooking area is in use it is surrounded by...

Page 7: ...ble cookware of stainless steel To determine whether the cookware is suitable check whether the base of the pot or pan attracts a magnet There are other induction capable pots and pans whose bases are...

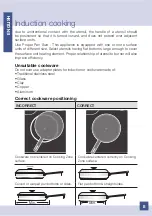
Page 8: ...e enough to cover the surface unit heating element Proper relationship of utensil to burner will also improve efficiency Unsuitable cookware Do not ever use adapter plates for induction or cookware ma...

Page 9: ...OOKING TIME off 0 off low heat level 1 Keeping food warm as required 1 2 Melting 5 25 mins Solidifying 10 40 mins Melt program Melting Automatically sets the temperature at 70 C 158 F as required 2 3...

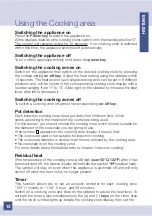
Page 10: ...e controlled by touching the sensor keys and confirmed by displays and acoustic signals Touch the sensor keys from above without covering other sensor keys The hob has four induction cooking zone and...

Page 11: ...activate Melt or Simmer program Left Right bridge press simoultaneously to activate Left or Right Bridge Timer press and or to activate and set a cooking zone Timer or to set an Egg timer Reminder Sli...

Page 12: ...oo small or no cookware has been placed on the cooking zone h 4 Residual heat indicates that the cooking zone is still hot Warning p 4 Power boost function is activated a 4 Automatic warm up function...

Page 13: ...mum limit which varies according to the material of the cookware being used For this reason you should choose the cooking zone which is most suitable for the diameter of the cookware you are going to...

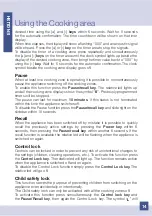
Page 14: ...he appliance switches off To disable the Pause function press the Pause recall key and slide right on the slidebar within 10 seconds Recall When the appliance has been switched off by mistake it is po...

Page 15: ...Melt Simmer Simmer The Simmer program sets the heat temperature of the selected cooking zone at 94 C 201 2 F to bring to a boil slowly preparing sauces or soups and stews To activate this program pres...

Page 16: ...until the symbol A alternating with the selected heat level appears on the cooking area display Safety switch The appliance has a safety switch that automatically switches off the cooking zones when...

Page 17: ...vate the Bridge function between the two adjacents cooking zones 1 2 3 4 switch on one cooking zone then press simoultaneously the slidebar in correspondence of the two bridge symbols see image below...

Page 18: ...key ON OFF Remove the object from the sensor key Residual heat indicator does not come on The zone is not hot because it operated only for a short time If the zone operated sufficiently long to be ho...

Page 19: ...ted Allow the appliance to cool down e 2 1 e 0 3 comes on The appliance is overheated The cooling fan might be blocked Allow the appliance to cool down Check if objects block the cooling fan If comes...

Page 20: ...a danger to children while being stored for disposal Energy saving advice Always place a fitting lid on cookware Cooking with an uncovered pan will result in a four fold increase in energy use Use a g...

Page 21: ...correctly placed in the center of the wireless symbol screen printed on the cooking surface otherwise the recharge does not activate and or does not work properly 3 Wireless charging takes place with...

Reviews: