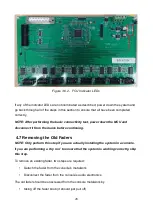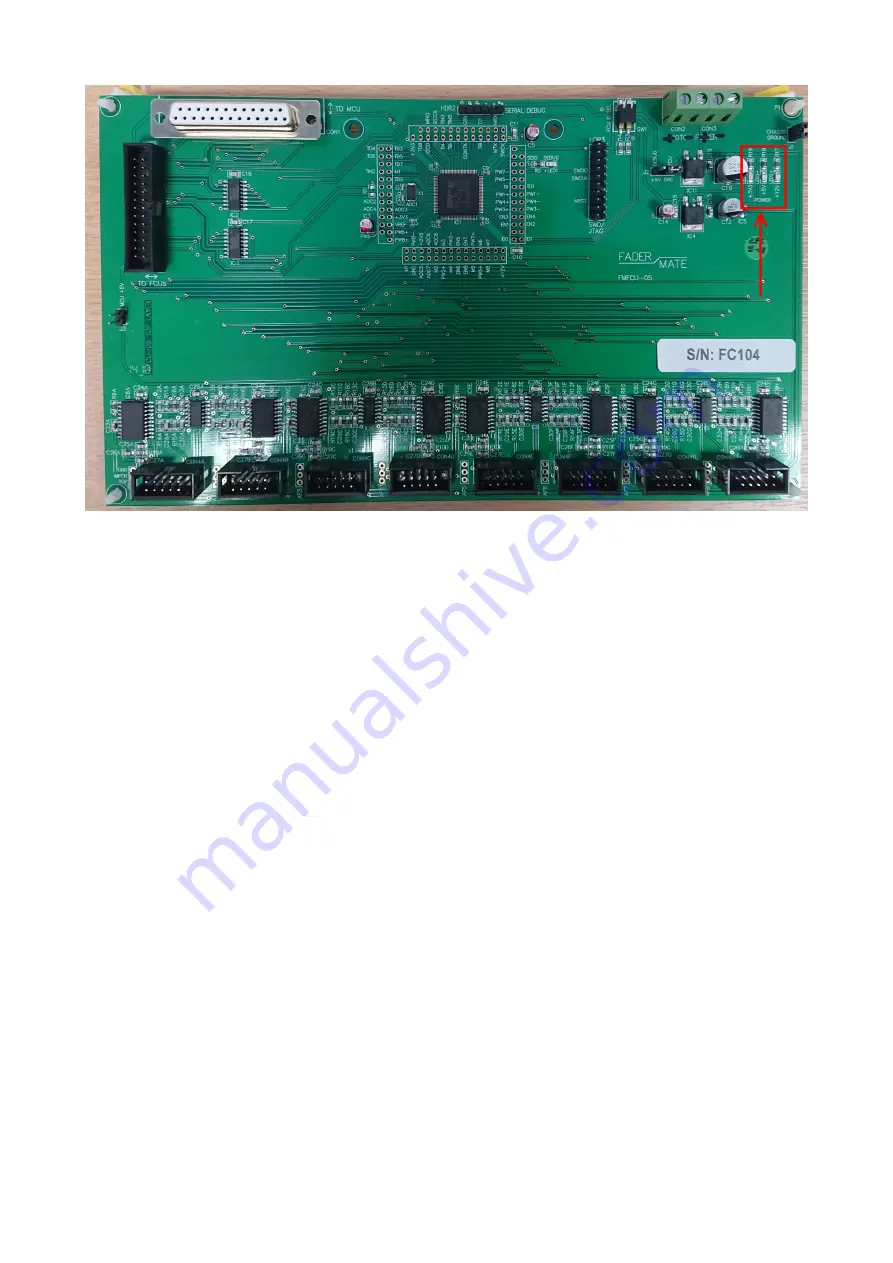
Figure 4.6.2 - FCU Indicator LEDs
If any of the indicator LEDs are not illuminated as described, power down the system and
go back through all of the steps in this section to ensure that all have been completed
correctly.
NOTE: After performing the basic connectivity test, power down the MCU and
disconnect it from the mains before continuing.
4.7 Removing the Old Faders
NOTE: Only perform this step if you are actually installing the system in a console.
If you are performing a ‘dry run’ to ensure that the system is working correctly, skip
this step.
To remove an existing fader, two steps are required:
•
Detach the fader from the console’s metalwork
•
Disconnect the fader from the console’s audio electronics
The old fader should be unscrewed from the console metalwork by
•
taking off the fader knob (it should just pull off)
28
Summary of Contents for Master Control Unit
Page 1: ...Product Fitting Guide v1 0 0 October 2018 2018 FaderMate All rights reserved 1...
Page 11: ...Figure 3 3 1 FCU Circuit Board Dimensions 11...
Page 23: ...Figure 4 4 4 Data Connections 23...
Page 26: ...Figure 4 5 4 Daisychain Power Connections Block Diagram 26...
Page 36: ...Version History Version Date Author Details 1 0 0 08 October 2018 AJN First release 36...


