16
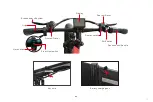
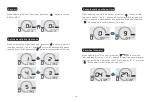
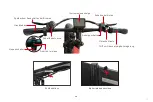
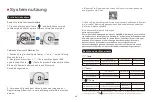
Ensure proper handlebar and seat adjustment. Lowering the seat so the rider can put one or both feet flat on the ground may offer a safer and more comfortable
introduction to operating the bike. Ensure the handlebar bolts and seat post quick release are fully and properly secured.
Handlebar and Seat
Select the desired level of pedal assistance(PAS) between level 0 to 3. Using the + and - buttons to remote. Level 1 corresponds to the lowest level of pedal
assistance and level 3 corresponds to the highest level of pedal assistance. Level 0 indicates pedal assistance is inactive. Start in PAS level 0 or 1 and adjust
from there.
PAS Level
The speed control handle is used by slowly and carefully rotate the handle downward without pedaling. Do not use the throttle unless you are on the bike.
Speed Control Handle
Test the battery lock security. Ensure the key port is aligned with the icon, which indicated the battery is powered on and locked onto the frame mount.
Carefully use both hands to pull up on the battery to test that the lock is secure.
Battery Lock
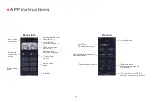
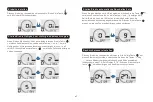
Press and hold the power button “ ” for approximately 3 seconds to turn on/off the bike.
Power on/off
Long press the " " button to turn on/off the front light.
Press the horn switch to remind passers-by or animals ahead when needed.
Electric Horn
Front Light
Long press " - " button for 5 seconds till the push mode mark turns up on the screen. Then the push mode is activated.
6km/h Push Mode
Accelerate the bike with the speed control handle to the speed that you want and keep for over 8 seconds. Then the cruise mode will be activated. The cruise
mode can be turned off by braking or accelerating.
Cruise Control

