53
Trendline 3
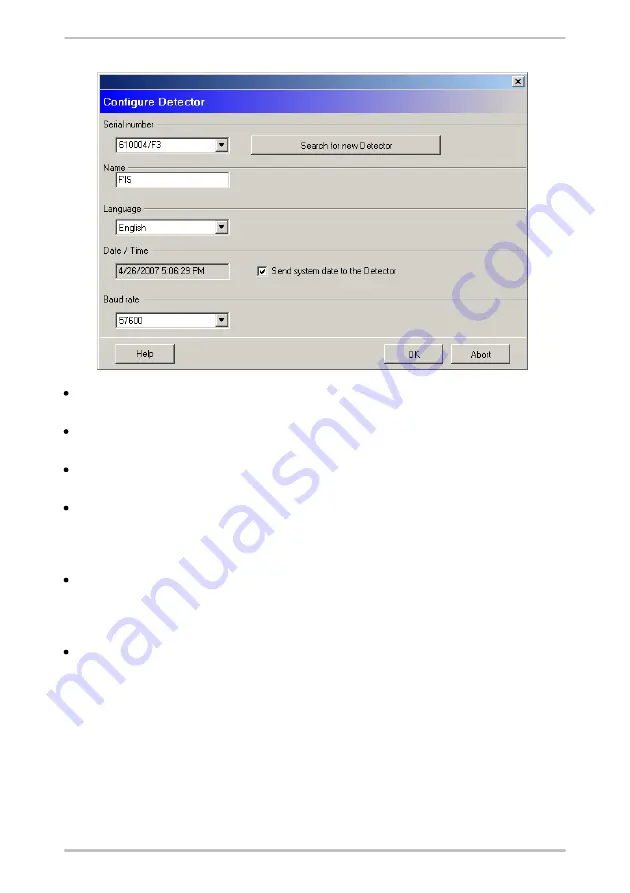
Connect the Detector to your PC and switch it on. Click on
Search for new
Detector
to register the new Detector on to the program.
You may give the Detector a
name
, which will be displayed in the default
display when switching on the instrument.
You can select the
language
for the Detector. Nevertheless it still can be
changed at the Detector.
You can set the time of the Detector either by entering the correct time and date
(to do this, click on the figure you want to change) or by clicking
Send system
date to the Detector
(that way the Detector is set to the same time and date as
your PC).
Here, you can select the
baud rate
of the Detector. Normally, you should select
the highest possible (57.6 kbps). In case of problems with communication (e.
g. the connection breaks down at times) you may select the lower baud rate of
38,4 kbps.
After completing all settings, click on
OK
to send the changes to the Detector.
Make sure that the Detector is switched on when clicking
OK
, because
otherwise no communication is possible.
4.4 Setting up configuration
4.4.1 Set up system tree
Each configuration is subdivided into three levels, e.g. section - machine -
measuring point.


