background image

7

EN

•  Max. capacity:150 Kg / 330 lb

•  Min. capacity: 3Kg / 6.6 lb

•  Graduation: 100 g / 0.2 lb

•  3V lithium battery (CR 2032) (included).

•  Foot-touch start. 

•  Automatic start-up

•  Automatic switch-off.

•  Overload indicator.

•  Low battery indicator.

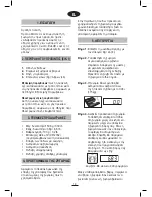
2. APPLIANCE DEFINITION (FIG. 1)

1.


Display

2.

   Weighing surface

3. 

  Battery compartment

4. 

  Kg/Lb selector

Interference suppression: 

The interference 

of this appliance has been suppressed in 

accordance with interference suppression 

standards.

Electromagnetic compatibility:

 This 

appliance complies with the CEM 

standards of electromagnetic compatibility.

4. ADJUSTMENT

Remove the plastic insulation from the 

battery contact, located underneath the 

scales, before using them.

If you are not going to use the scales for 

a long period of time, put the plastic back 

between one of the contacts and the 

battery, or remove the battery.

1. INTRODUCTION

Dear customer, 

We recommend you read this instruction 

manual carefully before using the scales for 

the first time, in order to use them correctly. 

You should also keep this manual for further 

reference.

5. FUNCTIONING

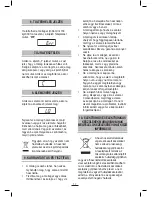
Step 1.

 Select the unit of measurement 

using the Kg / Lb selector (4). 

Step 2.

 Place the scales on a hard, 

horizontal surface. Avoid carpets 

to ensure greater precision and 

repeatability in the reading. Try 

and always weigh yourself with the 

scales in the same place.

Step 3.

  The scale will come on 

automatically when you stand on it 

or press the platform. (>15kg)

Step 4.

 Get on the scales carefully. Place 

your feet firmly on the scales 

without moving and wait for the 

scales to calculate your weight. 

When the scales finish the 

calculation, the number will stop 

flashing and the kg or lb symbol 

will appear, depending on which 

you selected in step 1. Your correct 

weight will be displayed in the 

following way:


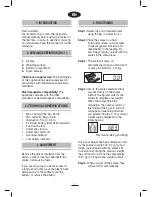
This means: 68 kg and 300g

Once your weight has been displayed, wait 

for the scales to switch off. If you try and 

weigh yourself again with the scales still 

in operation showing the previous weight, 

they will not work. Once the scale display 

"

0.0

", get on it again and weigh yourself.

Step 5.

 When you get off the scales, they 

will switch off automatically. 

3. TECHNICAL SPECIFICATIONS

Summary of Contents for BB-165

Page 1: ...ight to modify the models described in this User s Manual Le fabricant se r serve le droit de modifier les mod les d crit dans le pr sente notice O k t k v t t p ok t k to k v tpo o o t ovt ou p yp ov...

Page 2: ...irse de nuevo para pesarse 1 ES Fig 1 Eik 1 1 bra Obr 1 Rys 1 1 1 Capacidad max 150 Kg 330 lb Capacidad min 3Kg 6 6 lb Graduaci n 100 g 0 2 lb Pila de litio de 3V CR 2032 incluida Toque de pie para in...

Page 3: ...diza si est h meda Aseg rese de que est seca antes de usarla Limpie la b scula con un pa o seco y evite que entre agua en su interior No utilice agentes de limpieza qu micos fuertes como el alcohol o...

Page 4: ...residuo de electrodom stico significa evitar posibles consecuencias negativas para el medio ambiente y la salud derivadas de una eliminaci n inadecuada y permite un tratamiento y reciclado de los mat...

Page 5: ...ma a poder utiliza la correctamente Guarde este manual para posteriores consultas 5 FUNCIONAMENTO Passo 1 Seleccione a unidade de medida com o selector kg lb 4 Passo 2 Coloque a balan a numa superf ci...

Page 6: ...de que est seca antes de a usar Limpe a balan a com um pano seco e evite que entre gua para o seu interior N o utilize agentes de limpeza qu micos fortes como o lcool ou o benzeno Mantenha a balan a...

Page 7: ...um electrodom stico permite evitar poss veis consequ ncias negativas para o ambiente e para a sa de p blica resultantes de uma elimina o inadequada al m de que permite recuperar os materiais constitu...

Page 8: ...er to use them correctly You should also keep this manual for further reference 5 FUNCTIONING Step 1 Select the unit of measurement using the Kg Lb selector 4 Step 2 Place the scales on a hard horizon...

Page 9: ...ntiated waste collection centre or to a dealer providing this service Disposing of a household appliance separately avoids possible negative consequences for the environment and health deriving from i...

Page 10: ...9 symbol shown appears on the product warning you not to dispose of it in traditional refuse containers For further information contact your local authority or the shop where you bought the product...

Page 11: ...s afin de l utiliser correctement Conservez cette Notice pour de post rieures consultations 5 FONCTIONNEMENT 1 S lectionnez l unit de mesure l aide du s lecteur Kg Lb 4 2 Disposez le p se personnes su...

Page 12: ...et vitez de faire p n trer de l eau l int rieur N utilisez pas de produits chimiques abrasifs comme de l alcool ou du benz ne Rangez le p se personnes dans un endroit frais et air sec vitez les endroi...

Page 13: ...het d lectrom nager permet d viter d ventuelles cons quences n gatives pour l environnement et la sant d riv es d une limination inad quate tout en facilitant le traitement et le recyclage des mat ria...

Page 14: ...13 EL 150 Kg 330 lb 3Kg 6 6 lb 100 g 0 2 lb 3V CR 2032 2 1 1 2 3 4 E Kg Lb 4 Z 1 5 1 Kg Lb 4 2 3 15kg 4 kg lb 1 68 300 3...

Page 15: ...14 6 7 150 Kg 330 lb Err C 0 0 8 3 9 0 0 5...

Page 16: ...15 10...

Page 17: ...csoln a m rleget annak rdek ben hogy a megfelel m don haszn lja A haszn lati utas t st tartsa meg k s bbi felhaszn l s c lj b l 5 M K D S 1 l p s V lassza ki a m rt kegys get a kg font kiv laszt val 4...

Page 18: ...koss gi hullad kkal egy tt kezelni A leselejtezett term k az nkorm nyzatok ltal kijel lt szelekt v hullad kgy jt kben vagy az elhaszn l dott k sz l kek visszav tel t v gz keresked kn l adhat le Az ele...

Page 19: ...gtakar t s rhet el A szelekt v hullad kgy jt s k teless g nek hangs lyoz sa rdek ben a term ken egy jelz s szerepel figyelmeztet sk nt hogy ne haszn lj k a hagyom nyos kont nereket rtalmatlan t sukhoz...

Page 20: ...v hy aby jste zabezpe ili jej spr vn pou it N vod si odlo te aby jste do n j mohli pozd ji nahl dnout 5 POU V N V HY Krok 1 Zvolte m rnou jednotku voli em Kg Lb 4 Krok 2 Polo te v hu na tvrd a vodorov...

Page 21: ...r zabezpe uje tuto slu bu Odd len likvidace elektrospot ebi je z rukou prevence negativn ch vliv na ivotn prost ed a na zdrav kter zp sobuje nevhodn nakl d n umo uje recyklaci jednotliv ch materi l a...

Page 22: ...jej spr vne pou itie N vod si odlo te aby ste do ho mohli nesk r nahliadnu 5 POU VANIE V HY Krok 1 Zvo te mern jednotku voli om Kg Lb 4 Niektor modely m u zmeni hmotnostn jednotku z metrick ho syst mu...

Page 23: ...preto e by sa mohli vybi bat rie Nesna te sa ju otvori To by zru ilo platnos z ruky Nenechajte v hu spadn ani na nej nesk kajte ke ju pou vate Zabr te siln m ran m a otrasom preto e sa jedn o presn p...

Page 24: ...23 al ie inform cie v m poskytn miestne org ny alebo obchod v ktorom ste v robok zak pili...

Page 25: ...giwania si urz dzeniem Zachowaj instrukcj u ytkowania do p niejszych konsultacji 5 URUCHAMIANIE Krok 1 Za pomoc prze cznika Kg Lb 4 wybierz jednostk wagi Krok 2 Ustaw wag na twardej i poziomej powierz...

Page 26: ...rodka Do mycia nie u ywaj silnych rodk w chemicznych takich jak alkohol czy benzen Przechowuj wag w zimnym i suchym pomieszczeniu a nie w gor cym i wilgotnym Przechowuj wag w pozycji poziomej a nie pi...

Page 27: ...tu AGD pozwala unikn negatywnych skutk w dla rodowiska naturalnego i zdrowia z powodu jego nieodpowiedniego usuwania i umo liwia odzyskiwanie materia w z kt rych jest z o ony w celu uzyskania znacz c...

Page 28: ...27 BG 150 330 3 6 6 100 0 2 3 V CR 2032 2 1 1 2 3 4 CEM 4 1 5 1 Kg Lb 4 2 3 15 4 kg lb 1 68 300 3...

Page 29: ...28 7 6 C 0 0 150 330 Err 8 3 9 0 0 5...

Page 30: ...29 10...

Page 31: ...30 AR...

Page 32: ...31 68 300 68 300 68 300 68 300 68 300 15...

Page 33: ...32...

Page 34: ...33 7 10...

Reviews: