background image

9

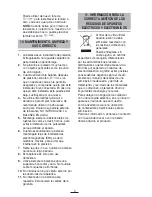
11. INFORMATION FOR THE CORRECT 

DISPOSAL OF ELECTRICAL AND 

ELECTRONIC APPLIANCES

At the end of its working 
life, the product must not 
be disposed of as urban 
waste. It must be taken to 
a special local authority 
differentiated waste 
collection centre or to a 

dealer providing this service. Disposing of 
a household appliance separately avoids 
possible negative consequences for the 
environment and health deriving from 
inappropriate disposal and enables the 
constituent materials to be recovered to 
obtain significant savings in energy and 
resources. 
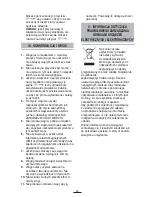
To remind you that you must collaborate 
with a selective collection scheme, the 
symbol shown appears on the product 
warning you not to dispose of it in 
traditional refuse containers.
For further information, contact your local 
authority or the shop where you bought the 
product.


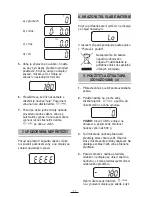
NOTE:

 When you activate the scales for 

the first time, if no reading appears or if 
the reading does not stabilise at 0, you 
can also press the   

  button.

10. MAINTENANCE AND CLEANING

1. 

These scales are a precision 
instrument. Make sure they receive no 
knocks. Do not store the scales with a 
weight on them for long periods.

2

  Always press the buttons gently. Do not 

use any sharp objects such as ballpoint 
pens to press them down.

3.

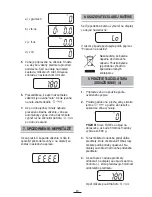
  If nothing appears on the screen when 

you switch on the scales using the  

 button, check the battery is 

inserted and correctly connected. If this 
is the case, the battery may have run 
down. Replace it with a new one.

4.

  Do not chemical solvents or abrasive 

substances to clean the scales. The 
use of a soft, dry cloth is recommended 
for cleaning the outer surface of the 
scales. DO NOT SUBMERGE THE 
SCALES IN WATER.

5.

  Always keep the scales away from 

heat sources, e.g. ovens, as this could 
deteriorate the buttons and damage 
the appliance.

6.

  When the scales are in use, keep 

them away from any electromagnetic 
interference (EMI), i.e. mobile phones, 
as this would affect their accuracy.

7.

  Remove the battery if the scales are 

likely to be out of use for some time.

8.

  These scales are for domestic use only. 

9.

  Always use the scales on a horizontal, 

firm surface. Do not use them on mats 
or carpets. 

10.

 Do not insert any foreign object into the 

openings of the scales.

11.

 Do not try to open the scales to repair 

them. This will invalidate the guarantee

Summary of Contents for BC-275

Page 1: ...mod les d crit dans le pr sente notice A gy rt fenntartja mag nak a jogot a haszn lati tmutat ban k z lt m szaki adatok megv ltoztat s ra V robce si vyhrazuje pr vo modifikovat modely popsan v tomto...

Page 2: ...balanza Retire dicho pl stico para poder encender el aparato 2 Coloque la balanza sobre una superficie seca y horizontal aseg rese de que est firme 6 FUNCIONAMIENTO 1 Presione sobre el bot n para cone...

Page 3: ...pondr a cero ATENCION La palabra TARE aparecer en la pantalla cuando el peso del envase sea superior a 600 g 3 Ahora puede a adir los art culos adicionales que desee pesar al envase repitiendo estos d...

Page 4: ...antes como la punta de un bol grafo 3 Cuando encienda la balanza despu s de presionar el bot n si ve que no aparece nada en la pantalla aseg rese y compruebe que la pila est instalada y bien conectada...

Page 5: ...an a Entre as pilhas e os contactos encontrar um pl stico que evita que a balan a se acenda Retire esse pl stico para conseguir acender o aparelho 2 Coloque a balan a sobre uma superf cie seca e horiz...

Page 6: ...s passos se o desejar O peso l quido do art culo ser indicado no visor 4 Se come ar a retirar os artigos da embalagem ver um valor negativo que representa o valor do peso da quantidade do artigo que e...

Page 7: ...is para evitar que interfira na precis o 7 Retire a pilha se n o utilizar a balan a durante um longo per odo 8 Esta balan a s para uso dom stico 9 Utilize sempre a balan a sobre uma superf cie horizon...

Page 8: ...atteries and the contacts to prevent the scales from being switched on Remove this plastic film before switching on the appliance 2 Place the scales on a dry solid surface making sure they are firmly...

Page 9: ...ticle you have removed Press the button again each time you remove an article to set the reading to 0 again 8 BATTERY LOW INDICATOR When the battery needs replacing the following message will appear o...

Page 10: ...rument Make sure they receive no knocks Do not store the scales with a weight on them for long periods 2 Always press the buttons gently Do not use any sharp objects such as ballpoint pens to press th...

Page 11: ...s contacts une languette plastique qui vite que la balance s allume Enlevez cette languette pour la mise en marche de l appareil 2 Poser la balance sur une surface s che solide et horizontale et v rif...

Page 12: ...suivante Pour ins rer une pile neuve suivre la d marche de la mise au point Ne pas jeter les piles us es la poubelle Les piles us es doivent tre d pos es dans les containeurs sp cialement destin s leu...

Page 13: ...s l utiliser sur des moquettes ou des tapis 10 Ne jamais introduire un objet externe quelconque travers les ouvertures de la balance 11 Ne jamais ouvrir la balance pour la 10 MAINTENANCE ET ENTRETIEN...

Page 14: ...k k z tt egy m anyag f lia tal lhat amely megakad lyozza hogy a m rleg bekapcsoljon A k sz l k bekapcsol s hoz h zza ki ezt a m anyag f li t 2 Helyezze a m rleget egy sz raz v zszintes s szil rd fel l...

Page 15: ...a kijelz a k vetkez t mutatja Ebben az esetben k vesse a be zemel si l p seket Figyeljen arra hogy az elem nem h ztart si szem t A haszn lt elemeket az erre a c lra kijel lt kont nerekben kell elhelye...

Page 16: ...vagy nem ll be null ra akkor szint n a gombot nyomja meg 1 A m rleg egy prec zi s m szer Ne t gesse s ne terhelje s llyal hossz ideig 2 Ne nyomja meg a nyom gombot t l er sen vagy olyan hegyes t rggya...

Page 17: ...zabra uje zapnut v hy Odstra te jej aby jste mohli p stroj zapnout 2 Postavte v hu na such vodorovn a pevn povrch p esv d ete se jestli pevn stoj 6 POU IT V HY 1 Stla te tla tko kter m zapnete v hu 2...

Page 18: ...vym nit na displeji se objev n sleduj c V takov m p pad postupujte podle popisu v P prav k pou it Nezapome te e baterie nepat do domov ho odpadu Pou it baterie je pot ebn odlo it do speci ln ur en ch...

Page 19: ...en p esnosti v hy 7 Pokud v hu nebudete del as pou vat vyberte baterii 8 Tato v ha je ur en jen pro pou it v dom cnosti 9 Pou vejte v dy v hu na vodorovn m a tvrd m povrchu Nepou vejte ji na ubrusech...

Page 20: ...r ok ktor zabra uje zapnutiu v hy Odstr te ho aby ste mohli pr stroj zapn 2 Postavte v hu na such vodorovn a pevn povrch presved ite sa i pevne stoj 6 POU ITIE V HY 1 Stla te tla idlo ktor m zapnete v...

Page 21: ...sledovn V takom pr pade postupujte pod a popisu v Pr prave na pou itie Nezabudnite e bat rie nepatria do domov ho odpadu Pou it bat rie je potrebn vyhodi do peci lne ur en ch kontajnerov 9 POU ITIE TL...

Page 22: ...po prv kr t zapnete ak sa na displeji neobjav nula alebo ak sa nezastav na nule m ete tie stla i tla idlo 1 V ha je presn pr stroj Zabr te derom Neodkladajte ju na dlh iu dobu so z a ou 2 Nestl ajte t...

Page 23: ...kowym znajduje si plastyk kt ry uniemo liwia w czenie si wagi Aby w czy urz dzenie musisz wyci gn plastyk 2 Ustaw wag poziomo na suchej i stabilnej powierzchni i sprawd czy waga jest stabilna 6 URUCHO...

Page 24: ...acja W takim przypadku dostosuj si do wskaz wek dotycz cych przygotowania wagi Pami taj e baterie nie s zaliczane do odpad w gospodarstwa domowego Zu yte baterie nale y wyrzuca do kontener w przeznacz...

Page 25: ...a aniu na dok adno odmierzania 7 Je eli przez d u szy czas waga nie b dzie u ywana wyci gnij z komory bateri 8 Waga przeznaczona jest wy cznie do u ytku domowego 9 Wag nale y u ywa zawsze na poziomej...

Page 26: ...RU 5000 11 lb 04 oz 5000 176 4 fl oz 1 0 1 lb oz 1 0 1 fl oz lb oz fl oz 1xCR2032 2 1 1 2 3 4 5 EMC 1 5 1 5 2 6 1 2 2 3 lb fl 3 a b c d e f g fl oz 4 2 25 1 15 3 12 1 1 6 50 1 12 2 1 12 100 1 75 6...

Page 27: ...4 fl oz lb oz a b lb oz c fl oz d 5 6 7 1 2 7 8 1 2 TARE 600 9 3 26...

Page 28: ...6 7 8 9 10 11 11 27 3 4 1 2 3 4 5 10...

Page 29: ...28 1 2 1 1 0 0 T 3 1 2 3 4 5 6 7 8 AR 1 2 3 4 5 RATE lb oz 4 2...

Page 30: ...29 5 6 2 1 2 5 8 1 5 5 2 2...

Page 31: ...7 1 30 8 9 4 1 3 3 4 6...

Page 32: ...31 12 1 2 3 4 5 6 7 8 13 10 10 11 11 10 11 9 4 3...

Page 33: ...ml 0 1 fl oz gr lb oz ml fl oz 1xCR2032 2 FIG 1 2 FIG 1 1 2 3 4 5 EMC 1 1 5 5 1 5 2 6 6 3 3 a b c d lb oz e g f ml g fl oz 4 FIG 2 4 FIG 2 1 2 Fig 2 3 lb fl ml or grams 4 grams lb oz fl oz ml a grams...

Page 34: ...8 8 7 7 33 1 2 3 4 1 2 0 600 g TARE 3 4 0 9 3 9 3 10 10 c fl oz d ml 5 6 0 0 7 1 2...

Page 35: ...34 5 5 6 6 EMI 7 7 8 8 9 9 10 10 11 11 11 11...

Page 36: ...astikstreifen der es verhindert dass sich die Waage einschalten kann Nehmen Sie den Streifen heraus damit Sie die Waage anschalten k nnen 2 Stelle Sie die Waage auf eine feste und wagerechte trockene...

Page 37: ...cheint auf dem Display ein Negativwert Dieser entspricht dem Gewicht des Wiegeguts das zuletzt entnommen wurde 8 HINWEIS BATTERIEWECHSEL Muss die Batterie gewechselt werden erscheint auf dem Display d...

Page 38: ...trument Setzen Sie sie keinen Schl gen oder St en aus und belasten Sie sie nicht ber l ngere Zeit mit Gewicht 2 Tippen Sie zum Bet tigen der Tasten diese nur leicht an und benutzen Sie dazu keine spit...

Page 39: ...balantza piztea eragozten duen plastikoa aurkituko duzu Ken ezazu plastiko hori aparatua piztu ahal izateko 2 Koka ezazu balantza azalera lehor eta horizontal baten gainean eta ziurtatu ongi finkatut...

Page 40: ...rtikuluaren pisu garbia pantailan agertuko da 4 Enbaseko artikuluak erretiratzen hasten bazara balio negatiboa ikusiko duzu erretiratzen ari zaren artikuluaren kantitatearen pisua adierazten duena 9 T...

Page 41: ...nik izan ez dezan 7 Kendu pila balantza aldi luze batez erabiliko ez baduzu 8 Balantza hau etxean erabiltzeko baino ez da 9 Erabil ezazu balantza beti azalera horizontal eta gogorraren gainean Ez ezaz...

Reviews: