Power supplies
94
2.
POWER SUPPLIES
Re
gene
rative regul
ated pow
er
su
ppli
es
80
DDS
HARDWARE
Ref.1310
Power connectors
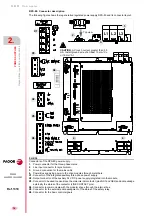
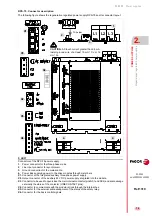
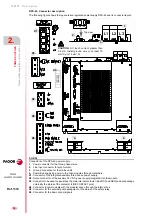
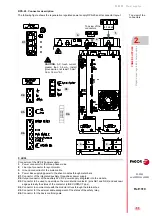
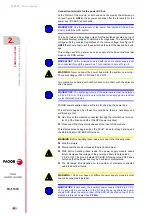
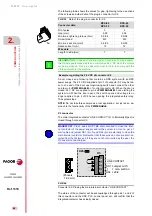
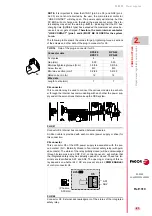
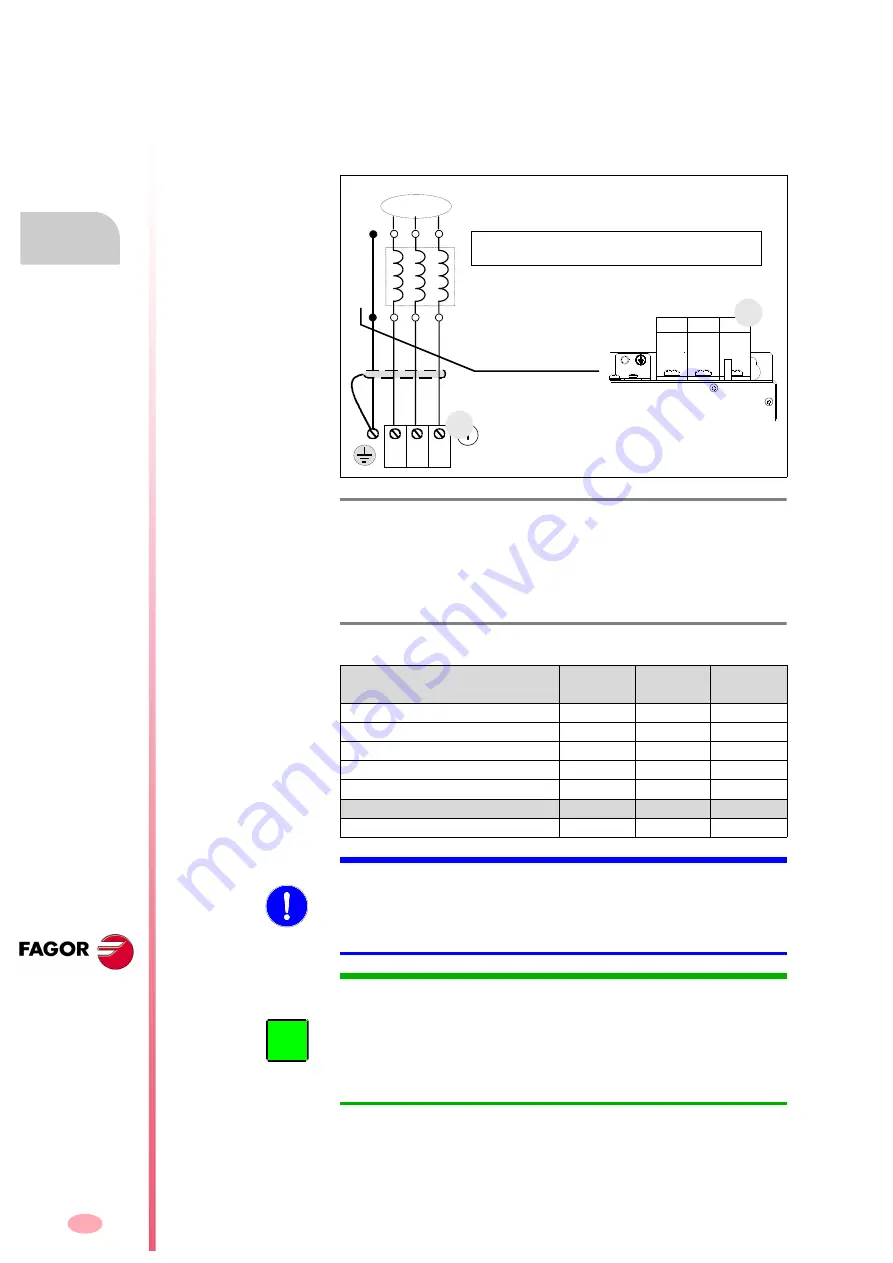
Terminal strip for mains connection
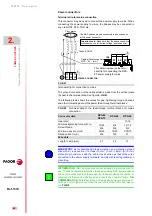
This connector may be used to connect the power supply to mains. When
connecting the power suppliy to mains, the phases may be connected in
any order RST, RTS, TRS, etc.
The ground connection of the cable shield is made from the vertical plate
(A) next to the terminal strip. See figure
.
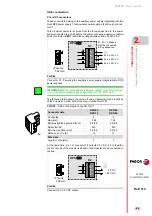
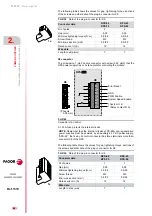
The following table shows the values for gap, tightening torque, sections
and other interesting data of the power feed-through terminal blocks:
F. H2/41
Terminal strip for connection to mains.
T. H2/29
Technical data of the feed-through terminal blocks for mains
connection.
Connector data
RPS-80
RPS-75
RPS-45
RPS-20
Gap (mm)
-
-
10.16
Min/max tightening torque (N·m)
15/20
6/8
1.2/1.5
Screw thread
M8
M6
M4
Min./max. section (mm²)
35/95
16/50
0.75/10
Rated current In (A)
232
125
41
Wire data
Length to strip (mm)
27
24
12
L3
L2
L1
From mains
S T
R
N
L1 L2 L3
2
)
The RST phases may be connected in any sequence
at the power connector.
Cable without connectors
MPC - 4x ... (mm
2
)
POWER CONNECTOR
Choke RPS-XX
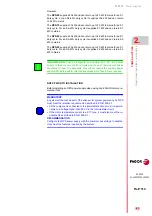
Important note:
Make sure that the phase sequence
matches the one at the line voltage input connector.
u1 v1
w1
w2
v2
u2
L1 L2 L3
(A)
1.
1.
This detail represents the termi-
nal strip for connecting the RPS-
80 power supply to mains.
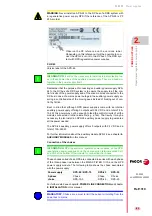
MANDATORY.
As for possible high leak currents, use a protection ground
wire with a cross section of at least 10 mm² (Cu) or 16mm² (Al) or two
protection ground wires with the same cross section as that of the wires
connected to the power supply terminals. Comply with local regulations on
grounding.
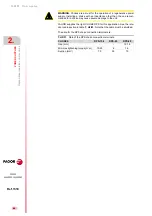
INFORMATION.
IGBT components cannot actually be protected with fu-
ses. Therefore, installing protection fuses when using RPS power supplies
does not prevent a failure of the module, but it does minimize the number of
components that may be destroyed as a result of a possible failure.
RE-
COMMENDATION
. Install fast fuses in three-phase power supply lines L1,
L2 and L3, for a higher current than the one for S6 of the RPS used. See ta-
ble
.
i
Summary of Contents for DDS
Page 1: ...DRIVE DDS Hardware manual Ref 1310...
Page 6: ...I 6 DDS HARDWARE Ref 1310...
Page 9: ......
Page 10: ......
Page 11: ......
Page 12: ......
Page 16: ...16 Ref 1310 DDS HARDWARE...
Page 30: ...1 DESCRIPTION 30 Description DDS HARDWARE Ref 1310...
Page 94: ...2 POWER SUPPLIES 94 Power supplies DDS HARDWARE Ref 1310...
Page 188: ...3 DRIVE MODULES 188 Drive modules DDS HARDWARE Ref 1310...
Page 204: ...4 AUXILIARY MODULES 204 Auxiliary modules DDS HARDWARE Ref 1310...
Page 232: ...SELECTING CRITERIA 5 232 Selection criteria DDS HARDWARE Ref 1310...
Page 266: ...7 CABLES 266 Cables DDS HARDWARE Ref 1310...
Page 312: ...8 INSTALLATION 312 Installation DDS HARDWARE Ref 1310...
Page 326: ...9 FUNCTIONAL SAFETY 326 Functional safety DDS HARDWARE Ref 1310...
Page 354: ...10 CONNECTION DIAGRAMS 354 Connection diagrams DDS HARDWARE Ref 1310...
Page 378: ...12 SALES REFERENCES 378 Sales references DDS HARDWARE Ref 1310...
Page 384: ...13 COMPATIBILITY 384 Compatibility DDS HARDWARE Ref 1310...
Page 385: ......


