18
6. BEFORE USING FOR
THE FIRST TIME
• Open the lid by pressing the lid open
button (Fig. 1).
• Remove the basket and rotate the
handle to its working position (Fig. 2).
• Remove the control panel and element
and place in a dry, safe place (Fig. 3).
• Remove all the packaging material from
inside the oil pan.
• Remove the lid from its housing by
pulling upwards (Fig. 4).
• Clean the basket, oil pan and lid with
warm soapy water. Rinse and dry
thoroughly before replacing (see
section en-titled "Cleaning").
Warning: Do not submerge the control
panel and element or the outer casing in
water, or hold them under a running tap.
7. HOW TO USE YOUR DEEP FRYER
• Place the appliance on a flat, stable,
horizontal surface away from the edge.
Do not let the cable hang over the edge
of the table or worktop or come into
contact with hot surfaces.
• Remove the cable from its housing at the
bottom of the fryer.
• Before filling the fryer with oil or fat,
make sure all the components are
properly assembled and completely dry.
• Pour oil or fat into the fryer up to the
maximum level mark inside the pan.
When using solid fat, melt it first in a
normal pan before pouring into the fryer
(see section entitled "Using with Solid
Fat"). Close the lid.
• Do not mix different types of oil or fat.
Do not add new oil or fat to used oil or
fat.
• You can leave the basket in the fryer
while the oil or fat is heating up.
• Plug the fryer into the mains.
• Turn the start/stop switch to "I" in order
to switch the fryer on. Both the switch
and thermostat pilot lights will come on.
• Select the temperature you require using
the temperature regulation control.
When selecting the temperature, consult
the information given on the packaging of
the item you wish to fry. If no information
regarding temperature is given, use the
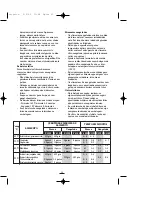
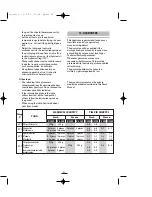
rough guide provided in this instructions
manual. Do not exceed the maximum
quantities indicated in the table.
• When the thermostat pilot light (5) goes
off (10-15 minutes), this means that the oil
or fat has reached the selected
temperature. The pilot light will continue
to go on and off during the entire frying
process, in accordance with the
thermostat’s cycles.
If you wish to fry several items one after
the other, wait until the thermostat pilot
light goes off before frying the second
item.
• Open the lid and insert the basket
containing the items to be fried. The
basket should be lowered slowly into the
oil or fat in order to prevent the water
contained in the food from causing the oil
to bubble over. Place the basket in the
frying position (Fig. 5) and close the lid.
• Monitor the frying process.
After frying
• Open the lid. Take care not to burn
yourself with the hot steam that will be
expelled.
• Remove the basket from the pan, shake a
little and place it in the draining position
(Fig. 6). Place the fried items in a dish
lined with absorbent kitchen paper. Doing
this will also give the oil time to heat up to
the selected temperature once again
ready for the next item (you will know it is
ready when the thermostat pilot light
switches off).
• Use a strainer to remove any loose
particles left over from the previous items.
Leaving these particles in the oil during
subsequent frying processes will lower
the quality of the oil.
• When you have finished frying, turn the
switch to "0" and unplug the appliance
from the mains.
• Wait until the oil has cooled completely
before disassembling and cleaning.
• If you do not plan to use your fryer on a
regular basis, it is best to store the oil or
interior. 5/2/02 11:48 Pgina 17

