N
C
M
Y
Congratulations!
This appliance offers you top technical features combined with maximum comfort and performance.
This new appliance is designed to the highest technical standards. Your appliance is equipped with energy-saving devices
that allow you to behave in an environment-friendly way.
Good reading and .....
Thanks!
“Warning - this appliance must
be earthed”
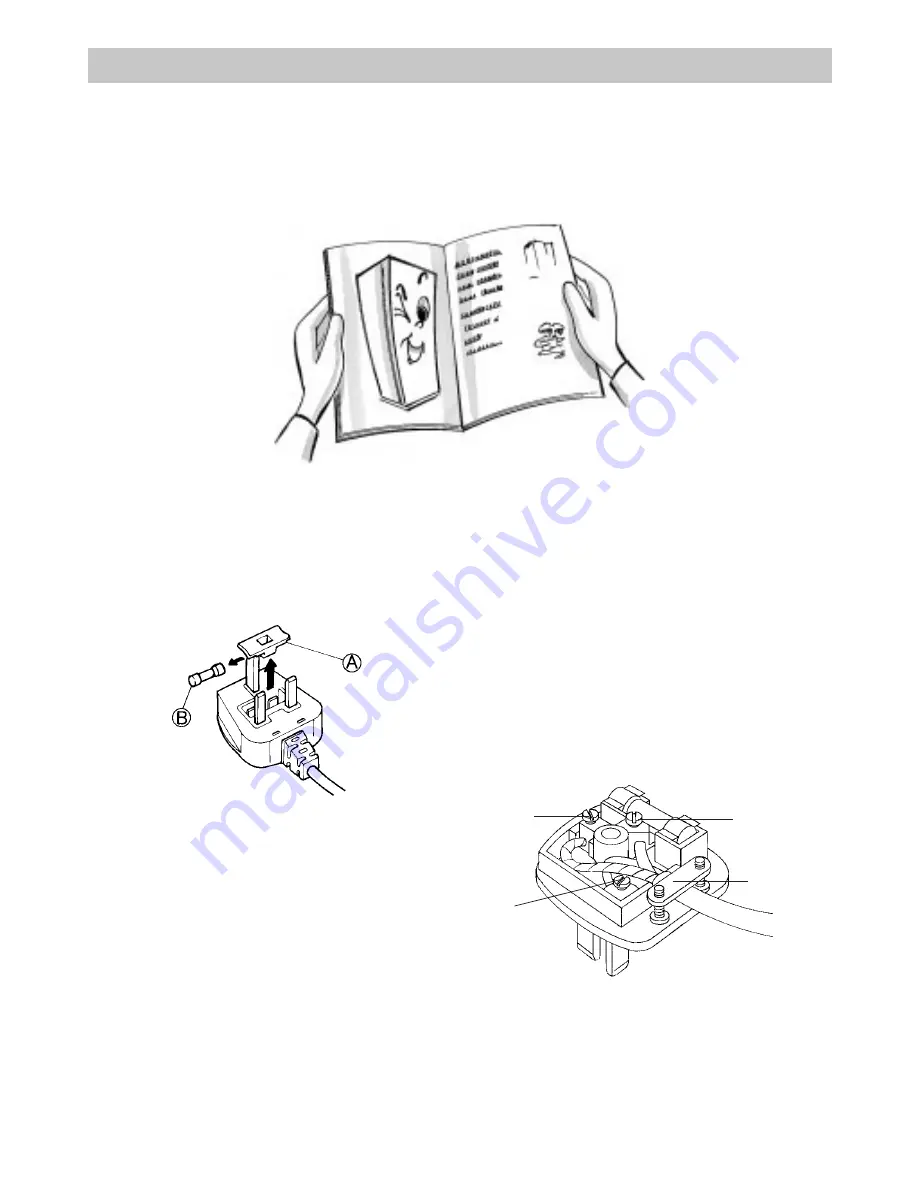
Fuse replacement.
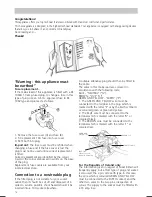
If the mains lead of this appliance is fitted with a BS
1363A 13 amp fused plug, to change a fuse in this
type of plug use an A.S.T.A. approved fuse to BS
1362 type and proceed as follows:
1. Remove the fuse cover (A) and fuse (B).
2. Fit replacement 13A fuse into fuse cover.
3. Refit both into plug.
Important:
The fuse cover must be refitted when
changing a fuse and if the fuse cover is lost the
plug must not be used until a correct replacement
is fitted.
Correct replacement are identified by the colour
insert or the colour embossed in words on the base
of the plug.
Replacement fuse covers are available from your
local electrical store.
Connection to a rewireable plug
If the fitted plug is not suitable for your socket
outlet, then it should be cut off and disposed of in
order to avoid a possible shock hazard should it be
inserted into a 13A socket elsewhere.
A suitable altenative plug should then be fitted to
the cable.
The wires in this mains lead are coloured in
accordance with the following code;
BLUE - “NEUTRAL” (“N”)
BROWN - “LIVE” (“L”)
GREEN AND YELLOW - “EARTH” (“E”)
1. The GREEN AND YELLOW wire must be
connected to the terminal in the plug which is
marked with the letter “E” or by the Earth symbol 4
or coloured green or green and yellow.
2. The BLUE wire must be connected to the
terminal which is marked with the letter “N” or
coloured black.
3. The BROWN wire must be connected to the
terminal which is marked with the letter “L” or
coloured red.
For the Republic of Ireland only
The information given in respect of Great Britain will
frequently apply, but a third type of plug and socket
is also used, the 2-pin, side earth type. In this case,
the wire which is coloured GREEN AND YELLOW
must be connected to the EARTH contact, and the
other two wires to the two pins, irrespective of
colour. The supply to the socket must be fitted with
a 16 amp fuse.
GREEN AND
YELLOW (“E”)
BROWN (“L”)
CABLE CLAMP.
BLUE (“N”)
Connection to a
typical 13 amp plug
12

