background image

32

INSTALLATION

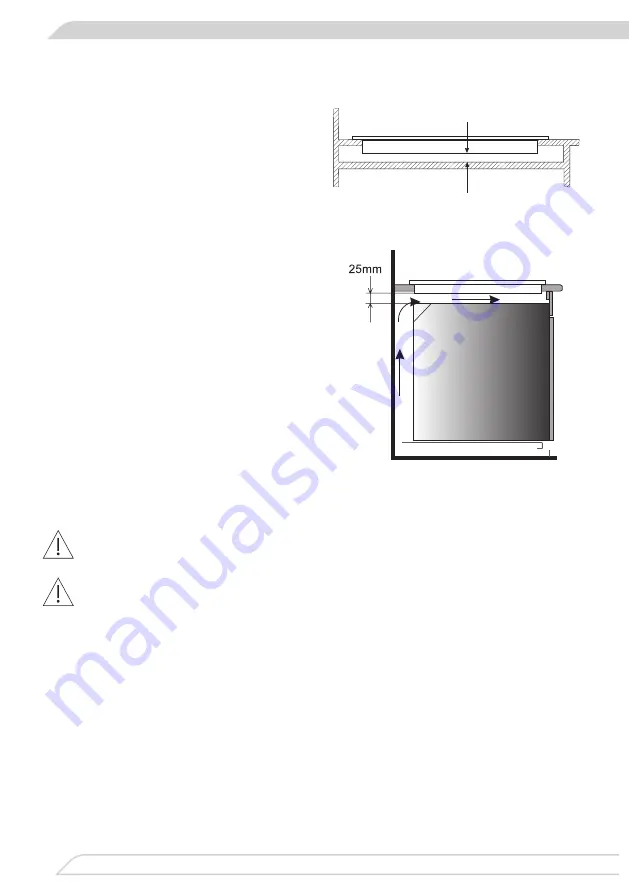
Do not install the hob above the oven without ventilation.

Route electrical lead so that it does not touch the lower guard.

Installing hob in kitchen cabinet worktop.   

min 25

Installing hob in kitchen cabinet worktop 

above oven.

Note. When installing the hob in the kit

-

chen worktop, install a partition panel, as 

shown on the picture. If the hob is to be 

installed above a built-in oven, installa-

tion of the partition panel is not required.

If  the  hob  was  installed  in  the  kitchen 

worktop  above  the  drawer,  the  bottom 

cover of the hob must be covered with 

a wooden panel or protective board for 

ceramic hobs.

Summary of Contents for PBZ4VQ247FN

Page 1: ...Q247FN 3VFT 40AS Manual de instrucciones EN Ceramic hob Lea detenidamente este manual antes de usar el aparato Before using the appliance please carefully read this manual Instruction manual ES EN IO...

Page 2: ...raci n del fabricante El fabricante declara por la presente que el producto cumple los requisitos esenciales de las si guientes directivas europeas Directiva de baja tensi n 2014 35 CE Directiva de co...

Page 3: ...3 CONTENIDO Informaci n b sica 2 Seguridad 4 Descripci n del producto 8 Instalaci n 9 Funcionamiento 13 Limpieza y conservaci n 19 Situaciones de emergencia 21 Datos t cnicos 23...

Page 4: ...a y conocimientos siempre que lo hagan bajo la supervisi n de otra responsable de su seguridad o sigan las instrucciones de uso Impida que los ni os jueguen con el aparato y que realicen las tareas de...

Page 5: ...la placa s lo despu s de haberla empotrado para protegerse as de la corriente al tocar las partes que reciben tensi n Las reparaciones de aparatos el ctricos deben ser realizadas por especialistas Aq...

Page 6: ...o es sensible ni al fr o ni al calor No deje caer objetos sobre el vidrio Los golpes locales por ejemplo la ca da de un frasco de especias puede llevar a la formaci n de grietas y astillas en la vitro...

Page 7: ...as nocivas consecuencias para el ser humano y para el medio ambiente derivadas de la presencia de componentes peligrosos o del inadecuado almacenamiento y proce samiento de dichos dispositivos Este ap...

Page 8: ...Zona de cocci n trasera derecha 180 mm Zona de cocci n delantera izquierda 210 mm Zona de cocci n delantera derecha 145 mm 1 Sensor Encender Apagar activar zona de cocci n 2 Indicador de la zona de c...

Page 9: ...d lateral del mueble deber ser de 55 mm l El revestimiento y el pegamento de los muebles para empotrar debe ser resistente a temperaturas superiores a 100 C de lo contrario el primero podr a sufrir de...

Page 10: ...horno Advertencia A la hora de instalar la pla ca en la encimera del mueble de cocina debe montar un estante distanciador como el que se muestra en el dibujo del lateral Cuando la placa se instala enc...

Page 11: ...a junta queda perfectamente adherida a la placa Atornillar un poco las abrazaderas en la parte baja de la placa Limpiar la encimera de polvo colocar la placa en el orificio y apretarla con fuerza cont...

Page 12: ...l ctrica lea la informaci n in cluida en la placa de datos y en el esquema de conexi n Advertencia El instalador debe entregarle al usuario el certificado de conexi n de la placa a la instalaci n el c...

Page 13: ...Existen recipientes fabricados especialmente para cocinar y asar en placas de inducci n Se deben seguir las instrucciones de sus fabricantes Los recipientes para cocci n que tengan fondo de aluminio...

Page 14: ...el diodo por encima de este sensor y luego podemos activar la placa vitrocer mica No coloque ning n objeto sobre la superficie de los sensores puede ser activado el diagn stico de fallo estas superfic...

Page 15: ...bloqueo de la placa de cocci n Para bloquear la zona de cocci n se debe apretar el sensor de la llave 5 hasta que se apague el diodo de se alizaci n 5 Despu s del apagado de diodo se oir una corta se...

Page 16: ...lientes Indicador de calor residual Despu s de la cocci n en el cristal cer mico se queda una energ a calor fica que se denomi na calor residual La proyecci n para indicar el calor residual se lleva a...

Page 17: ...amiento se prepara activando la selecci n del grado de la potencia de calentamiento por medio del sensor 4 Entonces ilumina en el indicador de la zona de calentamiento 2 el grado de la potencia de cal...

Page 18: ...s que limpian con vapor Eliminaci n de las manchas Las manchas claras de color perla resi duos de aluminio pueden desaparecer de la placa de inducci n utilizando un detergente especial cuando est fr a...

Page 19: ...rvan grietas o roturas en la placa cer mica deber apagarla inmediatamente y desconectarla de la red quitando el fusible o tirando de la clavija de la toma A continuaci n llame al servicio t cnico Revi...

Page 20: ...sar los botones durante un poco m s de tiempo Se han pulsado al mismo tiempo demasiados boto nes Pulsar siempre s lo un bot n excepto cuando se apaga la zona de calenta miento 3 El dispositivo no res...

Page 21: ...a Peligro Desconectar inmediatamente la placa de la red fusible y dirigirse al servicio t cnico m s cercano 8 Si el fallo no desaparece Desconectar la placa de la red fusible y dirigirse al servi cio...

Page 22: ...Modelo PB 4VQ247FN Zona de calentamiento 2 x 145 mm 1200 W Zona de calentamiento 1 x 180 mm 1800 W Zona de calentamiento 1 x 210 mm 2300 W Dimensiones 592 x 522 x 50 Peso ca 7 8 kg Cumple con los requ...

Page 23: ...u have read and understood this manual thoroughly The appliance is designed solely for cooking Any other use eg heating a room is incompatible with the appliance s intended purpose and can pose a risk...

Page 24: ...24 CONTENTS Basic Information 24 Safety instructions 26 Description of the appliance 31 Installation 32 Operation 36 Cleaning and maintenance 43 Troubleshooting 45 Specification 47...

Page 25: ...ack of experience and knowledge if they have been given supervision or instruction concerning use of the appliance in a safe way and understand the hazards involved Children shall not play with the ap...

Page 26: ...acked switch off the ap pliance to avoid the possibillity of electric shock The appliance is not intended to be operated by me ans of an external timer or separate remote control system You should not...

Page 27: ...iance is disconnected from the mains only when the mains plug is pulled out from the socket or when the fuse has been switched off Never allow children to remain unattended near the cooktop nor to pla...

Page 28: ...food may penetrate damaged places and get to the live components of the ceramic plate Should cracks or splits appear on the surface of your ceramic plate immediately disconnect it from the mains In o...

Page 29: ...avoid environmental and health hazards resulting from the pre sence of dangerous components and the in appropriate storage and processing of such goods In accordance with European Directive 2012 19 U...

Page 30: ...zone 145 mm Back right cooking zone 180 mm Front left cooking zone 210 mm Front right cooking zone 145 mm 1 On Off Select a cooking zone 2 Cooking zone displays 3 Lower heat setting selector 4 Higher...

Page 31: ...worktop The distance between the edge of the opening and the side wall of the furniture should be at least 55 mm Worktop must be made of materials including veneer and adhesives resistant to a tem per...

Page 32: ...tchen cabinet worktop above oven Note When installing the hob in the kit chen worktop install a partition panel as shown on the picture If the hob is to be installed above a built in oven installa tio...

Page 33: ...sive seal is properly applied to the hob s flange Loosely attach fixing brackets to the bottom of the hob Remove dust from the worktop insert hob into the opening and press in firmly Position fixing b...

Page 34: ...connecting the hob to the power supply it is important to read the information on the data plate and the connection diagram Caution The installer is obliged to provide the user with appliance electri...

Page 35: ...There is specially made and tested cookware for cooking on ceramic plates availabl on the market Observe instructions provided by the cookware manufacturers Cookware with aluminium or copper bottoms c...

Page 36: ...dicator is off Now you can use the appliance No objects should be placed on the sensors this could cause an error Touch sensors should be always kept clean Touch Of Off 1 to turn on the appliance and...

Page 37: ...the indicator light comes on you will hear a short beep Release the Child Lock To release the child lock function touch the child lock sensor field 5 until the indicator light 5 goes out When the ind...

Page 38: ...ime depending on the heat set ting selected and is then switched back to the heat setting originally set Activate the automatic warm up function by setting the required heat setting by touching the 3...

Page 39: ...n a cooking zone tem perature is above 65 C and the cooking zone or the appliance is switched off the relevant cooking zone display will show the letter H Residual heat indication is displayed as long...

Page 40: ...team or pressure cleaners Removing stains Bright stains of pearl colour residual aluminium can be removed from the cool hob using a special cleaning agent Limestone residue eg after evaporated water c...

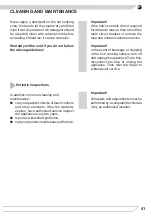
Page 41: ...nd contact customer service Important In the event of breakage or chipping of the hob cooking surface turn off and unplug the appliance To do this disconnect the fuse or unplug the appliance Then refe...

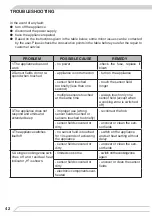
Page 42: ...r multiple sensors touched at the same time always touch only one sensor field except when a cooking zone is switched off 3 The appliance does not respond and emits and extended beep improper use wron...

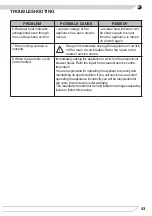
Page 43: ...e main circuit breaker Refer the repair to the nearest service centre 8 When the problem is still not remedied Immediately unplug the appliance or switch off the main circuit breaker fuse Refer the re...

Page 44: ...V 1N 50 Hz Rated power 6 5 kW Model PB 4VQ247FN hotplate 2 x 145 mm 1200 W hotplate 1 x 180 mm 1800 W hotplate 1 x 210 mm 2300 W Dimensions 592 x 522 x 50 Weight ca 7 8 kg Complies with EU regulations...

Page 45: ...45...

Page 46: ...46...

Page 47: ...47...

Page 48: ...F Electrodom sticos S L Avenida Sur del Aeropuerto de Barajas n 38 28042 Madrid Espa a www fagorelectrodomestico es...

Reviews: