


8
Press the Spray button (4). Press it
repeatedly to activate the spray action.
5. SprAy
The temperature selector must be on
"MAX" position. If it is not in this position
the iron will leak water. Before using this
function press the extra steam button (5)
several times to activate it. To prevent the
iron from leaking water, do not press the
button too quickly. Wait around 5 seconds
before pressing it each time.
Vertical steam:
The extra steam function
6. eXtrA SteAM
•
Turn the temperature selector (9)
to minimum, and turn the function
selector (3) to dry ironing position.
•
Unplug the iron from the mains and
empty the tank.
•
Wait for it to cool down and then
store it in a dry place, always in
vertical position.
7. AFter IroNING
1.
Turn the function selector (3) to dry
ironing position
2.
During dry ironing, the spray function
can used providing there is water in
the tank. (See "Spray" and "Filling the
tank" sections).
3. Dry IroNING
•
Turn the temperature selector (9) to the
steam position between
•••
and
"MAX" position. The closer to "MAX"
position the selector is, the more steam
there will be.
•
Turn the function selector (3) to a steam
ironing position between the symbols
(minimum) and (maximum).
Place the iron in horizontal position and
the steam will begin to come out of the
holes in the soleplate. If no steam is
coming out of the iron, gently tap the
soleplate against the ironing surface.
When the iron is stood up vertically the
steam will stop coming out.
Warning! Avoid any contact with the
steam and do not direct it towards
people.
Note:
If the tank needs to be filled during
ironing, unplug the iron before filling it with
water.
4. SteAM IroNING
•
When the indicator light (6) switches
off, the soleplate (10) has reached the
selected temperature.
also works when the iron is in vertical
position.
CLeANING AND MAINteNANCe
Cleaning
Unplug the iron and wait until it cools down
before cleaning.
Clean the outside of the iron and the
soleplate with a damp cloth.
Do not use abrasive cleaning agents,
vinegar or decalcifying products to clean
the iron.
To prevent the soleplate from being
scratched, avoid ironing fasteners, zips,
metal buttons, etc., and do not place the
iron on rough or metal surfaces.
Maintenance
This iron has a self-cleaning button which
should be used at least twice a month in
order to prevent harmful minerals from
accumulating in the steam chamber.
Proceed as follows:
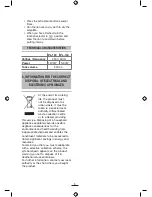
8. Self-cleaning
•
Fill the water tank, plug the iron in and
turn the temperature selector to "MAX"
position.
•
Wait until the indicator light has
switched on and off about 2 or 3 times.
•
Turn the temperature selector to "Min"
position and unplug the iron.
•
Hold the iron horizontally over a sink or
washbasin and turn the function
selector to self-cleaning position
Steam with drops of boiling
water will come out of the soleplate
outlet holes.
•
Gently move the iron backwards and
forwards, until the tank has emptied.
Summary of Contents for PL-140
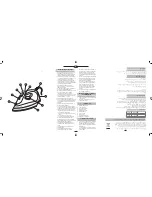
Page 20: ...19 GR 1 1 2 3 4 5 6 7 8 9 10 MIN...
Page 21: ...20 4 5 v MAX 5 5 6 v 1 3 2 3 9 MAX MAX 3 minimo m ximo 4 2 MAX 9 MIN MAX 6 10...
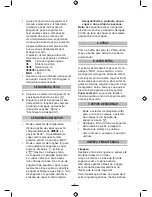
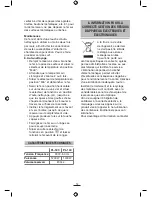
Page 22: ...21 Y 9 3 7 8 MAX 2 3 Min PL 120 PL 140 v 230V 50 Hz 1200W 1400W 200c c 8...
Page 35: ...BG 1 1 2 3 4 5 6 7 8 9 10 2 MAX T 9 MIN MAX 6 10 MIN 34...
Page 36: ...4 5 MAX 5 5 6 9 3 7 1 3 2 3 9 MAX MAX 3 4 8 MAX 2 3 Min 3 35...
Page 37: ...PL 120 PL 140 230V 50 Hz 1200W 1400W 200c c 8 36...
Page 38: ...RUS MIN 1 1 2 3 4 5 6 7 8 9 10 2 MAX 9 MIN MAX 37...
Page 39: ...4 5 MAX 5 6 9 3 7 1 3 2 3 9 MAX MAX 3 4 10 6 5 CLEANING AND MAINTENANCE 8 MAX 2 3 Min 38...
Page 40: ...8 PL 120 PL 140 230V 50 Hz 1200W 1400W 200c c 39...
Page 41: ...1 2 3 4 5 6 7 8 9 10 1 40...
Page 42: ...9 MIN MAX 6 10 2 3 1 2 3 9 MAX MAX 3 4 4 5 MAX 5 6 41...


