background image

5

EN

1. ELECTRICAL CONNECTION

• Before plugging in the heater, check

that the voltage of your domestic
supply corresponds to the voltage (V)
indicated on the appliance.

• Check that the electrical socket has

a rating of 10/16 Amps.

• This appliance complies with EEC

Directive 89/336, relating to electro-
magnetic compatibility.

2. INSTALLATION

• The appliance is available in a portable

and a fixed version.

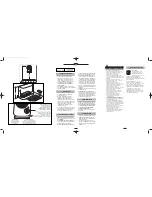
• In order to attach the appliance to the

wall, use two dowels and two screws
which are to be inserted in the holes
provided on the rear of the appliance.
Lock the appliance then onto the wall by
means of a screw positioned at the
bottom of the appliance. When
positioning the appliance, pay attention
to the minimum distances indicated in
fig. 1.

• If the appliance is installed in a

bathroom, it absolutely must be located
on the wall outside of the "critical zones"
as illustrated in fig. 2.

• Summer use (ventilation only): turn the

function switch (fig.3) clockwise to the
position.

• Heating at low power: turn the  function

switch (fig.3) to the position. The pilot
lamp switches on.

• Heating at maximum power: turn the

function switch to the position. The
pilot lamp switches on.

• Setting the thermostat(fig.3)when the

room temperature has reached the desi-
red level, slowly turn the thermostat dial
(fig.3) clockwise until the pilot light goes
out (or until you hear a ‘click’ on models

3. OPERATION

Voltage Wattage

See rating label

without pilot light) but no further. The
thermostat will now automatically main-
tain the temperature at the desired level.

• Switching the heater off: turn the knob

fully counter-clockwise to the “O” posi-
tion.

• Anti-freezing feature: With the knob of

the thermostat in        position, the
appliance maintains the room at a tem-
perature of about 5°C, thus preventing
free-zing with a minimal expenditure of
energy. With the models equipped with a
timer, the pins must be pulled out.

• Always pull the plug out of the power

point before cleaning the heater.

• Periodically clean the air intake and

outlet grilles during the period in which
the heater is in use with a vacuum clea-
ner.

• Do not use abrasive cleaning products

or solvents.

4. MAINTENANCE

• Do not use the appliance in the vicinity

of showers, bath tubs, wash basins,
swimming pools, etc.

• Always use the heater in an upright

position.

• Do not use the heater to dry your

laundry. Never obstruct the intake and
outlet grilles (danger of overheating).

• The heater must be positioned at least

50cm from furniture or other objects.

• When the appliance is used in portable

version, do not place it up against
walls, furniture, curtains, etc.

• The appliance must be installed so

that the switches and other controls
can not be reached by persons using
the bath tub or the shower.

• This appliance comes with a Y-type

connection. Replacement of the feed
cable must be entrusted only a techni-

5. WARNINGS

interior    18/5/04  08:50  Página 4

Summary of Contents for TRV-6100

Page 1: ...er Gebrauchsanweisung beschrieben Modelle zu verändern Il fabbricante si riserva il diritto a modificare i modelli descritti in questo Manuale d Istruzioni O k t ÛkÂv Ût ç È tËp okÏÂÈÛtÈk to Èk ˆÌ v tpo o oÈ Û t Ìovt Ï ou ÂpÈyp ºovt È Ûto pfiv Evtu o O ËyÈÒv A gyártó fenntartja magának a jogot a használati útmutatóban közölt műszaki adatok megváltoztatására Výrobce si vyhrazuje právo modifikovat ...

Page 2: ...cadora se enciende Calefacción con potencia máxima Tension Potencia véase placa de características gire el selector de funciones a la posi ción 2 La luz indicadora se enciende Regulación del termostato fig 3 cuando el ambiente ha alcanzado la temperatura deseada gire lentamente el selector de funciones hacia la dere cha justo hasta que la luz indicadora se apague o justo hasta que oiga un clic en ...

Page 3: ...es y los otros mandos no puedan ser alcanzados por quien está utilizando la bañera o la ducha Aparato equipado con conexión tipo Y El reemplazo del cable de alimentación deberá ser realizado por parte de per sonal autorizado No colocar el aparato inmediatamente debajo de una toma de corriente fija No tapar el aparato durante su funcio namiento para evitar recalentamientos y riesgos de incendio No ...

Page 4: ... alojamentos situados nas aletas posteriores do aparelho Em seguida bloqueá lo à parede através de um parafuso no furo situado na base do aparelho Posicionar o aparelho respeitando as distâncias mínimas indicadas à fig 1 Se o aparelho for instalado numa sala de banho deve ser absolutamente posicionado na parede fora do volume de protecção ilustrado à fig 2 3 FUNCIONAMENTO E UTILIZAÇÃO Serviço de v...

Page 5: ...u a utilizar o duche Aparelho dotado de ligação Y A substituição do cabo de alimentação deve ser feita somente por pessoa autorizada pelo fabricante pois são necessárias ferramentas especiais Este aparelho não deve ser colocado imediatamente por baixo de uma tomada de corrente fixa Não cobrir o aparelho durante o funcionamento para evitar superaquecimentos e riscos de incêndio Não utilize o aparel...

Page 6: ... or until you hear a click on models 3 OPERATION Voltage Wattage See rating label without pilot light but no further The thermostat will now automatically main tain the temperature at the desired level Switching the heater off turn the knob fully counter clockwise to the O posi tion Anti freezing feature With the knob of the thermostat in position the appliance maintains the room at a tem perature...

Page 7: ...because such work requires special tools The appliance must not be positioned directly underneath a fixed power point Do not cover the appliance while it is functioning in order to avoid overhea ting with the attendant risk of fire Do not use the appliance in rooms less than 4 m2 in area The heater is fitted with a safety device which will switch off the heater in case of accidental overheating eg...

Page 8: ... ET UTILISATION Tension Puissance Réglage du thermostat fig 3 quand la pièce a atteint la température voulue tourner lentement le bouton du thermostat dans le sens des aiguilles d une montre jusqu à ce que le voyant lumineux s éteigne ou jusqu à la position signalée par un click pour les modèles sans voyant et pas au delà La température ainsi établie sera réglée automatiquement et maintenue consta...

Page 9: ... est muni de connexion du type Y Le remplacement du cordon d alimentation doit être effectué exclusivement par un personnel agréé par le fabricant étant donné que des outils spéciaux sont nécessaires Cet appareil ne doit pas être placé juste au dessous d une prise de courant placée à poste fixe Ne jamais couvrir l appareil pendant le fonctionnement pour éviter tout risque d incendie Ne jamais util...

Page 10: ...WEISE UND GEBRAUCH Spannung Leistung Heizbetrieb bei hoher Leistungsstufe Drehknopf auf Stellung 2 drehen die Betriebskontrollampe leuchtet auf Temperaturregelung fig 3 Ist die gewünschte Raumtemperatur erreicht den Thermostatknopf langsam nach rechts drehen bis die Kontrollampe erlischt oder bei Modellen ohne Kontrollampe bis zum Klicken des Thermostats Die so eingestellte Temperatur wird dann du...

Page 11: ...den Das Gerät muß so installiert werden daß Schalter und andere Schaltelemente nicht von der Badewanne oder Dusche aus erreichbar sind Das Gerät ist mit einer Y Verbindung ausgerüstet Der Austausch des Versorgungskabels darf nur von Personal ausgeführt werden das hierzu vom Hersteller autorisiert wurde da Spezialwerkzeuge erforderlich sind Das Gerät darf sich nicht unmittelbar unter einer ortsfest...

Page 12: ...ogliere sempre la spina dalla presa di corrente Pulire periodicamente con un aspirapolvere le griglie di entrata ed uscita dell aria durante la stagione di utilizzo dell apparecchio Non usare mai polveri abrasive o solventi 5 AVVERTENZE Non installare l apparecchio in locali umidi o vicino a docce vasche da bagno lavan dini ecc Non usare l apparecchio per asciugare la biancheria non ostruire le gr...

Page 13: ...a prevista per lo smaltimento di questo tipo di rifiuti Per ulteriori informazioni al riguardo rivolgersi alle autorità locali competenti Importante L apparecchio è provvisto di uno speciale dispositivo di sicurezza che inter rompe il funzionamento del termoventilatore in caso di surriscaldamento accidentale es ostruzione delle griglie di entrata ed uscita del l aria motore che non gira o gira len...

Page 14: ...mi is sh h t to ou u q qe er rm mo os st ta avvt th h e ei ik k 3 3 ÚÚ ovtan to dwmavtio evcei ftavsei sthn epiqumhthv qermokrasiva gurivste argav to diakovpth tou qermostavth pro ta dexiav mevcri ovtou sbhvsei h endeiktikhv lucniva hv mevcri th qevsh pou epishmaivnetai me evna ÆklikÆ sta montevla cwriv endeiktikhv lucniva kai ovci parapevra H me autov ton trovpo ruqmismevnh qermokrasiva ruqmivzet...

Page 15: ...u aevra kivndu no uperqevrmansh Se mia apovstash 50 ekat mprostav apov th suskeuhv den prevpei na upavrcoun evpi pla hv avlla antikeivmena H suskeuhv eivnai efodiasmevnh me suvndesh tuvpou U astevra H antikatavstash tou kalwdivou trofodosiva prevpei na givnei apov exousiodothmevno proswpikov H suskeuhv den prevpei na topoqeteivtai kavtw apov mia movnimh privza tou reuvma to Mhn crhsimopoieivte aut...

Page 16: ...llenőrizze hogy az aljzat 10 16 Amperes e EZ A KÉSZÜLÉK MEGFELEL AZ ELEKTROMÁGNESES KOMPATIBILITÁSRÓL SZÓLÓ EU 89 336 SZ UTASÍTÁSÁNAK ÉS A 476 92 SZ OLASZ MINISZTERI RENDELETNEK 4 KARBANTARTÁS Mielőtt bármilyen tisztítási munkához látna mindig húzza ki a dugót az aljzatból Rendszeresen tisztítsa meg a szellőzőrácsokat azokban a hónapokban amikor használja a készüléket Soha ne használjon dörzshatás...

Page 17: ...ait ne tudja elérni az a személy aki a fürdőkádban illetve a zuhanyozóban van A készülék Y típusú csatlakozással ren delkezik A tápvezeték károsodása esetén a cserét a gyártó vagy márkaszervize illetve kizárólag egy hasonló szakképesítéssel rendelkező személy végezheti el a biztonságos használat érdekében A készüléket ne tegye közvetlenül egy állandó aljzat alá A készüléket tilos használat közben ...

Page 18: ...t knoflík na symbol 2 Rozsvítí se světelná kontrolka Nastavení termostatu obr 3 v okamžiku kdy teplota prostředí dosáhne Vámi požadované teploty otáčejte pozvolna kolečkem termostatu ve směru hodinových ručiček dokud rozsvícená kontrolka nezhasne anebo u modelů bez světelné kontrolky dokud neuslyšíte klapnutí dbejte na to abyste neotáčeli dále Takto nastavenou teplotou se bude dále termostat řídit...

Page 19: ...jako přenosný nenechávejte přístroj v provozu v těsné blízkosti stěn nábytku záclon atd Instalace ventilátoru musí být provedena tak aby uživatel nemohl používat spínače a jiné ovládací prvky ventilátoru přímo z vany nebo ze sprchy Spotřebič je vybaven zapojením typu Y Výměnu přípojného kabelu může provádět pouze pověřený pracovník Spotřebič se nesmí instalovat přímo pod pevnou zásuvku el proudu N...

Page 20: ...siahnete v miestnosti požadovanú teplotu otočte pomaly volič funkcií a termostatu doprava až kým nezhasne kontrolka alebo až do polohy kým počujete kliknutie pri modeloch bez kontrolky Takto sa nastaví teplota ktorá je automaticky regulovaná a udržiavaná sa konštantná pomocou termostatu Vypnutie otočte volič funkcií do polohy O Nastavenie proti zamrznutiu otočte volič funkcií do polohy V tejto pol...

Page 21: ...zdialenosti menšej než 50cm od prístroja Ak používate prístroj v prenosnej verzii pri použití ho neopierajte o steny nábytok závesy záclony atď Prístroj musí byť inštalovaný tak aby na vypínače a ostatné voliče funkcií nebolo možné dosiahnuť z vane alebo zo sprchy Prístroj je vybavený prípojkou typu Y Prívodný kábel môže vymieňať iba autori zovaný personál Prístroj nesmie byť umiestnený priamo pod...

Page 22: ...kazówek zegara aż zgaśnie lampka kontrolna lub dopóki nie znajdzie się w pozycji zasygnalizowanej kliknięciem w przypadku modeli bez lampki kontrolnej ale nie dalej W ten sposób ustawiona temperatura będzie automatycznie regulowana i utrzymywana przez termostat Wyłączanie przesunąć pokrętło do pozycji O Funkcja zapobiegania zamarzaniu po ustawieniu pokrętła w pozycji urządzenie będzie utrzymywać t...

Page 23: ... 50 cm od urządzenia W przypadku używania urządzenia w wersji przenośnej nie należy go włączać z dala od ścian mebli zasłon itp Urządzenie powinno być zainstalowane w taki sposób by wyłączniki i inne klawis ze poleceń nie znajdowały się w zasięgu osoby biorącej kąpiel w wannie lub pod prysznicem Urządzenie wyposażone jest w połącze nie gwiazdowe Wymiany kabla zasilają cego może dokonać jedynie upo...

Page 24: ...сим или фиксиран вариант За да монтирате апарата на стената използвайте 2 дюбела и 2 винта които се поставят на съответните места на ушите на задната страна на апарата Фиксирайте апарата с винт в отвора разположен в основата на апарата Като го поставяте спазвайте минималните разстояния посочени на фиг 1 Ако апаратът се инсталира в банята следва да се поставя само на стена която е извън защитния об...

Page 25: ...ели пердета и други подобни Апаратът трябва да се инсталира по начин който да не позволява на човек който ползва душа или ваната да достигне прекъсвачите и превключвателите Апаратът е снабден със свързване тип Y Смяната на кабела за захранването трябва да се извършва от оторизиран персонал Не поставяйте апарата непосредствено под фиксиран контакт Не използвайте апарата в помещения с площ по малка ...

Page 26: ...ÓÈ È Ï ÏÓ Ó Ì ÌÓ ÓÒ ÒÚ ÚË Ë ÔÓ Â ÌËÚÂ Û ÍÛ ÔÓÎÓÊÂÌË 2 2 á Ó ËÚÒfl ËÌ ËÍ ÚÓ Ì fl Î ÏÔ ê êÂ Â Û ÛÎ ÎË Ë Ó Ó Í Í Ú ÚÂ Â Ï ÏÓ Ó Â Â Û ÛÎ Îfl flÚ ÚÓ Ó Ë ËÒ Ò 3 3 ÍÓ ÔÓÏ ÂÌËË Û ÂÚ ÓÒÚË ÌÛÚ Ú Â ÛÂÏ fl ÚÂÏÔ ÚÛ Ï ÎÂÌÌÓ ÔÓ Â ÌËÚÂ Û ÍÛ Ú ÏÓ Â ÛÎflÚÓ ÔÓ ÒÓ ÓÈ ÒÚ ÂÎÍÂ Ó ÍÎ ÂÌËfl ËÌ ËÍ ÚÓ ÌÓÈ Î ÏÔ ËÎË Ó ÂÎ Í Îfl ÏÓ ÂÎÂÈ ÂÁ ËÌ ËÍ ÚÓ ÌÓ Ì Π íÂÏÔ ÚÛ ÛÒÚ ÌÓ ÎÂÌÌ fl Ú ÍËÏ Ó ÁÓÏ Û ÂÚ ÚÓÏ ÚË ÂÒÍË Â ÛÎË Ó Ú Òfl Ô Ë Ó ÓÏ...

Reviews: