
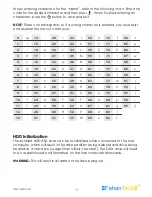
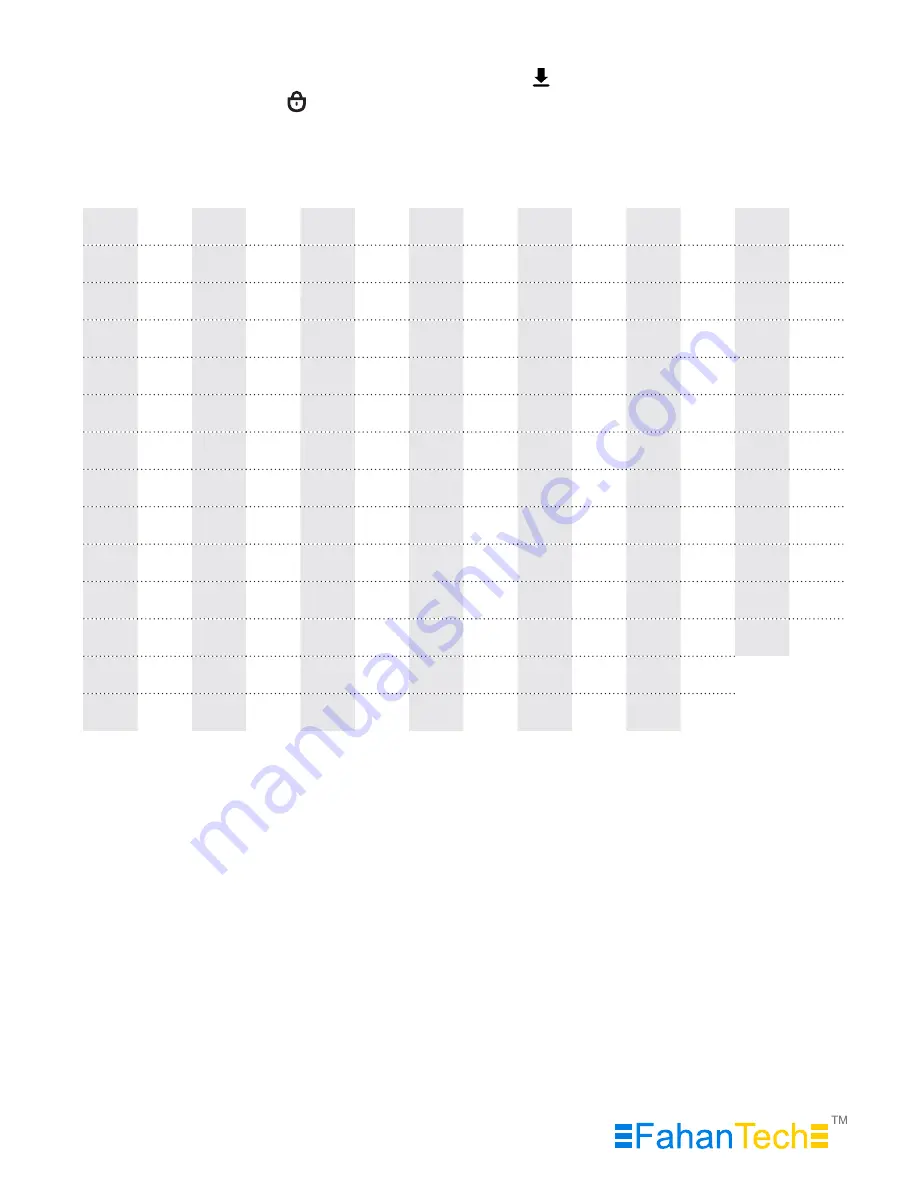
When entering characters for the “Name”, refer to the following chart. Enter the
code for the desired character and then press . When finished entering all
characters, press the button to save and exit.
NOTE
: There is no backspace, so if a wrong character is entered, you must exist
and re-enter the menu to start over.
0
sp
14
.
28
<
42
J
56
X
70
f
84
t
1
!
15
/
29
=
43
K
57
Y
71
g
85
u
2
“
16
0
30
>
44
L
58
Z
72
h
86
v
3
#
17
1
31
?
45
M
59
[
73
i
87
w
4
$
18
2
32
@
46
N
60
\
74
j
88
x
5
%
19
3
33
A
47
O
61
]
75
k
89
y
6
&
20
4
34
B
48
P
62
^
76
l
90
z
7
‘
21
5
35
C
49
Q
63
_
77
m
91
{
8
(
22
6
36
D
50
R
64
`
78
n
92
|
9
)
23
7
37
E
51
S
65
a
79
o
93
}
10
*
24
8
38
F
52
T
66
b
80
p
94
~
11
+
25
9
39
G
53
U
67
c
81
q
95
[]
12
,
26
:
40
H
54
V
68
d
82
r
13
-
27
;
41
I
55
W
69
e
83
s
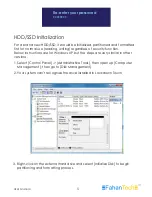
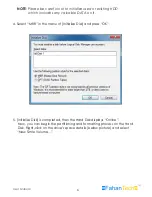
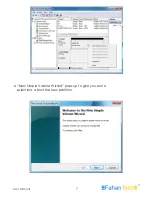
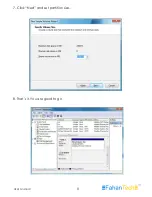
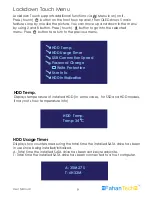
HDD Initialization
The installed HDD/SSD drive can be re-initialized while connected to the host
computer, which will result in the drive partition being deleted and drive being
treated as a new drive (usage timer will also be reset). The SATA drive will need
to be re-partitioned and formatted on the host computer afterwards.
WARNING:
This will result in all data on the drive being lost.
User Manual
11


