PAI N T E X E RC I S ES
1)
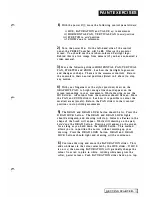
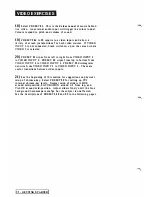
Wi th the power Off, move the following control panel slid ers:
i) HUE, SATURATION and VALUE
up
to maximum
ii) HORIZONTAL PAN, VERTICAL PAN to
mid-position
iii) STRETCH to
mid
position
i v ) ZOOM down to mi nimum.
2)
Turn the power
On.
O n the left-hand side of the control
panel, the PRESET nu mber will be
00.
Observe the monitor
screen. You should see the rainbow-coloured Fa irlight logo.
Behind this is a live image from camera (if you have con nected a
video camera).
3)
Move the following sliders: HORIZONTAL PAN, VERTICAL
PAN, STRETCH and ZOOM. See how the Fairlight logo moves
and changes in shape. These are the
movement
controls. Return
the controls to their neutral posi tions (listed i n
1
above) to stop
any motion.
4)
With your fingernail or the stylus provided, draw o n the
GRAPHICS PAD. A bright orange line should appear on the
screen responding to your movements. While d rawing, move the
HUE slider. All colours from the spectrum should be seen. Move
the PAN a n d ZOOM sliders. See how i t is possible to colour the
smallest areas (pixels). Return the PAN sliders to their central
positions to stop sliding movements.
5)
The DRAW and DRAW LOCK bu tton should be lit. Press the
DRA W LOCK button. The DRAW and DRAW LOCK lights
shoul d exti nguish, and drawing will stop. Instead , a
Cursor
in the
shape of the brush will a p pear. While still drawing on the pad,
hold down
the DRAW button. Drawing will appear on the screen
for as long as you hold down the DRAW button. This method
allows you to re-position the cursor without messi ng u p your
drawing. P ress the DRAW LOCK bu tton. DRAW a n d DRAW
LOCK buttons should light a n d drawing will be continuous.
6)
Continue d rawing and move the SATURATION slider. This
adds whiteness to the colour selected by the HUE slider. If HUE
is on
red,
then moving SATURATION will gradually change the
col our from red to pink to w h ite. Adding whiteness gives the
softer, pastel colours. Push SATURATION slider back up to top.
GETTING STA RTED
-
Summary of Contents for CVI
Page 1: ...r e User Manual Computer Video Instrument...
Page 4: ...Startea 2 Video Melius...
Page 102: ...33 Quad mirror Slow scan across L J _J...
Page 103: ......
Page 104: ...56 Under over stencil 57 Under over catch up 58 Push to freeze...
Page 105: ...60 L J _JI L...
Page 106: ...80 Under over texture wipe L J _J...
Page 107: ...L J _Jd r...
Page 197: ...RS232C Port ControI 1 Rev 7 Software Update 1...
Page 268: ...Glossary 1 Index 5...
Page 282: ......


