

2-3
I
NSTALLATION
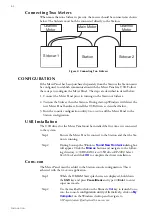
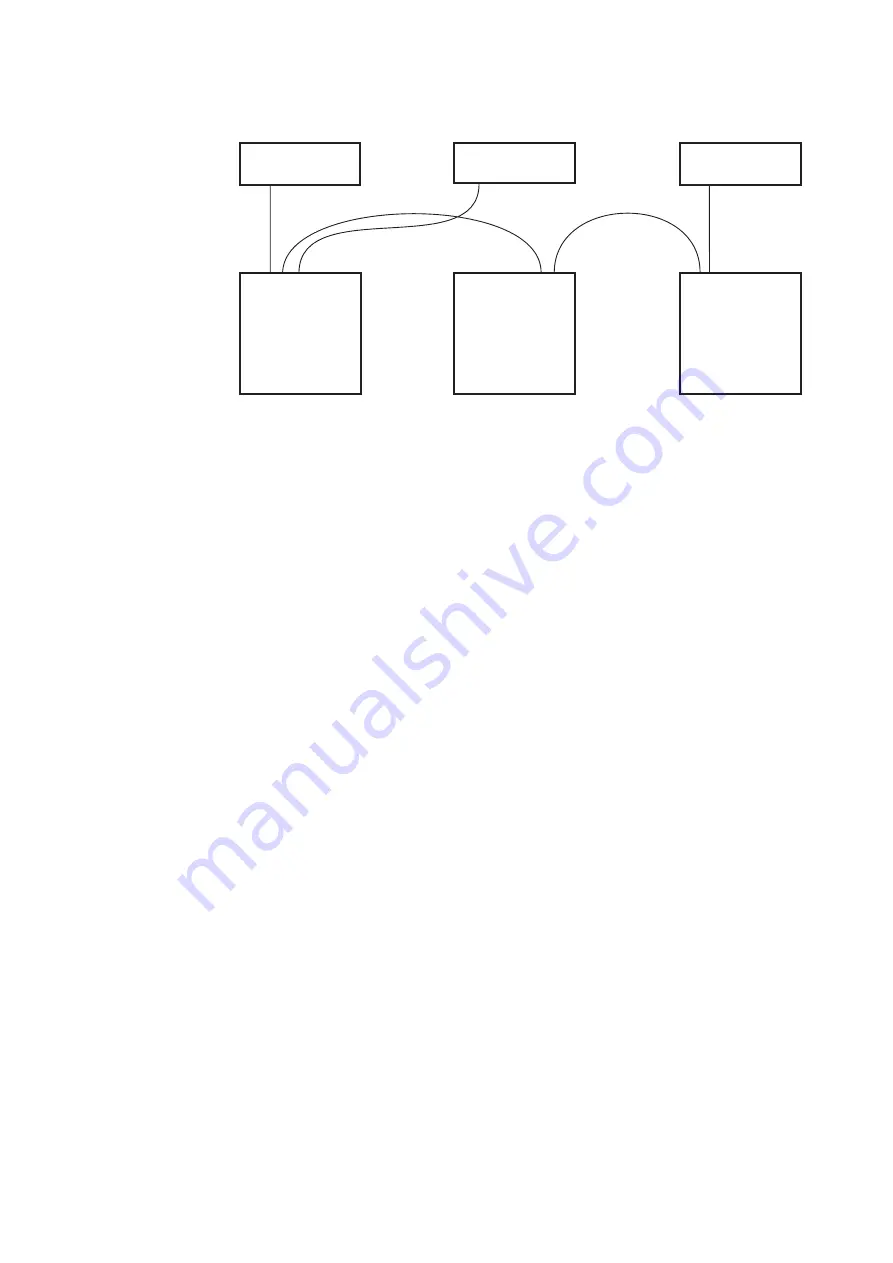
Connecting Two Meters
When more than one Sidecar is present, the meters should be connected as shown
below. The Sidecars must both be connected directly to the Station.
Figure 2: Connecting Two Sidecars
CONFIGURATION
If the Meter Panel has been purchased separately from the Station, the Station must
be configured to establish communication with the Meter Panel via USB. Follow
these steps to configure the Meter Panel. The steps are described in detail below:
1. Connect the Meter Panel prior to turning on the Station or Sidecar.
2. Turn on the Sidecar, then the Station. During start-up Windows will detect the
new Meter Panel hardware. Install the USB drivers as described below.
3. Run the console configuration utility Cons-con to add the Meter Panel to the
Station configuration.
USB Installation
The USB driver for the Meter Panel must be installed the first time it is connected
to the system.
Step 1
Ensure the Meter Panel is connect to the Station and that the Sta-
tion is running.
Step 2
During boot-up the Windows
Found New Hardware
dialog box
will appear. Click the
Browse
button and navigate to the follow-
ing directory: C:\DREAM Drivers\USB drivers\W2000. Select
FairUsb.inf and click
OK
to complete the driver installation.
Cons-con
The Meter Panel must be added to the Station console configuration. This is
achieved with the Cons-con application.
Step 1
While the DREAM Start splash screen is displayed, hold down
the
Shift
key and press
Pause/Break
and type
SU
Enter
to enter
super user mode.
Step 2
Use the trackball to click on the Binnacle
Cut
key to launch Cons-
con, the console
configuration utility. Alternatively,
click on
My
Computer
on the Windows desktop and navigate to
C:\Projects\mixers\fmc\system\Cons-con.exe.
Station
Sidecar 1
Sidecar 2
Main Meter
Channel
Meter
Channel
Meter
Summary of Contents for DREAM Station SCP1
Page 6: ...2 1 NOTES...
Page 10: ...3 1 NOTES...