background image


Xynergi Media Production Centre 

User Manual 

16 February 2010 

Software Version 2.6 

Issue 001

Summary of Contents for Xynergi

Page 1: ...Xynergi Media Production Centre User Manual 16 February 2010 Software Version 2 6 Issue 001...

Page 2: ...t is copyright to Fairlight AU Pty Ltd and may not be quoted or reproduced in any form without written permission from the company Fairlight is a trademark of Fairlight AU Pty Ltd All other trademarks...

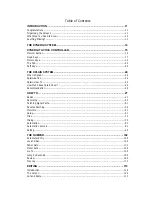
Page 3: ...TEM 26 What is Xplain 26 Xplain Button 26 Xplain How To 26 How Much does Xplain Cover 26 Recommendation 26 HOW TO 27 Basics 27 Recording 43 Patching Signal Paths 51 Reverse Patching 56 Monitors 57 Set...

Page 4: ...utomation Basics 145 How to Use Automation 146 Enabling Mix Items 148 Mix Item Status 149 Programmed Automation 152 Saving and Loading Mixes 153 Mix Undo 154 System Mix Save function 155 AutoSave 155...

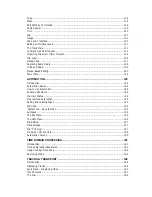
Page 5: ...190 Panning 191 Equalisation 192 Dynamics 193 Aux Sends 195 Zoom Panels 195 On Screen Automation Controls 201 METERS 202 Introduction 202 Fat Channel Bus Meters 202 Master Screen Meters 202 Meter Sets...

Page 6: ...234 ADR Preferences 236 The ADR Display 237 AUTO CONFORM WITH EDL TOOL 240 Introduction 240 Loading an EDL 240 Capture and Conform 240 Reconform 242 Additional Facilities 243 PROJECT AND FILE MANAGEME...

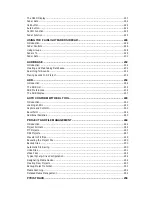
Page 7: ...he Surface 275 Plug ins on Faders 275 Plug ins in the Pad 277 Clip based Plug ins 282 Using VST Instruments in Xynergi 284 ReWire 284 Fairlight Partner Program 287 HUI SLAVE MODE 289 Introduction 289...

Page 8: ...Putting Machines Online 310 Editing with Machine Control 311...

Page 9: ...diting Screen The Editing Screen is shown full screen expanding automatically to fit the display size of the monitor Note Screen bit depth MUST be 24 bit The Mixer Screen The Mixer Screen is normally...

Page 10: ...ntary and Latching What Sorry but this is one of the keys to speed in Xynergi Many operations can be done two ways Momentary means Hold down a key to open a mode do one thing in that mode then let go...

Page 11: ...re are many topics that are not covered here They are covered in the Xplain system on board the Xynergi controller In many cases that s a much easier way to learn about them For information about Xpla...

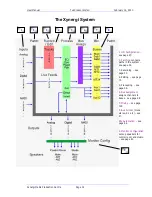
Page 12: ...nnects paths in the system see page 32 3 Recording see page 30 4 Editing see page 72 5 Processing see page 56 6 Bus Assignment assigns channels to Buses see page 48 7 Mixing see page 118 8 Bus Format...

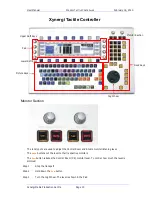
Page 13: ...and Studio monitor listening level The Mute buttons cut the level to their respective monitors The Dim button reduces the Control Room CR monitor level To control how much the level is dimmed Step 1 S...

Page 14: ...r level When fixed it is unaffected by the rotary pot To turn on Fixed Level monitoring Step 1 Stop the transport Step 2 Hold down the BLUE key Step 3 Press the Dim button To set the level for Fixed m...

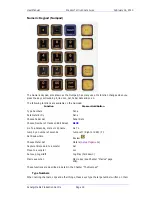
Page 15: ...OLLER February 16 2010 Xynergi Media Production Centre Page 17 Fixed Keys Fixed keys are normal switches with labels that do not change Their functions change a little but not as much as the picture k...

Page 16: ...arameter Entry None Choose Fader Set Fader Sets Choose Number of tracks on Edit Screen BLUE Go To a timecode mark or clip name Go To Jump by a number of seconds Jump Left Right or REW FF Set Review ti...

Page 17: ...re keys Both REW and FF can be repeated many times to increase speed Pressing REW FF issues a STOP command jog REW jump left jog FF jump right REW 0 jump left one frame FF 0 jump right one frame REW 1...

Page 18: ...Recording a range can be automatically recorded Mix Automation a range can be filled with automation values or isolated for a Write pass See more about Using Ranges on page 96 Undo Redo Allow a large...

Page 19: ...being displayed horizontally across the Edit screen A specific Zoom value can be obtained by holding down Zoom and pressing a Numpad key combination making a number between 1 and 20 the releasing Zoom...

Page 20: ...ng states Layouts A layout is a group of keys that are presented together Some layouts include all the keys and some include only a few or even one Layouts can include picture keys and fixed keys Pict...

Page 21: ...les are actually triggles i e they choose amongst three options Toggles are always blue in colour Path Keys Path keys are used to select or deselect signal paths Their colour changes depending on the...

Page 22: ...It works in momentary mode hold down or latching mode press and release Action Keys Action keys cause an immediate result They are always coloured orange The Pad This displays all mixing information...

Page 23: ...nformation about automation using the Pad see page 83 Soft Keys Soft keys display the soft menu options for the current mode The soft key label immediately above or below the soft key tells you what i...

Page 24: ...ing again When you see a flashing button read the text first then press the button Sometimes the text will instruct you to press a button without flashing it Go ahead and press the button This symbol...

Page 25: ...ted to the mix buses Track contains clips i e edits of recorded audio You can record directly into tracks Live audio entering the system from a physical input in real time Bus mix destination Includes...

Page 26: ...n in the Numpad to move the track selection one place up or down Type a number up to 3 digits on the Numpad then release Track to select that track This is great for selecting tracks that are not curr...

Page 27: ...e but those of Track 1 are not affected To set up for Multi ON set Track 2 s Level higher than Track 1 and its L R pan further right than Track 1 Also set its Mute to the opposite of Track 1 Multi Rel...

Page 28: ...use the U keys like this Hold down BLUE and also hold down the U1 button Numpad 3 Keep holding down BLUE and U1 Press the Clear soft key and then select a few tracks They are displayed on the screen R...

Page 29: ...ress the Record Megamode button Above the Jog Wheel Above the Jog Wheel is a complete set of transport commands designed to let you keep your hand in one position for editing Play Jog First press is J...

Page 30: ...mp by a number of seconds hold down either Jump Key and use the Numeric Keypad to select the length of jump from one to nine seconds 0 jumps 10 seconds 00 jumps 1 frame Get Ready Select one of the fol...

Page 31: ...t key next to the Numeric Keypad and recalled using the Loc key above it Get Ready Make sure the Go To menu is not active Storing Locators To store a location press the Set button then press 1 2 or 3...

Page 32: ...Go To button to display the Go To menu In the Go To menu press the mark soft key The list of marks appears over the Edit screen To select a Mark use the Jog Wheel the and buttons click with the mouse...

Page 33: ...ess Enter To rename the mark press the Rename soft key or click the Rename screen button and type in a name then press Enter To change the mark index click the Set Index screen button and type in a In...

Page 34: ...he Solo Menu and Mute Menu mentioned above Editor Screen Click a Solo button in the Editor Screen to toggle solo on any track Click a Mute button in the Editor Screen to toggle mute on any track Click...

Page 35: ...gage the PadLock menu Step 3 Press the Solo Safe soft key Using the Fader Each fader strip includes a Solo button that affects the channel being controlled by the fader Solo Mute Swap Constellation XC...

Page 36: ...d are now soloed These channels are the ONLY channels soloed if there were other channels soloed before they no longer are Solo and Mute to SEL Constellation XCS allows you to transfer your solo or mu...

Page 37: ...button Step 2 Select some channels Step 3 Hold down the SEL button Two new buttons appear beside it Step 4 Press the to Solo button The SEL layout remains but the selected channels are now soloed The...

Page 38: ...e to selected these solo modes Soloed feeds are shown with a green indicator on the mixer video display Solo Clear The Solo Clear button clears all currently soloed paths press the Solo Clear button a...

Page 39: ...name will be displayed on the Xynergi picture keys making it easier for you to choose signal paths If you use more than one space character the first one becomes a breaking space and the others are pu...

Page 40: ...modes are active three action keys at the left of the Jog Wheel give you the main commands needed e g cut tail trim head erase clip For details of the main editing commands see How To Editing For deta...

Page 41: ...mode is for setting up your monitor system Much of this is setup at installation but there are also controls for setting up the monitors for a particular session and switching quickly between differen...

Page 42: ...called an Input The system has many physical inputs and you can patch any input to any track The next section Patch Inputs to Tracks explains patching in detail Here we will just get something patched...

Page 43: ...an be armed in three different ways Please try all these now to get familiar with your system Press a Track button when the Arm menu is displayed in the Record Megamode This track button should turn r...

Page 44: ...tom of the Edit Screen To fix this go to the Patch page as described above in Patching Inputs and give it a source Once a track is armed use the Play and Record keys to punch into record Play Stop REW...

Page 45: ...ors repro in Play or Jog otherwise input RECORD mutes the track when stopped otherwise as AUTO MUTE mutes the track while in Record otherwise repro REPRO always monitors recorded audio Tape Mode Overv...

Page 46: ...ically adds this piece just as if you entered recording earlier This can be very useful when trying to capture performances as it gives you extra time to react This guide shows you how to set the leng...

Page 47: ...t Click OK to finish Press exit to leave the Name menu Clip Naming Each clip can be given a typed name For existing clips you select them and issue the clip name command You can also name clips while...

Page 48: ...then ADR then use the on screen dialog Using the Record Menu Hold down the Record button in the transport section lowest row on the console The Pad displays the Record Menu soft keys head prerolls the...

Page 49: ...Pre Roll time can be set in the ADR menu press the green Record Megamode button then ADR then use the on screen dialog Auto Rec Operation Make a range as follows Locate to the desired in point and pr...

Page 50: ...patch one source to many tracks but not vice versa Sources are shown on the left of the screen while destinations are shown at the right Source Categories Categories of signal paths are selected in th...

Page 51: ...ry 16 2010 Xynergi Media Production Centre Page 53 In this case Analog Inputs have been selected Destination Categories Selecting a category of destinations expands it into the upper right of the scre...

Page 52: ...e 54 In this case Track Inputs are shown Making a Patch Select a source and a destination then click the Patch button in the center Afterwards the tiles used in the patch will show the results Source...

Page 53: ...ted touch the Clear button The Multi Button Clicking the Multi button allows you to patch the same sources multiple times Normally after a patch both sources and destinations are deselected but if Mul...

Page 54: ...mm1 and Comm2 Inputs physical inputs analog or digital Outputs physical outputs analog or digital Meters the components of the current Meter Set see Meters page 202 So for example Analog Inputs means...

Page 55: ...s will toggle between the MAIN and alternative monitor speakers The Mon Megamode button indicates when any alternative monitor function ALT Speakers ALT Format ALT Source is being used You can still u...

Page 56: ...how you how to set up the formats outputs and names of your speaker sets Get Ready Press the green Mon button Press the Mon Setup button if it s not already lit Configure To configure speaker sets pre...

Page 57: ...t Click Analog or Digital Outputs at lower right Choose the right number of free outputs to match the number of selected elements Click Patch Repeat as needed Press the end soft key to leave the Confi...

Page 58: ...Press the green Mon button Press the Mon Setup button if it s not already lit Choose Source System buses can be chosen for immediate listening on the picture keys To access and configure External Sour...

Page 59: ...ress Alt format This will toggle to the last non standard format you used if any Setup Frame Rate Overview Timecode Frame Rate can be changed at any time while a project is open and the timecodes of a...

Page 60: ...Press the green Setup button Press the sync key This displays the Sync Smart Panel above the Edit Screen Note you can also select the Sync Smart Panel at any time using the mouse with the View menu a...

Page 61: ...t Screen Click in the Preroll or Postroll field in the ADR dialog Type in a number of seconds for the desired length of roll Press the ENTER key or click in another field to apply the time you typed T...

Page 62: ...used when you need to mix to more than one format simultaneously Every channel that goes to the Main Bus can also be assigned manually or automatically to the Sub Bus that will be used for Reduction...

Page 63: ...ther way around one path to multiple buses use the Path layout in the Pad This is visible in the Editor and Mixer Megamodes This guide will show you how to assign paths to Buses using the Bus Assign s...

Page 64: ...ultiple paths click and drag the mouse over them Use Page Up and Page Down to reach more paths Sub Buses are at the bottom of the second page They are grayed out unless Main is the selected destinatio...

Page 65: ...Overview Bus Params allows you to toggle pre post for a number of paths at the same time For Aux Buses pre means that the aux send goes before the channel fader send and before the channel mute button...

Page 66: ...f your Link Group Press the last or first member for your Link Group Now choose the application of defaults Default Pans pans the members as though going directly to a surround bus e g Two members pan...

Page 67: ...aster to the Channel Panel or add it to a fader set Displaying Group Masters The Mixer Screen optionally shows VCA Group masters To control this Step 1 Open the System Variables window by typing SHIFT...

Page 68: ...oduction Centre Page 70 Global Assignment Fader Group membership can be controlled globally using the Grouping Window To open this click on the Mixer screen and type SHIFT ctrl V To use this window St...

Page 69: ...group Step 1 Call the desired feed Step 2 Press hold the FADER GROUP key top right corner of the Channel Panel Step 3 Toggle the feed in out of a group using the fader set keys 1 9 Membership of fade...

Page 70: ...ext step for details Note you can bypass this procedure using the mouse and go directly to the File New command above the Edit screen Get Ready Press the green proj menu button Press the Proj button i...

Page 71: ...es Note you can bypass the Xynergi controller and use the mouse directly by clicking File Open above the Edit screen Import project Overview Importing a project is like opening one where the file form...

Page 72: ...other configuration data The Mix information is optionally saved and can also be manually saved at any time see Save My Automation Data below To ensure that Mix information is automatically saved when...

Page 73: ...open soft key in the Pad This opens the Windows Open dialog Use the mouse to navigate as follows Click on the Look in list box and select Audio D or whichever is your designated Audio drive Double cl...

Page 74: ...k button in the Mixer Megamode or by double pressing Path EQ Dyn Aux or Plug ins See How to Mixer Pad Details for more information Using SEL Press and release the SEL button While SEL is active the Pa...

Page 75: ...t or front back of center BLUE Touch Pan LR knob set Pan LR to center Spread applies only to Link Groups It is a measure of how wide the elements are panned into the Surround field Divergence measures...

Page 76: ...functions Press the Path EQ or Dyn buttons for their details Aux ALT The three Aux modes are selected on the lower soft keys Aux sends are Muted using the ON MUTE button Path Copy Overview Path Copy...

Page 77: ...ode is active Inserts are used for getting signals out of the system and back in again They are also used to place Plug ins in a signal path The first step in working with an Insert is to set its phys...

Page 78: ...a Link Group is selected Press Enter to apply The ON OFF toggle and the PRE POST toggle are available once the output is defined Oscillator The system oscillator is toggled on and off in the Mixer or...

Page 79: ...Operation Pressing the CALL button on a Sidecar Fader brings its signal path to the Pad and the Fat Channel It behaves as though it is the most recently selected path If it is a track this does not s...

Page 80: ...a number from 1 to 9 If faders are properly configured using the Xynergi Configure application Start All Programs Fairlight Xynergi Utils Configure Xynergi new projects will open with the Tracks and L...

Page 81: ...nable Parameter s Press the Enable Params button In the enable layout you choose parameters for writing automation data When a path enters Write or Trim only enabled parameters will have their values...

Page 82: ...ew automation data Note there is only one level of undo Fader Control Overview The steps in working with faders are similar to working with the Pad except that enabling the path is done locally on the...

Page 83: ...utomation Touch AutoEnable Operation Press the touch button labelled touch off touch latch or touch snap and select one of the following touch off Touch Write does nothing touch latch Touching an enab...

Page 84: ...ntrol puts it into Write It continues writing after you let go for the whole automation pass touch snap Touching an enabled control puts it into Write Releasing the control puts it into Read immediate...

Page 85: ...en indicating Read status To review your results press the Play Menu button twice Auto Punch Overview Auto Punch performs an automation pass pre rolling then punching in and out at the Range start and...

Page 86: ...nd select faders and pans Press exit Press preview The preview button pulses The AUTO button on Xynergi or on a Fairlight Sidecar will now put its corresponding path into Preview mode Press AUTO The L...

Page 87: ...bled for the relevant signal path it will go into Write This is a handy way of writing snapshots into the automation like this Create a series of snapshots presets of the whole console containing mixe...

Page 88: ...Level and Pan as desired Press the fill range soft key Note Write Trim has no effect Values are always written by fill range Isolate Overview Isolate is a way of disconnecting the automation from sele...

Page 89: ...t is illuminated Press the file button Operation The file menu uses a list of files shown in the Pad Use the file menu soft keys as follows System Mix if YES saves the current mix with the Project Thi...

Page 90: ...ess a particular parameter The first six buttons are provided with factory presets but you can replace them with your own To apply a preset simply click on it when the Display button is selected To cr...

Page 91: ...en line with the name of the parameter to the right of the cursor For switched parameters like Mutes the line is shown high when the channel is on and low when it is muted as shown below When writing...

Page 92: ...nd of the project Editing Automation Curves Automation data can be edited graphically using the mouse To do this click the Edit button There are two ways to edit Events and Draw Events To edit Events...

Page 93: ...Drawing Drawing allows you to create automation data using the mouse To begin drawing click the Draw button Now click and drag on any selected track to create or replace automation data Undo Automatio...

Page 94: ...changes to cut range copy range erase range In this situation the basic editing commands cut copy and erase target the parts of clips that lie inside the range Some other commands like Nudge Fade and...

Page 95: ...e press its button to make it the only selected track If necessary use the Bank key Create a range within the clip using from and to For help with this see How to Editing Using ranges Press razor Pres...

Page 96: ...r later This means exposing a different portion of the original recording Note another quick way to slip a clip is to drag and drop it with the mouse You can drag it to another track as well Holding d...

Page 97: ...gining fade in and end fade out of each clip A fade in starts from silence and ends at the full level of the clip and a fade out does the opposite Crossfades between two clips are created by first lay...

Page 98: ...track has a blue label in the Edit Screen Clip EQ does not use a range Get Ready Press the green Editor button Operation Press the clip eq button Locate the transport so that the cursor crosses the m...

Page 99: ...own Ctrl and Zoom while jogging Locate the transport so that the cursor crosses the middle of a clip Make its track the only selected one If necessary use the Bank key The target clip should now be th...

Page 100: ...er a value In the picture they are swapped Sorry Loc and Set The system maintains three Locators They are very useful for quick marking of positions and returning to them They are not saved with proje...

Page 101: ...ne edit points For these you should use Marks see Using Marks in the How To Chapter Basics section Fader Sets When used with external faders Fairlight Xe6 Sidecar or Mackie fader blocks it allows diff...

Page 102: ...s dedicated to Mixer Set do the following Step 1 Press the Fader Sets button Step 2 Hold down the 0 button for a couple of seconds The numbers 1 to 24 appear on the track keys The selected number corr...

Page 103: ...nywhere Capture Timecode Sometimes you need to capture the current timecode and then do something with it For example you might want to move the transport exactly 2 seconds and 3 frames backwards To c...

Page 104: ...n your Mark press the Go To button again or ENTER to locate to the displayed timecode or Play to locate and go into play immediately or press Esc upper left key to close the dialog without locating an...

Page 105: ...except those with names containing what you typed In the example shown above all the clips contain the letters pa Step 4 Having chosen your clip press the Go To button again or ENTER to locate to the...

Page 106: ...orer window showing the file containing the media for the clip Resize the dialog by dragging with the mouse on any of its sides Change the order of displayed fields by dragging the field names horizon...

Page 107: ...yout change b it has priority over all other numpad functions except Blue which means it will work any time regardless of what is displayed on the numpad This makes it great for use in macros Review T...

Page 108: ...Audio is heard on all tracks up to about four times play speed depends on number of tracks playing and speed of disk system Jog Speed Jog Speed depends on Zoom setting the wider you zoom the faster y...

Page 109: ...hord change in an orchestral piece You can position the loop up to over or after the Cursor position i e the Play Head where editing is normally performed In other words you can hear the audio up to a...

Page 110: ...t of clips through time not using clipboard Fade fades or cross fades the selection Once a mode is selected it remains current until another mode is selected The Cursor Most edits are performed at the...

Page 111: ...e middle of the screen which can be useful for seeing more of the incoming audio for example But if you want to get it exactly back to the center use the command Setup Reset Playhead Cut and Paste Who...

Page 112: ...ove a clip under the cursor Step 2 Press the cut key if not already selected Step 3 Press the cut head key Step 4 Select another track and or move to another location The clip is pasted Only the head...

Page 113: ...to start the range Step 2 Press the from key Step 3 Move the transport where you d like to end the range Step 4 Press the to key Now we ll cut and paste the audio in the range Step 1 Choose the track...

Page 114: ...the target is all the clips and parts of clips on selected tracks that are inside the range Again the target clips are always red An exception with a range you can use the mouse to deselect a clip To...

Page 115: ...old down the takes button and select the on off soft key or simply double press the takes button Razor Sometimes it is useful to cut the time out of a track not just the audio This is similar to cutti...

Page 116: ...at the cursor position mute clip Silences the clip cleave clip Removes the link between stereo linked clips reverse Creates a reversed version of the audio in the selected clip s and replaces the orig...

Page 117: ...te Special Instead of pasting the clipboard contents at the cursor position it is possible to paste characteristics of a clip into other clips Step 1 Copy some clips to the clipboard using the Copy me...

Page 118: ...r point in the audio Step 6 Jog backward a few frames and press ENTER Now the head is moved earlier revealing more of the audio You can keep jogging and pressing ENTER as long as you like until you ar...

Page 119: ...d moves the head of a clip to the cursor while maintaining the position of the tail Slipping the tail moves the tail of a clip to the cursor while maintaining the position of the head slip is accessed...

Page 120: ...thout changing the positions of the head and tail To do this press the Slip Sync soft key move the transport and press ENTER The audio within the clip will move by the amount you just moved the transp...

Page 121: ...uding those which are completely buried NOTES Nudging is possible while the transport is in play When nudging a Range clips not wholly within the Range are not affected However the Range itself is als...

Page 122: ...fields shown in the Smart Pane Using Multiple Tracks If multiple tracks are selected the simple Fade Head and Fade Tail commands will apply to all clips touching the cursor on selected tracks Using a...

Page 123: ...u can use the Numeric Keypad type Minus then 12 or the other way round then press Enter Using the QWERTY keyboard you can use the Down Arrow to go from zero to 1 frame then type in a value to be used...

Page 124: ...o apply it Deleting Fades Step 1 Press the delete soft key then press the fade head fade tail or fade clip key to delete fades Pressing the fade clip key affects fades at both the Head and Tail of eac...

Page 125: ...pes and controls for creating and editing fades Fade Head Step 1 Select a track and move a clip under the cursor Step 2 Press the fade button if not already on Step 3 Click the Head button in the scre...

Page 126: ...enient fade shapes as presets These can be recalled instantly by clicking on the keypad at the left Having recalled a preset it can be applied to the Head and or Tail of the currently selected clips u...

Page 127: ...y touching the play head on the active track Having captured those values you can apply them to any other red clip by clicking the Clip button Untick shape or length if you don t want to apply it Cros...

Page 128: ...its The current value for Soft edits is shown in the Audio Options group A value of 72 samples is generally useful when the Project sample rate is 48 kHz but you may set this according to your own tas...

Page 129: ...Menu Takes menu To display the Takes menu press BLUE Takes The system displays a Smart Panel showing the individual layers on the current editing track For the configuration shown above the Takes disp...

Page 130: ...s the numbers soft key Step 4 Select the second track Move This command uses a range exclusively It moves all layers of the audio from the source track to the destination track replacing the audio tha...

Page 131: ...opy menu active press the Cut or Copy button in the Editor Megamode Step 2 Hold down the SHIFT button and press the green Editor Megamode button The Quick Edit layout is shown This layout contains onl...

Page 132: ...he Trim Left button to make the edit Note Clips on multiple tracks can be trimmed at the same time Fade Head Curve Fade Tail Curve These keys combine the Jog Wheel and the Fade function To use the Fad...

Page 133: ...function To use Level Adjust Step 1 Start with the cursor touching a clip whose level you wish to trim Step 2 Press and hold the Jog Level button Step 3 Turn the Jog Wheel to adjust the level trim di...

Page 134: ...ect until you select another mode The clips will be sample rate converted on import to match your current project Clip Level Each clip has a volume level that you can set This is a quick and easy alte...

Page 135: ...ial layout to appear with many different level changes that can be applied instantly The Clip Level Layout will disappear when you select other menus but its prescence will be remembered when you retu...

Page 136: ...it simply changes the portion of the media being played by the clip Sometimes it is also valuable to change the media played by a clip This can be done in two ways Replace the media of the selected c...

Page 137: ...Undo List In the Edit Menu there is an undo list showing all undoable functions which you have performed in your current session You can choose one of these operations to undo but be warned it will al...

Page 138: ...ot select tracks but selecting clips by directly Ctrl clicking them does select tracks To remove the current range click but don t drag anywhere with the mouse Moving Clips Clips can be dragged horizo...

Page 139: ...he mouse can be used to change the order of clip layers To do this simply click and drag a clip from one level to a higher or lower level Changing levels in this way can be combined with dragging a cl...

Page 140: ...ITING February 16 2010 Xynergi Media Production Centre Page 142 Mouse Edit Menu The screen Edit Menu provides many commands that are available elsewhere in the system The mouse can be used to access t...

Page 141: ...se all the recorded audio Heals split in audio clips must be positioned together Unlinks linked clips Opens a palette of colours for directly applying to clips Cuts the selected clips into two at the...

Page 142: ...ribed in the Chapter on Fades on p 139 It is also possible to apply fades using the Fades Menu This is located at the top of your Dream II window and looks like this Uses Playback head location on a c...

Page 143: ...system Example procedures are detailed later in the chapter Automation Basics Write Trim and Read In Automation we use the terms Write Trim and Read Write means to record absolute values of parameters...

Page 144: ...s see Enable Parameters below Step 2 Press the Auto button this puts the currently selected channel into WRITE or TRIM see below Step 3 Press Play to move the transport automation data starts writing...

Page 145: ...out of record by pressing the all read soft key The enabled signal paths and parameters remain enabled so you can enter automation record again at any time by pressing the In key Using Touch Snap Ste...

Page 146: ...rding audio on to them Enabling mix items requires enabling their parameters and their signal paths as outlined below Enable Parameters Parameters can be enabled by pressing the any of the blue oval P...

Page 147: ...icators are illuminated amber In trim mode moving a control applies an offset to the values already recorded for that mix item For example in trim mode increasing a fader level by 10dB will add 10dB t...

Page 148: ...written for ANY signal path Recording Mix Data Mix Events Mix data is recorded as discrete events Each event occurs at a specific timecode location and relates to a specific mix item When a new mix is...

Page 149: ...rom Preview to Write Glide In data will be written The Glide In transition starts before the point that the system entered record In point minus Glide In time and finishes at the point where the syste...

Page 150: ...omation system can be punched into record at which time all enabled mix items will start to write automation data This can be done manually or automatically Manual Punch In The In and Out keys can be...

Page 151: ...t points must be made active again by pressing Active In and or Active Out Link Audio and Mix Recording with PRIME The PRIME function links the automation to the audio recording controls This means th...

Page 152: ...p 1 Press the File button Step 2 Turn the jog wheel to scroll through the previously saved mixes Step 3 Press the Delete soft key in the LCD menu to delete the selected mix Creating a New Mix Follow t...

Page 153: ...on The From and To keys can be used to set the In and Out points for automation punch In and Out points which are displayed at the left of the LCD The available mix memory is displayed in percent The...

Page 154: ...is a handy way of writing snapshots into the automation Fill Range Used in conjunction with Preview Causes the current values of previewed parameters to be written through the range The Utils Menu Gl...

Page 155: ...tion follows Clip Editing In addition to the Mix Edit functions it is also possible to edit automation data whilst editing the audio For Clips or Ranges of Clips their corresponding mix data can be Co...

Page 156: ...the Update Sys File soft key Step 3 Type Shift Pause Q Y on the keyboard to quit out of the FMC console software program Step 4 Navigate in Windows to Fairlight FMC Data and open the file System_Vari...

Page 157: ...ter The Display button is also used to turn the curves off Presets Presets are used to quickly access a particular parameter The first six buttons are provided with factory presets but you can replace...

Page 158: ...gh when the channel is on and low when it is muted as shown below When writing automation the graph is shown in red Existing automation data is shown in green allowing you to target punch out points e...

Page 159: ...s red squares Note that each event is a value of the parameter After an event the value stays constant until just before the next event when it ramps up or down to the next value When events are close...

Page 160: ...ing and creating by clicking above or below the line If there is no point at the timecode where you clicked one will be created but if there is one within a quarter frame of where you clicked it will...

Page 161: ...g length and hear the result in real time as you jump from clip to clip Pitch n Time FE is fully integrated with Dream II s Binnacle controller allowing for fast intuitive operation Note Pitch n Time...

Page 162: ...der your changes back to the timeline A new clip will be created and the original clip will be muted and preserved in the layer underneath Using VocAlign Processing Note Vocalign Project can be purcha...

Page 163: ...e Menu press the WAVE key Step 2 Select the track where the click is found Step 3 Identify the click by zooming in very close and position the click exactly under the cursor Step 4 Press the Remove Cl...

Page 164: ...eo screen Select the number of tracks to display by holding down the BLUE key and pressing one of the numeric keys labeled 1T 2T 4T 8T 16T 24T 32T and 48T The most recently selected track always appea...

Page 165: ...u want in this set Deselect tracks that you do not want in this set Step 4 Release the 3 6 or 9 key To access a User Set Step 1 Hold down the BLUE key Step 2 Press and release the 3 6 or 9 key To retu...

Page 166: ...ll clips on the track that currently have its old colour are given its new colour This applies to all clips for which you have never explicitly chosen a colour Tracks show colour tabs Click to choose...

Page 167: ...ultaneously To do this double press the Takes button in the Editor Megamode or select deselect Display Layering in the onscreen View menu While Display Layering is on you can drag clips from one layer...

Page 168: ...ou may type in the name of the file if you know it including its full path Alternatively click the Browse button labeled and find the file in your disk storage Step4 Choose a name for the clip Step5 Y...

Page 169: ...Move the transport so the clips are under the cursor or make a range using the From and To keys The clips should be red Step 3 Use the menu Edit Set Clip Colour Multichannel Clips Multichannel clips a...

Page 170: ...s press and hold down the first track select key and double click the last track selection key you wish to be active All other selections will be deselected To select a single track double click on th...

Page 171: ...clip Note the mouse can also be used to Mute or unmute a track click the M Solo or unsolo a track click the S Arm or disarm a track click the button at left the track must have an input patched to it...

Page 172: ...om the display click on the Edit Screen first to put it in focus Float the mouse over the track display while turning the wheel Track display selection and zooming is possible while playing and record...

Page 173: ...s The Edit Screen shows dark bar lines and light beat lines To set up parameters go to Setup Bars and Beats Setup This displays a dialog with the following parameters Tempo Expressed as beats per minu...

Page 174: ...on click Edit Snap Editing Note that several types of snap may operate at the same time e g clip and beat This can lead to conflicts if two snap points are in close proximity BPM from Range The syste...

Page 175: ...two are already on the screen While audio scrollers are displayed you can Click at any point to locate to that position Click and drag the scroller to move the transport Zoom the scroller by floating...

Page 176: ...for detecting pitch changes in music sibilance in speech or other changes in tone To toggle this on and off hold down the Jog key and press the Loop soft key to choose Loop On or Off Other options in...

Page 177: ...PLAY then hold down the BLUE key and press JOG To shuttle at half speed hold down ctrl and press REW or FF To shuttle at play speed hold down SHIFT and press REW or FF To shuttle at double play speed...

Page 178: ...shown in Choosing a Parameter below or by clicking in the appropriate field in the EQ display above Step 5 Adjust the parameter using the Jog Wheel Changes are heard in real time Step 6 Repeat steps...

Page 179: ...fixed ranges you have the full frequency range available on each of them Filter Type Choices are P Band pass filter High pass filter Low pass filter Each band can be set to any filter type Mouse clic...

Page 180: ...ric keypad not recommended With the mouse by dragging the red squares in the EQ graph Applying the Changes To apply your changes click the Apply button or press the apply soft key Only the bands whose...

Page 181: ...t to the frequency Range for each band so you can have your low frequency higher than your high frequency if you want 4 When you are using a Range it is possible to change one or more bands for the en...

Page 182: ...Tiles A Tile shows basic information about the Feed it represents Bus tiles show only fader information Track Feed and Live Feed tiles display more information and provide control for a group of funct...

Page 183: ...s for EQ dynamics insert solo solo defeat and mute The parameter window within each channel tile provides a condensed display of the current settings of the Channel Panel for EQ dynamics or pan Click...

Page 184: ...e Main bus are also displayed Mouse Control in the Mixer Screen Every switch and control in the Mixer Screen may be changed using mouse clicks For switches this is simply a case of clicking on them to...

Page 185: ...xer Screen in focus simply click anywhere on the screen For mouse wheel control of any fader or rotary knob in any of the Mixer Screen displays hover the mouse pointer over the control and turn the wh...

Page 186: ...r level for the signal path is displayed with a numeric display of the fader gain This is an active control The direct out level pre post status and output patching is displayed If the direct out is s...

Page 187: ...mple we have right clicked Track 8 To close the Virtual Channel right click anywhere inside it While it is open you may move to the next or previous channel by clicking the and buttons next to the cha...

Page 188: ...ase flips the audio phase at the input to the mixer It does not affect the signal being recorded on a track Direct Send and Insert Direct In toggles the Direct Output on and off Pre toggles the Direct...

Page 189: ...format does not have surround channels the F B control will still be shown but will do nothing Spread Only available when a link group is selected The spread control adjusts the perceived size of a su...

Page 190: ...l can be done pre or post fader Equalisation The track feed mixer EQ provides four bands of parametric equalization and two filters Each parametric section can be switched in or out independently The...

Page 191: ...e each with its own sound Dynamics The Dream II Dynamics comprises three sections compressor limiter and expander or gate Each section has an independent IN OUT control All three may be active at the...

Page 192: ...User Manual SCREEN MIX CONTROLS February 16 2010 Xynergi Media Production Centre Page 194...

Page 193: ...annel has an independent Pre Post switch and In Out control Zoom Panels It is possible to see more detail when adjusting EQ Dynamics and Pan control using Zoom Panels In particular numeric values for...

Page 194: ...User Manual SCREEN MIX CONTROLS February 16 2010 Xynergi Media Production Centre Page 196 Right Click here to display Zoom panels The Equalizer Panel The Dynamics Panel...

Page 195: ...X CONTROLS February 16 2010 Xynergi Media Production Centre Page 197 The Pan Panel In addition to using the hardware controls you may turn the knobs on the screen or use the mouse to move the red dot...

Page 196: ...ilt These are intended for applications with new surround types It also provides a useful perspective for normal panning especially when Link Groups are involved To choose the 3D panner as your pannin...

Page 197: ...oduction Centre Page 199 The Pan Theatre You may superimpose the 3D Panner on your Pyxis Track video This allows you to see very clearly how the panning corresponds to action on the screen To toggle d...

Page 198: ...User Manual SCREEN MIX CONTROLS February 16 2010 Xynergi Media Production Centre Page 200 The Aux Panel...

Page 199: ...ia Production Centre Page 201 On Screen Automation Controls The controls in the lower right of the screen correspond with controls in the menus and on the Xynergi picture keys The Mix On checkbox is e...

Page 200: ...e keys This will cause its meter s to be displayed below in the Fat Channel Step 2 Right Click on the meters in the Fat Channel This will cause the meters to be displayed or hidden if already displaye...

Page 201: ...es A1 A2 to toggle them on or off the meters You can add any number of buses and the system will display meters for up to eight Bus elements starting at the top of the selected buses With Meter Set se...

Page 202: ...displayed in order of loudness Overshoots of up to 8 6 dB are shown although the audio is actually clamped to 0 dB at the channel output To display history click in the Peak or RMS level display for a...

Page 203: ...layed the Master Screen Meters There are 9 meter sets in the system There are two ways to choose sources for the Meter Sets Using the Master Screen Meters Step 1 Click Meter Sets and choose a meter se...

Page 204: ...off the end and pulling them to the left when it contracts If you leave blanks to the right of a resizable bus it will consume the blanks before starting to push other channels to the right Using the...

Page 205: ...in the Meters Menu as follows Step 1 Press the Meters button Step 2 Press the Over Hold soft key Step 3 Use the Jog Wheel to change the overload hold time Step 4 Press the Enter key or the Exit soft k...

Page 206: ...e things The macro button in the Editor Record Mixer and Setup megamodes Key 7 this is a soon to be labeled button next to Xplain Either of these keys will toggle the macro trigger buttons on and off...

Page 207: ...slowly as you like but the macro will play as fast as possible You may change modes and megamodes as often as you like You may press an existing macro trigger button to record its keystrokes into your...

Page 208: ...t in the macro layout being removed from the Picture keys when your macro runs To avert this problem add an extra press of the macro button at the end of your macro Or better still start with the macr...

Page 209: ...CONTROL 16 CID_SW_CUT 1 CONTROL 16 CID_SW_CUT 0 These two items are keystrokes The one ending in 1 is the downstroke The one ending in 0 is the upstroke CONTROL 687 CID_SW_MFX4_61 1 CONTROL 16 CID_SW_...

Page 210: ...Group Live Feed or Track Feed Fader Group Master Fader Group menu key and soft Speaker Set key No No Link Groups Link groups allow the control of up to eight feeds with one fader They can only includ...

Page 211: ...parameters display the current setting of the first member in the group Pressing a switch with a toggled value e g Mute On Off will toggle the master s value and set all other members to that value F...

Page 212: ...lso applies the feed parameter values of the first member of the group to all the members Parameters modified are fader level pan EQ dynamics aux sends inserts and direct out state default pans applie...

Page 213: ...Link Group menu Step 1 Press the Setup Megamode button Step 2 Press the Link Gp button The feeds that currently belong to link groups are shown in yellow or brown Feeds available for selection are sho...

Page 214: ...track button that was inside a Link Group before it was suspended The Link Group is reinstated and becomes the Current Path Panning Link Groups When a Link Group is the Current Path the pan controls...

Page 215: ...m divergence is set to minimum and rotation is set to zero The spread control can be used to great effect when it is desired to collapse the surround sound field to a point source This may occur for i...

Page 216: ...ing sessions Add the Group Master to a fader set This is done using the Mapping software See page 230 Use the mouse directly on the Mixer Screen by moving the Group Master faders By clicking on a Grou...

Page 217: ...o use this window Step 1 Select a VCA group at the bottom of the window Step 2 Toggle signal paths in and out of the group Step 3 Use Page Up and Page Down to access more Tracks and Live Feeds Step 4...

Page 218: ...ion Centre Page 220 Naming a Group Groups are named the same way as other signal paths using the Name Path function see page 41 Multi Trim MultiTrim group members Click here to change the Fader Group...

Page 219: ...fader to move all the group s faders absolutely they are all set to the same value Click any toggle switch on any member s tile Mute Solo EQ In Out Insert In Out to toggle all members switches Ctrl Cl...

Page 220: ...range from 90 dB to 10 dB The current fader level can be read in the OLED display above more info about this below To set the fader to exactly 0 dB hold down the BLUE button and touch the fader The mo...

Page 221: ...you a lot of information about the channel Steady State Under normal circumstances the OLED will show details of the channel being controlled by its associated fader The most common situation is show...

Page 222: ...n on the Xynergi surface because The selection button selects the channel as well as calling it The selection button can TOGGLE the channel on and off The CALL button makes the channel the current Pad...

Page 223: ...e Main Bus and sub busses Faders can also control a number of other parameters To change the function of the faders Step 1 Select the Mixer Megamode on the Xynergi surface Step 2 Press the Faders To b...

Page 224: ...al path Soft Pot normally Left Right Pan Control but switchable to other functions Solo toggle Mute toggle Automation read write indicator CALL button brings channel to PAD Fat Channel etc Soft button...

Page 225: ...ot button next to green Proj button A number of choices appear on keys just above the Pot button They include Pan LR Pan FB used for Buses with surround elements Ch Trim sets a digital level control i...

Page 226: ...he TRIM indicator flashes while in trim mode but not re cording INPUT The fader controls the input level to a disk recorder track BUS The fader controls a bus level LINK The fader is a member of a lin...

Page 227: ...hese parameters for automation Faders to Reduction Bus While BLUE Faders To is active Sub buses which are configured for bus reduction may be selected All channel faders now control the level at which...

Page 228: ...to Aux when it controls the Pre Post switching it can only be separated from the recording of the other controls by using Trim Mode or Touch Write which are described in the chapter on Automation Fad...

Page 229: ...assigned If a link group is included in a range the group takes up only one fader Inserting and Deleting Faders When the Map key is pressed the map menu is displayed in the LCD Press the Insert key to...

Page 230: ...abases Searching for Sounds AudioBase3 uses a simple search interface to find clips Step 1 Press the audio base key The search field becomes active Step 2 Enter the text you wish to find and click the...

Page 231: ...list will play as a clip on the current track while everything else is frozen if necessary take M1 off line to prevent the video moving You can also press the Jog button and move the clip with the Jo...

Page 232: ...h one has a controlled In and Out point and text that can be displayed on the screen To open the ADR List press the ADR button recommended or click the ADR Menu above the Track display and select ADR...

Page 233: ...m type the timecode you want and click OK Step 4 If necessary set the Out Point of the ADR cue in the same way The cue is shown as below ADR Characters Your project may contain a list of characters an...

Page 234: ...the top of the ADR list box In the same way you can sort by From time To time or dialog alphabetically Click any one of these a second time to reverse sort ADR Preferences Once you have entered all th...

Page 235: ...ing the Preroll The text referred to is that shown on the Decklink output from the Pyxis Track The font colour height control and Wrap Text control are used to customise the text display Note this tex...

Page 236: ...ACK soft key until its label is RECORD This puts the ADR system in Record mode Step 2 Select a cue The transport will locate to its In Time Step 3 Click Cycle This will cause the transport to drive th...

Page 237: ...button This can import a short script that has been written in a word processor Each line of text in the file is treated as a separate line of ADR cue text Each line of text can optionally have one or...

Page 238: ...e process placing it at the destination locations indicated by the edit list Reconform re edits an existing DREAM II project according to a cut list usually representing a re edit of the pictures in a...

Page 239: ...mapping for a specific number of tracks per EDL track Presets allow you to save a track mapping for reuse Type a name into the field and click Save To load a preset simply select it from the drop down...

Page 240: ...L events You need only specify the first destination track the software uses the following tracks to place audio for events requiring more tracks Step 6 Click the Capture button The EDL Capture and Co...

Page 241: ...Step 6 Set up destination tracks If all tracks will be involved choose Track 1 as the destination Step 7 Click the Reconform button If one of the linked projects is not found an error message will be...

Page 242: ...ed The newer format has the extension DR2 It has the strongest feature set and is recommended for use where compatibility with older systems is not required The older format is called MT This was intr...

Page 243: ...it FUFs are saved as soon as the recording is complete At this point the audio media is written to disk but it is still not safe The clip s that appear in the edit screen immediately after recording a...

Page 244: ...ess Stuff Fufs Selected Clips This will copy all external media into the Project s Fuf files Please note that this process can take some time depending on the quantity and size of external files that...

Page 245: ...ted to MT projects with FUF files as described above The DR2 file format provides enhanced capabilities compared with the legacy MT file format and all future development will focus on the DR2 file fo...

Page 246: ...Files The Project Name Clip Name and Frame Rate are embedded in each WAV file by Xynergi during recording and can be viewed with the Fairlight Shell Extension Using the Fairlight Windows Explorer She...

Page 247: ...ally be the most recent ones i e the ones with the latest modification date Step 4 Drag the missing WAV files from their folder to the DREAM II track display and drop them there Step 5 For each WAV fi...

Page 248: ...n optional backup of the previous saved version can be made This will only happen if your system is set up correctly To enable backup saving issue the command Setup General Preferences and go to the P...

Page 249: ...was created because the system is designed only to work with the currently open project file Immediately after reopening any file the UNDO command cannot be issued it only works on edits made in the c...

Page 250: ...sed Standard Definition video may play back from a single 10 000 RPM SATA drive while uncompressed High Definition Video may require a large fast RAID array Please contact your Fairlight distributor t...

Page 251: ...elect File New from the Xynergi pulldown menu You will see the following dialog Choose a Project Type MT or DR2 By default your project is created in its own subfolder named with the Project Name This...

Page 252: ...tup Media and Project Management from the XYNERGI main menu Controlling Scanned Folders You may wish to save time when the system starts by omitting the scan of some folders in your system This is par...

Page 253: ...he selected project s current directory It will only remove native recorded or localized media not files that have been imported from other systems The device list has a column reporting how much spac...

Page 254: ...mats and export to many formats Some of these formats require special licences to operate See below for import export information Creating a Pyxis Track Before using Pyxis Track a video track must be...

Page 255: ...the Edit Screen use the menu commands View Show Pyxis Track Show and View Show Pyxis Track Hide Video Track Display Offset When using a monitor with an inbuilt display such as an LCD or plasma screen...

Page 256: ...n stop or Jog the correct frame is output but in play the advancement is activated You can have a separate setting for your Decklink output and your VGA output since they are likely to feed different...

Page 257: ...types can be imported using this method Quicktime mov Avi avi Windows media format wmv Mpeg4 files mp4 Mpeg 1 or 2 mpg m2v mvf dv25 dv or dif Bitmap bmp or Cineon cin sequence of images in sequential...

Page 258: ...dv25 or uncompressed video Thomson Grass valley dv25 files vid Bitmap files single still image bmp useful for a clapper board LongGop requires mxf licence option mpeg licence option plus MXFReader2 1...

Page 259: ...Decklink card Configure the required settings for your Decklink card by navigating to START Setting Control Panel Decklink It is critical that you select the appropriate Inputs for your system In the...

Page 260: ...what format you wish your project to be and configure it in consequence The Device value tells Dream II which video hardware capture unit will provide the incoming video signal Under normal condition...

Page 261: ...der to record an incoming signal In DreamII you can invoke this mode by navigating to Setup Video Capture Mode With Video Capture Mode ON your decklink card will act as a loopthough device and will di...

Page 262: ...s window is displayed you may click on an empty marker at any time This will capture the current video frame and display it with a timecode number To locate to any video locator simply click it To re...

Page 263: ...eo Scroller is useful because you can see specific frames and scene changes coming up and use it for easy location To Display the Video scroller hold down the Shift and Zoom buttons Now the track butt...

Page 264: ...While the Video Scroller is active you can Click on any part of any frame to locate the transport to that position Drag the scroller left or right to move the transport Note there is no zoom control o...

Page 265: ...ed with the video track the same way as they are with audio The copy and cut commands can be used as with audio to put video clips on the clipboard but unlike audio clips they can only be pasted back...

Page 266: ...Watermark tab This tab is present if a Decklink video card is present and active See your Fairlight distributor for information about video cards Choose the bitmap you wish to superimpose by typing i...

Page 267: ...edia Production Centre Page 269 Using Pyxis Track as a Machine Selecting Pyxis Track as one of your machines allows you to take it offline the same way as physical machines For information about setti...

Page 268: ...ate VST plug ins for use within VST host applications or to create VST host applications themselves The VST plug in standard is the most widespread plug in standard in use today with thousands of avai...

Page 269: ...with extension DLL in the folder that your plug in has been installed most commonly located in C Program Files VSTPlug ins Step 2 Copy the DLL file and paste into C Program Files Fairlight Dream II E...

Page 270: ...how long it takes the CPU to process a block of samples This is reported by each manufacturer of VST plug ins For Track Feeds containing plug ins the track playback is automatically advanced by the am...

Page 271: ...Another way to remove the plug in when the Pad plug in display is shown is to hold the ALT key down and press the Un Plug soft key on the LCD screen Automation of Plug ins This is described in our sec...

Page 272: ...Lock icon Clicking the Lock icon prevents that window from disappearing it will continue to display that Plug in for that channel until you unlock it then remove it Using the Library Saving a Plug in...

Page 273: ...ERSTRIP 1 FADERSTRIP 2 FADERSTRIP 3 FADERSTRIP 4 FADERSTRIP 5 FADERSTRIP 6 FADERSTRIP 7 FADERSTRIP 8 FADERSTRIP 9 FADERSTRIP 10 FADERSTRIP 11 FADERSTRIP 12 Plug ins on Faders When plug ins are control...

Page 274: ...is method does not always produce the optimal mapping The PREV and NEXT parameters are automatically inserted by the system to switch to the previous and next page of controls Do not deassign these co...

Page 275: ...which gives an idea of the parameter value ALT controls do not display this line To see the current value of the parameter look at the graphic display of the plug in Toggle A Toggle is a switch with t...

Page 276: ...If larger than the Pad it is cropped at the bottom and right to fit To toggle between zoomed and full views of the plug in graphic press the upper 5th soft key next to Macro This is labeled Zoom if v...

Page 277: ...t that the control works WARNING Don t touch any other controls or the parameter will be moved to them The name assigned to the control will be the same as the one shown on the tile Note these names a...

Page 278: ...mal controls and one for ALT controls To create the built in zoom windows create a zoom window for normal and or one for ALT controls as described in the Plug in Zoom section above while the Plug in E...

Page 279: ...DARY 2 0 00 1 00 LIN VST ANYPLUG_01 dynamic sat Dyn Satur CONTROL XP_SECONDARY 3 0 00 1 00 SWITCH VST ANYPLUG_01 air air CONTROL XP_SECONDARY 4 0 00 1 00 LIN VST ANYPLUG_01 air level air level CONTROL...

Page 280: ...original To do this Step 1 Press the Wave button Step 2 Press the Render Plug in soft key Step 3 Use the Jog Wheel to search for a desired plug in to be used on this clip Step 4 Press the Edit soft ke...

Page 281: ...ntre Page 283 Step 6 When the clip sounds the way you want press the render softkey This will directly render your plug in processing to the clip Note the original clip is still there on an underneath...

Page 282: ...s ReWire About ReWire ReWire is a software protocol jointly developed by Propellerhead and Steinberg It enables remote control and data transfer among digital audio editing and related software Origin...

Page 283: ...Manual PLUG INS AND REWIRE February 16 2010 Xynergi Media Production Centre Page 285 Using ReWire Devices in Xynergi Setup and installation Step 1 Install your software as outlined by your the manufac...

Page 284: ...on will launch automatically Others eg Ableton Live need to be launched manually Step 5 Open or create a project within your Rewire application demo projects that accompany the application are a good...

Page 285: ...m About the Partner Program The Fairlight DREAM II Manufacturer Partner Program streamlines the integration of third party software applications into the open architecture of its CC 1 powered family o...

Page 286: ...roarts co uk Here is a list of our current Gold Partners IK Multimedia is the developer of Amplitube T RackS Classik Studio Reverb and many other popular VST plug ins http www ikmultimedia com Waves i...

Page 287: ...lt in faders mutes pans solos and selects from your HUI device working correctly on the Xynergi system That is to say they will act and will also tally the changes MIDI Devices For HUI to work the Xyn...

Page 288: ...cated 39062K GDB 09 42 59 FMC is ONLINE GDB 09 42 59 FMC re sync GDB 09 43 00 Disabling UI Completed GDB 09 43 00 FaderCount 8 GDB 09 43 00 Midi IN 0 of 4 name USB Audio Device GDB 09 43 00 MIDI in de...

Page 289: ...Synth GDB 09 43 00 MIDI Out device 4 GDB 09 43 00 manufacturer 1 GDB 09 43 00 product 102 GDB 09 43 00 version 5 10 GDB 09 43 00 name Microsoft GS Wavetable SW Synth GDB 09 43 00 Using MIMidi Out 0 A...

Page 290: ...ACKIE_GROUP CID_SW_EN_AUX_GROUP enables aux send parameters for automation Examining this line CID_SW_MACKIE_STOP CID_SW_STOP we see that the first part is the HUI stop key and the second part is the...

Page 291: ...n get access to 27 macro keys Identifying Keys On some HUI controllers the key labelling may not match the list above You can find out the name of any HUI key using the following method Step 1 Start t...

Page 292: ...wn the keys CID_SW_MACKIE_F1 and CID_SW_MACKIE_F2 have been pressed and released hence two events per key Advanced using Scripted Macros Many HUI controllers have extra keys that can be assigned to va...

Page 293: ...files from other manufacturers MXF Files these are files from other manufacturers Importing Video Files See Pyxis Track on page 256 Importing an OMF Step 1 Click on File then choose import OMF Step 2...

Page 294: ...below Found at Setup General Preferences Options Place Files at Embedded Timecode Some audio files carry a timecode with them Checking this option for a particular file type causes it to be placed at...

Page 295: ...ps that need to be sample rate converted Step 2 Issue the command Process Localise Audio Use handles if the clip has been edited and might need to be re extended Select all clips using this media befo...

Page 296: ...rrect balance Audio Type Select bit depth and Sample Rate for exported file s Defaults to Project sample rate and bit depth Mixdown Select Entire Project to export the entire project one file per trac...

Page 297: ...ntents will be exported as a stereo media file If a track contains a two channel clip its contents will be exported as a stereo media file Mix Track to a single Mono File All tracks in the export are...

Page 298: ...Production Centre Page 300 Step 1 Choose the video format into which you wish to export Step 2 Choose whether you want to export the whole project or a selected range NOTE to export as a Quicktime fil...

Page 299: ...frame rate of the Master video device in your system or of the timecode being chased if any Bit Depth Can be changed at any time All subsequent recordings will have this depth Extn Video Rate This is...

Page 300: ...n external machine such as a video machine audio recorder or digital audio workstation a positional source allows the machines to tell each other where they are The Position Sync Source indicator is g...

Page 301: ...never occur and digital interconnections may made with ease In this instance the sync HOUSE option is always used Pull Up and Pull Down The normal sample rates used by the digital audio industry are...

Page 302: ...key plus M1 key the BLUE key plus M2 key or click View Smart Pane Machine Control Step 2 The following Smart Pane is displayed Use the type soft key or Type list box to select one of the following mac...

Page 303: ...e The master Video Arm Enabled box must be checked and each video Arm En box must also be checked on the desired device before the Video arm LED can be used to arm the video track Click the Eject butt...

Page 304: ...ws for faster locates for video tape recorders Lace Window Causes the machine to unlace if it is given a locate command outside the range of this window Unlacing allows the machine to travel faster an...

Page 305: ...h the tape is removed from the heads automatically to prevent wear Play Tracking Determines how many incorrect frames the system must see before it jumps to be in sync with the incoming timecode or st...

Page 306: ...ny master device in response to the 0x61 0x20 Status sense command If Play Only is set the value of this bit is 1 only when Dream is in Play or Record modes If Play and varispeed is set the value of t...

Page 307: ...s that DREAM II will chase MIDI Time Code entering the MIDI In port on the SX 20 The settings are identical to those for LTC Chase Machine Control Indicators Name Name of the 9 Pin Device Servo LEDs T...

Page 308: ...checkbox is ticked a repeated timecode frame is generated when the transport is stationary Otherwise timecode is generated only in Play Putting Machines Online Machines stay in stop and are ignored by...

Page 309: ...tellation s transport will locate to the timecode from the 9 pin machine The system defaults to M1 controlling 9 pin Port A Placing Sound to Picture Step 1 With M1 online locate the video at the desir...

Reviews: