User Manual
E
DITING
February
16,
2010
Xynergi Media Production Centre
Page 137
Step 1
Start with the cursor touching a clip whose level you wish to trim.
Step 2
Press and hold the
Jog Level
button.
Step 3
Turn the
Jog Wheel
to adjust the level trim displayed in the dialog box.
At the same time, the clip waveform will change amplitude.
Step 4
When ready, release the
Jog Level
button to apply the level change.
Note
: Clips on multiple tracks can be level-adjusted at the same time. If a range is present, all clips
wholly inside the range will be affected.
To quickly change clip display amplitude:
Step 1
Start with the cursor touching a clip whose amplitude you wish to trim.
Step 2
Press and hold the
Jog Disp
button.
Step 3
Turn the
Jog Wheel
to adjust the amplitude trim displayed in the dialog box.
At the same time, the clip waveform will change amplitude.
Step 4
When ready, release the
Jog Disp
button to apply the amplitude change.
Note
: Clips on multiple tracks can be amplitude-adjusted at the same time. If a range is present, all
clips wholly inside the range will be affected.
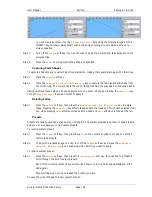
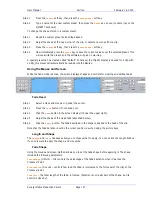
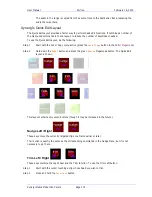
Clip Level Layout
If you are doing a lot of Clip Level editing, try pressing the
Clip Level
button a second time. This will
cause a special layout to appear, with many different level changes that can be applied instantly.
The Clip Level Layout will disappear when you select other menus, but its prescence will be remembered
when you return to the Clip Level menu. To remove it, press the
Clip Level
button again.
Gating Clips
A rough but useful and quick way to remove unwanted silence or near silence from clips is with the Gate
Clips function.
Using the Gate Clips Function
First you will need to select the track(s) using the track feed keys and select the clip(s) either by
selecting a range or by parking the playback head over the desired clips. You are now ready to perform
the Gate Clips function. To do this:
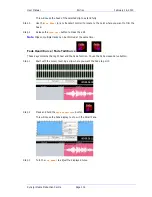
Step 1
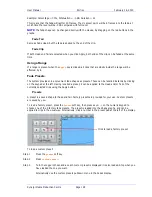
Press the
gate
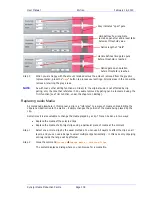
button. The gate preview window is displayed automatically.
Step 2
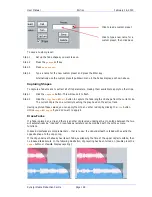
Your selected clips will now be shaded in grey. The grey areas mark the audio that will be
retained after the Gate Clips operation is performed. Start by moving the “Threshold” slider
slowly to the right.
Step 3
Depending on the type of audio contained in the clip, areas will begin to be shaded in pink. This
indicates the areas that will be removed when the Gate Clips function is performed.
Step 4
Once you have adjusted the threshold so that the undesired portions of the clip are highlighted
in pink, adjust the hold time and pre handle time to fine tune the gating process(see below).
Threshold defines when the gate
“opens” to preserve audio in clip


