User Manual
U
SING THE
F
AIRLIGHT
F
ADER
S
IDECAR
February
16,
2010
Xynergi Media Production Centre
Page 230
Faders to Direct Output
While
BLUE
Faders To...
is active, the
Direct Output
soft key may be chosen. All channel faders
now control the direct out level.
The
Mute
key toggles the direct output ON and OFF.
The fader control may be automated and will record data for the direct out level parameter. Use the
enable key next to the Master fader to enable this parameter for automation.
Fader To Boom
While
BLUE
Faders To...
is active, the
Boom
soft key may be chosen. All channel faders now control
the boom level.
The
Mute
key toggles the boom ON and OFF.
The fader control may be automated and will record data for the boom level parameter. Use the enable
key next to the Master fader to enable this parameter for automation.
Faders To … under Automation
While Faders To is active, the parameters controlled by the individual control elements (Fader, Panpot,
Mute Switch etc.) are recorded into the automation as usual. The Enable buttons associated with those
controls, which are found on the single fader located in the editing panel, are used to enable the cur-
rently controlled parameters, not the normal ones. There are Enable buttons for the Fader, panpot and
Mute Switch, but not for the Solo key. When that is being used to control a parameter, as in the case of
Faders to Aux when it controls the Pre/Post switching, it can only be separated from the recording of the
other controls by using Trim Mode or Touch Write, which are described in the chapter on Automation.
Fader Sets
Channel Faders are assigned to signal paths using the
Map
key in the Fader Set Section.
Fader sets define the function of each channel fader on the Constellation. Fader sets are stored along
with the preset snapshot in each project. In addition, separate fader set setups are stored in each
automated mix that is saved. There are 10 fader sets available at any time. Press any fader set key to
instantly recall that fader configuration.
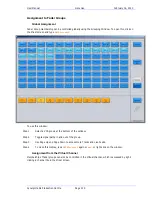
Mapping Fader Sets
Step 1
Press the
Map
key in the Fader Set section.
Step 2
Press a fader set number key to select the fader set to map.
Step 3
The
CALL
key on the first fader will flash to indicate that it is ready to be defined.
Selection keys on the selection panel for signal paths already in the current fader set are
illuminated. The selection key of the path currently assigned to the current fader will flash.
Press any feed, bus or Group Master selection key on the selection panel to assign that path to
the current fader.
Step 4
The next fader is automatically selected and the path assigned to it flashes. Continue to assign
faders in order or select a fader out of sequence by pressing its
CALL
key and making a selection
on the selection panel.
Step 5
Press the
Map
key to complete mapping or select another fader set to map.
Mapping Multiple Faders
A range of feeds may be mapped to a range of faders.

