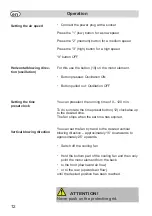
background image

12

Operation

en

• Connect the power plug with a socket

Press the “1” (low) button for a slow speed

Press the “2” (medium) button for a medium speed

Press the “3” (high) button for a high speed

“0” button OFF

For this use the button (10) on the motor element.

• Button pressed: Oscillation ON

• Button pulled out: Oscillation OFF

You can preselect the running time of 0 – 120 min.

To do so rotate the time preset button (12) clockwise up

to the desired time. 

The fan stops when the set time has expired.

You can set the fan by hand to the desired vertical

 blowing direction – approximately 15° downwards to

approximately 25° upwards.

• Switch off the cooling fan

• Hold the bottom part of the cooling fan and then only

point the motor element from the back:

• to the front (downward air flow) 
• or to the rear (upwards air flow)
until the desired position has been reached.

Setting the air speed

Setting the time

preset clock

Horizontal blowing direc-

tion (oscillation)

Vertical blowing direction

ATTENTION!

Never push on the protective grid.

Summary of Contents for prestige VC 20 S

Page 1: ...Bedienungsanleitung Stand Ventilator de DE prestige VC 20 S...

Page 2: ...Elektrischer Strom 5 Versand 5 Im Gefahrenfall 5 Bei einem Defekt 6 berblick Auspacken Lieferumfang 7 Teile und Funktionen 8 Technische Daten 9 Montage Montage 10 Bedienung Einstellen der Luftgeschwi...

Page 3: ...auch die Bedienungsanleitung mit F r Sch den die aufgrund der Nichtbeachtung der Bedienungsanleitung entstehen bernehmen wir keine Haftung Wird das Ger t zweckentfremdet unsachgem bedient oder nicht...

Page 4: ...hren CE Konformit tserkl rung Bestimmungsgem e Verwendung Bestimmungswidrige Verwendung Brand und Explosionsgefahr Das Ger t niemals in der N he von explosiven oder leicht entz ndli chen Stoffen verw...

Page 5: ...am Kabel Die Netzanschlussleitung darf nicht geknickt eingeklemmt oder ber fahren werden und nicht mit Hitzequellen in Ber hrung kommen Wenn die Netzanschlussleitung dieses Ger tes besch digt wird mus...

Page 6: ...an unsere Servicehotline Service Hotline 01805 325474 14 Cent Minute aus dem Festnetz der deutschen Telekom Vor dem Anruf unbedingt Artikel Nr und Ger te Modell bezeichnung bereit halten Diese Angabe...

Page 7: ...kopf R ndelschraube Teleskoprohr berwurfmutter Standrohr Rohrverteiler 4 Standrohrf sse Fuss Verbinder Set Schrauben Bedienungsanleitung Sollten Sie einen Transportschaden bemerken wen den Sie sich um...

Page 8: ...nde 5 Windfl gel 6 berwurfmutter 7 Schutzgitter hinten 8 Sicherungsschraube 9 Haltering hinten 10 Schaltknopf Oszillation 11 Bedienpult 12 Drehknopf Zeitvorwahl 13 R ndelschraube 14 Teleskoprohr 15 be...

Page 9: ...Nennspannung 220 240 V AC Nennfrequenz 50 Hz Leistung max 55 W Geschwindigkeitsstufen 3 Zeitvorwahl 0 120 Minuten Netzkabel ca 1 5 m Korbdurchmesser ca 44 cm Fl geldurchmesser 40 cm Gewicht ca 3 5 kg...

Page 10: ...torkopf in die zwei L cher im Schutzgitter stecken und mit beiliegender berwurf mutter 6 fest anschrauben Windfl gel 5 bis zum Anschlag auf die Motorachse stecken und mit beiliegender Hutmutter 4 sich...

Page 11: ...rstellung Der Ventilator kann in der H he ver stellt werden Dazu berwurfmutter 15 l sen das Standrohr auf die gew nschte H he herausziehen oder zusammenschieben und mit der berwurfmutter 15 wie der si...

Page 12: ...hrzeigersinn bis zur gew nschten Zeit Der Ventilator stoppt wenn die eingestellte Zeit abge laufen ist Den Ventilator k nnen Sie von Hand auf die gew nsch te vertikale Blasrichtung einstellen ca 15 na...

Page 13: ...aufwickeln Ger t staubgesch tzt aufbewahren Ger te die l ngere Zeit nicht in Betrieb waren m ssen vor einer erneuten Inbetriebnahme von Fachkr ften berpr ft werden Dies gilt auch wenn das Ger t innen...

Page 14: ...ten Fehler m gliche Ursache Abhilfe Ger t l uft nicht Stecker ist nicht eingesteckt Stecker einstecken Ger t ist nicht eingeschaltet Ger t einschalten Steckdose f hrt keinen Strom Andere Steckdose ver...

Page 15: ...rde oder Ihren H ndler Ausgediente elektrische und elektronische Ger te sowie Batterien und Akkumulatoren Akkus enthalten sch dliche Stoffe die aber vorher f r Funktion und Sicherheit der Ger te notwe...

Page 16: ...ns nicht autorisiert sind Ferner d rfen weder fremde Ersatz oder Zubeh rteile eingebaut werden 5 Die Garantieleistung besteht vorzugsweise in der Instandsetzung bzw im Austausch der defekten Teile Rep...

Page 17: ...Notizen 17 de...

Page 18: ...Notizen 18 de...

Page 19: ...Notizen 19 de...

Page 20: ...e GmbH Industriestra e 6 D 71665 Vaihingen Enz Postfach 1480 D 71657 Vaihingen Enz Tel 49 7042 912 0 Fax 49 7042 912 360 www fakir de info fakir de 2016 Fakir Hausger te GmbH nderungen vorbehalten 69...

Page 21: ...prestige VC 20 S Operating Instructions Pedestal cooling fan en EN...

Page 22: ...dren 4 General 5 Electric current 5 Dispatch 5 In case of danger 5 In case of defects 6 Overview Unpacking Scope of delivery 7 Parts and functions 8 Technical data 9 Assembly Assembly 10 Operation Set...

Page 23: ...ng the appliance on to another user We will accept no liability for damages resulting from failure to comply with the operating instructions We cannot assume any liability for damage resulting from us...

Page 24: ...ury CE Declaration of Conformity Intended use Unauthorized use Danger of fire and explosion Never use the appliance in the vicinity of explosive or flammable materials Damage to appliance from rain an...

Page 25: ...he power cord Do not kink pinch or run over the power supply cord and do not expose it to heat sources If the mains connection of this appliance is damaged it must be repla ced by the manufacturer or...

Page 26: ...ian in your country Service hotline 49 0 1805 325474 14 cents minute from the wire line network of the Deutsche Telekom Before calling have the article no and appliance model name at hand This informa...

Page 27: ...otor head Knurled screw Telescopic tube Cap nut Tube Tube distributor 4 base feet Foot connector Set screws Operating Instructions If you detect damage from transport contact your retail dealer immedi...

Page 28: ...nut with left handed thread 5 Fan blade 6 Cap nut 7 Protective grille on back 8 Locking screw 9 Rear retaining ring 10 Oscillation button 11 Control panel 12 Time preset rotary knob 13 Knurled screw 1...

Page 29: ...009 Rated voltage 220 240 V AC Rated frequency 50 Hz Maximum power consumption 55 W Speeds 3 Time preset 0 120 minutes Power cord approx length 1 5 m Approx grille diameter 44 cm Diameter of blades 4...

Page 30: ...motor head into the two holes in the protective grille and screw tight using the included cap nuts 6 Place the fan blades 5 all the way onto the motor axle and secure with the included cap nut 4 left...

Page 31: ...d secure with the knurled screw 13 Height adjustment The height of the fan can be adjusted For adjustment loosen the cap nut 15 pull out or push in the tube to the desired height and secure again with...

Page 32: ...clockwise up to the desired time The fan stops when the set time has expired You can set the fan by hand to the desired vertical blowing direction approximately 15 downwards to approximately 25 upwar...

Page 33: ...cord Protect from dust during storage Appliances that have not been in use for an extended period of time must be checked by a trained technician before being put back in operation The same applies i...

Page 34: ...of the appliance or the 7 digit replacement part number Problem Possible cause Solution Appliance does Plug is not plugged in Plug in not operate Appliance is not switched on Switch on appliance No e...

Page 35: ...act your local authorities or your retail dealer Unserviceable electrical and electronic appliances and batteries contain hazardous substances which were previously necessary for the proper functionin...

Page 36: ...ccessories may be used 5 The main focus of the warranty is on performing repairs or exchanging defec tive parts Repairs on site can only be demanded for large stationary applian ces The invoice or sal...

Page 37: ...17 Notes en...

Page 38: ...18 Warranty en...

Page 39: ...19 Notes en...

Page 40: ...te GmbH Industriestra e 6 D 71665 Vaihingen Enz Postfach 1480 D 71657 Vaihingen Enz Tel 49 7042 912 0 Fax 49 7042 912 360 www fakir de info fakir de 2016 Fakir Hausger te GmbH Subject to revision 69 0...

Reviews: