background image

6

KULLANIM ÖNCESİ

TR

Teknik Özellikler

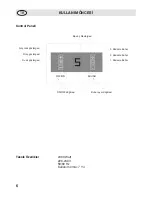
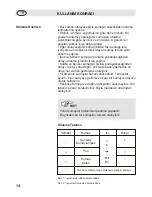
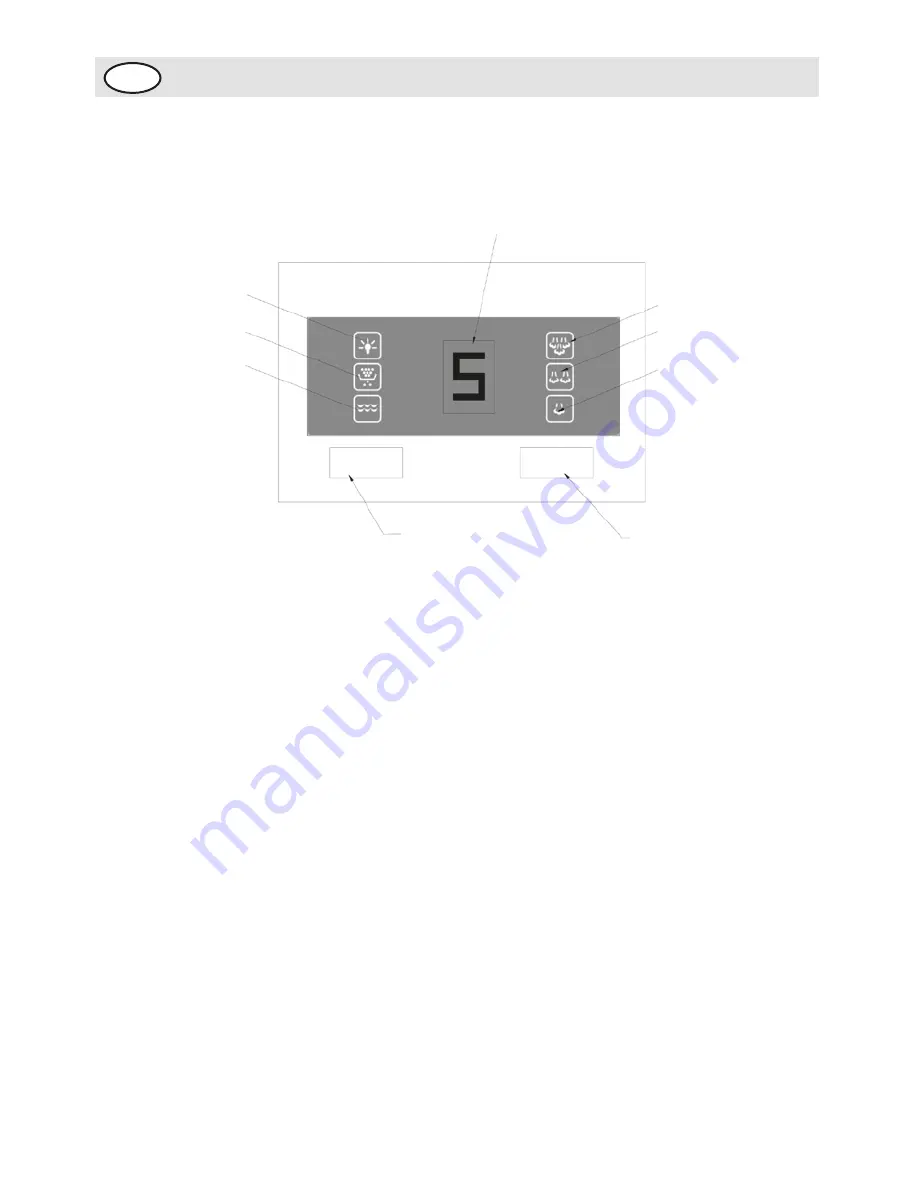
Kontrol Paneli

2400 Watt

220-240 V

50/60 Hz

Kullanım ömrü: 7 Yıl

Güç ikaz göstergesi

ON/OFF düğmesi

Buhar ayar düğmesi

Kireç göstergesi

Su az göstergesi

3. Kademe Buhar

Basınç Göstergesi

2. Kademe Buhar

1. Kademe Buhar

OFF/ON

BUHAR

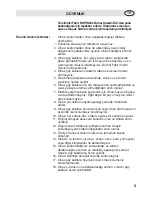
Summary of Contents for RAPHAEL

Page 1: ...RAPHAEL Kullanım Kılavuzu Buhar Kazanlı Ütü TR Instructions Manual Steam Station Iron GB ...

Page 2: ...skısı 7 Ön Destek Askısı 7 On Off Düğmesi 7 Termostat Ayar Düğmesi 7 Pilot Işığı 7 Buhar Ayar Düğmesi 8 Su Az Göstergesi 8 Kireç Göstergesi 8 Tahliye Vanası 8 Kablo Tutucu 8 Kilit Mandalı 8 Otomatik Kapanma 8 Kullanım Öncesi 9 Kullanım 10 Kuru Ütüleme 10 Buharlı Ütüleme 10 Kullanım Sonrası 12 Temizlik Ve Bakım 12 Ütüleme Önerileri 14 CE Uygunluk Deklerasyonu 15 Cihazın geri dönüşüm noktalarına bır...

Page 3: ...en emin olunuz 7 Elektrik çarpmasından kaçınmak için cihazı suya ve başka sıvılara daldırmayınız Eğer böyle bir şey olmuş ise cihazı artık kullanmayınız 8 Cihazı çocukların ulaşamayacağı yerlerde muhafaza ediniz 9 Cihaz güç kablosu fişe takılı iken veya cihaz ütü masasının üzerinde iken korumasız bırakmayınız 10 Cihazı her zaman düz stabil ve yatay bir zemine koyunuz 11 Orijinal olmayan aksesuar k...

Page 4: ...msiz bırakmamalıdır 24 Ütüyü ve güç kablosunu cihaz çalışır haldeyken 8 yaşından küçük çocuklardan uzak tutunuz 25 Su püskürtme veya buhar direk olarak elektrik aletlere veya elektrik ile ilgili parçalara sıkılmamalıdır 26 Cihaz güç kablusu cihaz kullanılmayacağı zaman cihaz temizliği veya bakımı yapılacağı zaman fişten çekilmelidir 27 Cihaz yüzeyi çalışır haldeyken sıcak olabilir SICAK METAL PARÇ...

Page 5: ...Su Tankı Dolum Kapağı Su Tankı Kablo Yolu Ütü Kilidi Kablo Tutucu Kontrol Paneli Buhar Kazanı Termal İzole Bant Arka Destek Askısı Ön Destek Askısı Su Tankı Çıkartma Tetiği Pilot Işığı Ütü Buhar Düğmesi Termostat Ayar Düğmesi Minimum Ayar Maksimum Ayar 3 Kademe 2 Kademe 1 Kademe ...

Page 6: ...likler Kontrol Paneli 2400 Watt 220 240 V 50 60 Hz Kullanım ömrü 7 Yıl Güç ikaz göstergesi ON OFF düğmesi Buhar ayar düğmesi Kireç göstergesi Su az göstergesi 3 Kademe Buhar Basınç Göstergesi 2 Kademe Buhar 1 Kademe Buhar OFF ON BUHAR ...

Page 7: ... ütü ucu ön destek askısının üzerine gelecek şekilde bırakabilirsiniz Ayrıca ütüleme işlemi bittiğinde ütü kilit açma düğmesini basarak ütü tabanı ön destek askısından aşağıda olacak şekilde ütüyü kilitleyebilirsiniz On Off Düğmesi Cihaz güç kablosunu fişe takınız ve On Off düğmesine basınız Dijital sesle birlikte ekran açılacak ve düşük buhar seviyesi varsayılan ayar olarak gözükecektir Cihazı ka...

Page 8: ... iki kere dijital ses verecek ve buhar jeneratörü çalışmayı durduracaktır Cihaza su ekleyip kullanmaya devam edebilirsiniz Kireç Göstergesi Eğer kireç göstergesi yanıyor ise cihazın içerisindeki mineral kalıntılarının temizlenmesi gerekmektedir Sistem içerideki mineral kalıntılarını temizlendiğini algılarsa gösterge sönecektir Tahliye Vanası Cihazı temizlemek için vanayı açınız Kablo Tutucu Cihaz ...

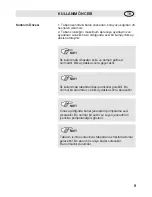
Page 9: ...lanımda cihazdan koku ve duman gelmesi normaldir Birkaç dakika sonra geçecektir NOT İlk kullanımda tabandan bazı partiküller gelebilir Bu normal bir durumdur ve birkaç dakika sonra duracaktır NOT Cihaz açıldığında buhar jeneratörü pompalama sesi çıkarabilir Bu normal bir sestir ve suyun jeneratörün içerisine pompalandığını gösterir NOT Tabanın ısınma sürecinde tabandan az miktarda buhar gelecektir...

Page 10: ...i geçmemelidir 2 Su tankını tekrar yerleştiriniz 3 Ütü kilit açma düğmesine basınız ve ütüyü sola kaydırarak kilitten çıkarınız Ütünün öne tarafı ön destek askısına denk gelecek şekilde yerleştiriniz Ütü tabanının sadece termal izole bandına temas ettiğinden emin olunuz 4 Cihaz güç kablosunu fişe takınız ve On Off düğmesine basınız Varsayılan buhar ayarı az seviyede olacaktır Termostat ayarını arz...

Page 11: ...de kapatmak için On Off düğmesine iki saniye basılı tutunuz Cihaz kapanacak ve bütün göstergeler sönecektir Güç kablosunu fişten çekiniz fakat taban hala sıcak olacağından kesinlikle dokunmayınız 8 Cihaz soğuduktan sonra ütüyü termal izole bandına kilitleyebilirsiniz Bunun için öncelikle ütünün arka tarafını arka destek askısına yerleştiriniz Daha sonra ütü tabanını kilit mandalının üzerine koyara...

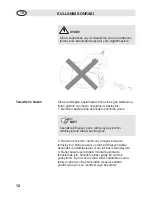
Page 12: ...nı nemli ve yumuşak bir bezle temizleyiniz Buhar kazanı ve termal izolasyon taban üzerindeki su damlacıklarını kuru bir bezle temizleyiniz 3 Buhar kazanı içerisindeki mineral kalıntılarını temizlemek için öncelikle cihazı yatay bir zemine yerleştiriniz Daha sonra cihazı biraz salladıktan sonra tahliye vanasını cihaz kolisinden çıkacak anahtar yardımıyla açınız ve içerideki suyu boşaltınız UYARI Ci...

Page 13: ...vanasını tekrar kapatınız ve cihazı yatay pozisyonda tutunuz 2 Cihazı uzun süre kullanmayacağınız zaman su tankı içerisindeki suyu boşaltınız ve ütüyü termal izole taban üzerinde kilitli olarak saklayınız 3 Cihaz güç kablosunu ve ütü kablosunu kablo sarma yuvalarına sarınız ve kablo tutucular ile sabitleyiniz UYARI Yanık ihtimaline karşı tahliye vanasını açmadan önce cihazın tamamen soğuduğundan e...

Page 14: ...leme yapınız İpek ve benzeri kumaşlar parlama yapabileceğinden dolayı ütüleme işlemini içten yapınız Kadife ve benzer kumaşlar hızlıca parlayabileceğinden dolayı tek bir yöne doğru çok fazla baskı yapmadan ve ütüyü her zaman gezdirerek ütüleyiniz 100 yünlü kumaşlar buharlı ütülenebilir Termostat ayarını max seviyeye getiriniz ve kuru bir kumaşı koruyucu olarak kullanınız Kesinlike fermuar ve düğme...

Page 15: ...retilmiştir Bunları geri dönüşüm çöp kutularına atınız Kullanılmış toz torbası ve filtreleri genel çöp kutularına atabilirsiniz CE Uygunluk Deklerasyonu Bu cihaz Avrupa Birliği nin 2004 108 EC Elektromanyetik Uyumluluk ve 2006 95 EC Gerilim Direktifleri ne tamamen uygundur Bu ürün cihaz tip etiketinde CE işaretine sahiptir Cihazın orijinal ambalajında veya zarar görmesini önlemek için iyi ve yumuş...

Page 16: ...rt hook 21 ON OFF switch 21 Temperature dial 21 Temperature indicator 21 Steam switch 22 Lack of water indicator 22 Descaling indicator 22 Drain water cap 22 Cord clamp 22 Locking pin 22 Automatic power off 22 Before first use 23 Operating 24 Dry ironing 24 Steam ironing 24 After Use 26 Cleaning and maintenance 26 Ironinig tips 28 CE Declaration of Conformity 29 Waste disposal 29 Dispatch 29 ...

Page 17: ...te when it is hot 5 Burns may occur from touching hot metal parts hot water or steam 6 Do not let cord hang over edge of table or hot surface 7 To protect against a risk of electric shock never immerse the iron in water or other liquids If this has happened do not use this appliance any more dispose of the appliance 8 Keep the appliance out of the reach of children 9 Do not leave iron unattended w...

Page 18: ...t not leave the iron unattended while connected to the supply 24 Keep the iron and its cord out of reach of children less than 8 years of age when it is energized or cooling down 25 Liquid or steam must not be directed towards equipment containing electrical components such as the interior of ovens 26 The appliance has to be unplugged after use and before cleaning or user maintenance of the applia...

Page 19: ...nding groove Locking pin Cord clamp Control panel see below Steam generator Thermal insulating cushion Front supprt hook Trigger Temperature indicator Iron Steam control button Temperature dial see below Minimum setting Maximum setting The third setting The second setting The first setting ...

Page 20: ...l Panel 2400 Watt 220 240 V 50 60 Hz Usage Life 7 Years Power indicator Descaling indicator Lack of water indicator OFF ON switch Steam switch High steam rate indicator LED Indicator Medium steam rate indicator Low steam rate indicator OFF ON BUHAR ...

Page 21: ...n can be secured onto the thermal insulating cushion Front support hook You can put the iron on the front support hook for operation and you can also secure the iron into the front support hook after finishing ironing ON OFF switch Plug in the appliance and press down the ON OFF switch a D sound of buzzer will be heard and the power indicator will be illuminated also the low steam rate regarded as...

Page 22: ... the steam generator stops working It prompts you to add water into the tank Descaling indicator If the descaling indicator illuminating it indicates the steam generator shall be cleaned by virtue of the mineral deposits collecting to a degree When the system ensures the mineral deposits have been removed the indicator will be extinguished Drain water cap Open the cap for cleaning the steam genera...

Page 23: ...use This will cease after a short while NOTE Some particles may come out of the soleplate when you use the iron for the first time This is normal the particles are harmless and stop coming out of the iron after a short while NOTE When you switch on the appliance the steam generator may produce a pumping sound This is normal the sound tells you that water is pumped into the steam generator NOTE Dur...

Page 24: ...exceeded the MAX mark 2 Replace the detachable water tank properly 3 Press the release button with one finger and grasp the iron s handle with the hand to rotate the iron anti clockwise see Fig 1 to take out of the iron and then put the iron on the steam generator s front hook And you do not need to secure the iron onto the thermal insulating cushion during the operation and can just put the iron ...

Page 25: ...be turned off all the indicators will be extinguished Remove the plug from the wall socket But the soleplate is still hot never touch it with hand 8 After cooling down you can replace the iron onto the thermal insulating cushion according to the following operation firstly you can insert the back of the iron into the rear support hook then put the soleplate on the locking pin and press the locking...

Page 26: ...r part of iron with a soft damp cloth Wipe the water drop on the steam generator and the thermal insulating cushion with dry cloth 3 To remove the mineral deposits collecting at inner steam generator firstly put the iron horizontally on a level surface then tilt the steam generator and unscrew the drain water cap with the attached screwer and then drain the steam generator see Fig 4 UYARI During t...

Page 27: ...drainage screw the drain water cap tight and recover the steam generator standing 5 When do not use the appliance for a long time pour out the water in the tank and store the iron on the thermal insulating cushion 6 Wind the iron cord and power cord around the cord winding groove and secure it by the cord clamps WARNING To avoid a risk of scald make sure the steam generator has been cooled down co...

Page 28: ...st ironing temperature to iron the composition of those fibers Silk and other fabrics that are likely to become shiny should be ironed on the inner side Velvet and other textures that rapidly become shiny should be ironed in one direction with light pressure applied Always keeps the iron moving at any moment Pure wool fabrics 100 wool may be ironed with the steam iron Preferably set temperature di...

Page 29: ...e carried out on them For advice on recycling refer to your local authority or your dealer Dispose of used dust bag and filters in domestic waste CE Declaration of Conformity This appliance fulfills the requirements of the Appliance and Product Safety Law GPSG and the EU Directives 2004 108 EC Electromagnetic Compatibility and 2006 95 EC Low Voltage Directive The appliance bears the CE mark on the...

Page 30: ...İmalatçı İthalatçı Firma Fakir Elektrikli Ev Aletleri Dış Tic A Ş Meşrutiyet Cad No 43 Tepebaşı İstanbul TÜRKİYE Tel 212 249 70 69 pbx Fax 212 251 51 42 ...

Reviews: