12
CHARGING THE BATTERY
1- Before the first use, the battery must be
charged for 15 hours. Before the first charge,
the battery should be fully discharged.
Operate the On/Off switch until the motor
stops. Make sure that the On/Off switch is
returned to the Off position. The battery will
not charge with the switch in the On position.
New batteries, or a battery that has been
stored uncharged for some time, may not
initially accept a full charge. This is normal.
It will charge fully after several charge and
discharge cycles. The battery should always
be charged at ambient air temperatures
of between 40 and 400 C.
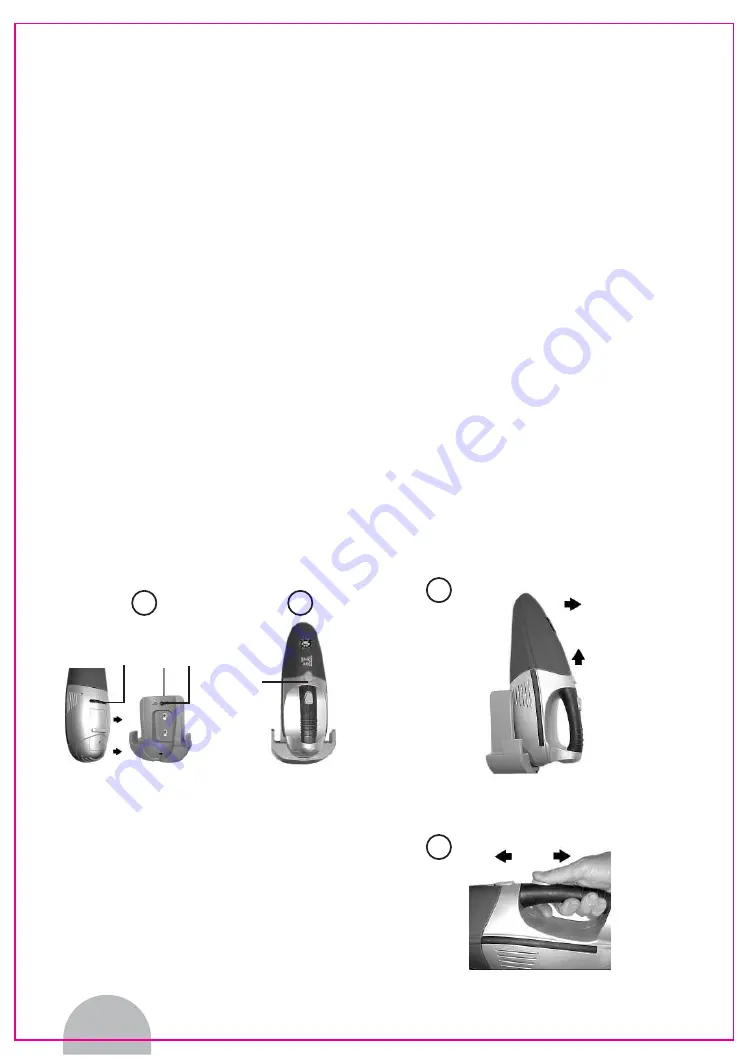
2- Locate the cleaner in the charging base,
making sure that the charging socket on the
cleaner is correctly located with the charging
pin on the charging base. See figure 3.
3- Plug the charging adaptor into the mains
supply. The charging indicator LED will light
to show that the battery is accepting the
charge. See figure 4.
CHARGING THE BATTERY - continued
4 Whilst charging, the charging adaptor will
become warm. This is normal and does not
indicate a problem. The cleaner may be
stored in the charging base. However,
ensure that the charger is disconnected
from the mains supply when charging is
complete (maximum 15 hours).
NOTE
After fully charging the battery, the average
effective use of the cleaner is approximately
10 minutes. This will reduce to 8 minutes
if the rotating brush head described on page
9 is used.
USING THE CLEANER
1 Lift and pull the cleaner from the wall
mounting base. See figure 5.
2 Push the On/Off switch forward to switch
On. See figure 6. The cleaner will start.
3 Perform the cleaning operation.
4 Pull the On/Off switch back to switch Off.
See figure 6.
5 Return the cleaner to the wall mounting
base.
CAUTION!
Do not use the cleaner to pick up liquids as
this will severely damage the motor.
Charging
Socket
Charging
Pin
Led
3
4
5
6
Pul
Lift
On
Off


