6.4.4. Adjustment of cogged pinion for whirl control.
The correct setting of the cogged pinion and whirl ensures longer working life. When the cogs of the two
components become worn and are no longer a perfect fit, adjust them closer together.
To adjust this setting, proceed as follows:
- Turn off the machine with the main switch and disconnect the machine cable from the elctricity
supply.
- Remove the grub screws, n. 90503.5 and slide out the tip n. 5504.00.
- Remove the cogged pinion n. 5506.00
- Turn the screw n. 90531.5 in the double horn with a 1.5 spanner. In a clockwise direction ,
tightening the screw, the pinion is lowered. In an anticlockwise direction, loosening the screw, the
pinion is raised.
- Insert the pinion again.
- Insert the tip, fixing it in position with the two grub screws, starting with the first one
from the top of the horn.
Warning:
Avoid pushing the screw too far forward: the cogged pinion must not come into contact with
the the internal wall of the whirl cover plate.
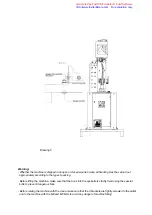
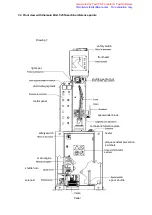
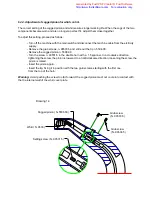
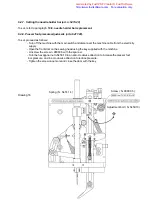
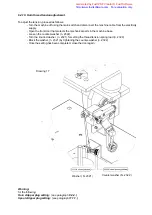
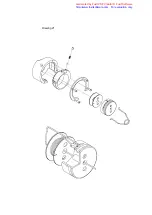
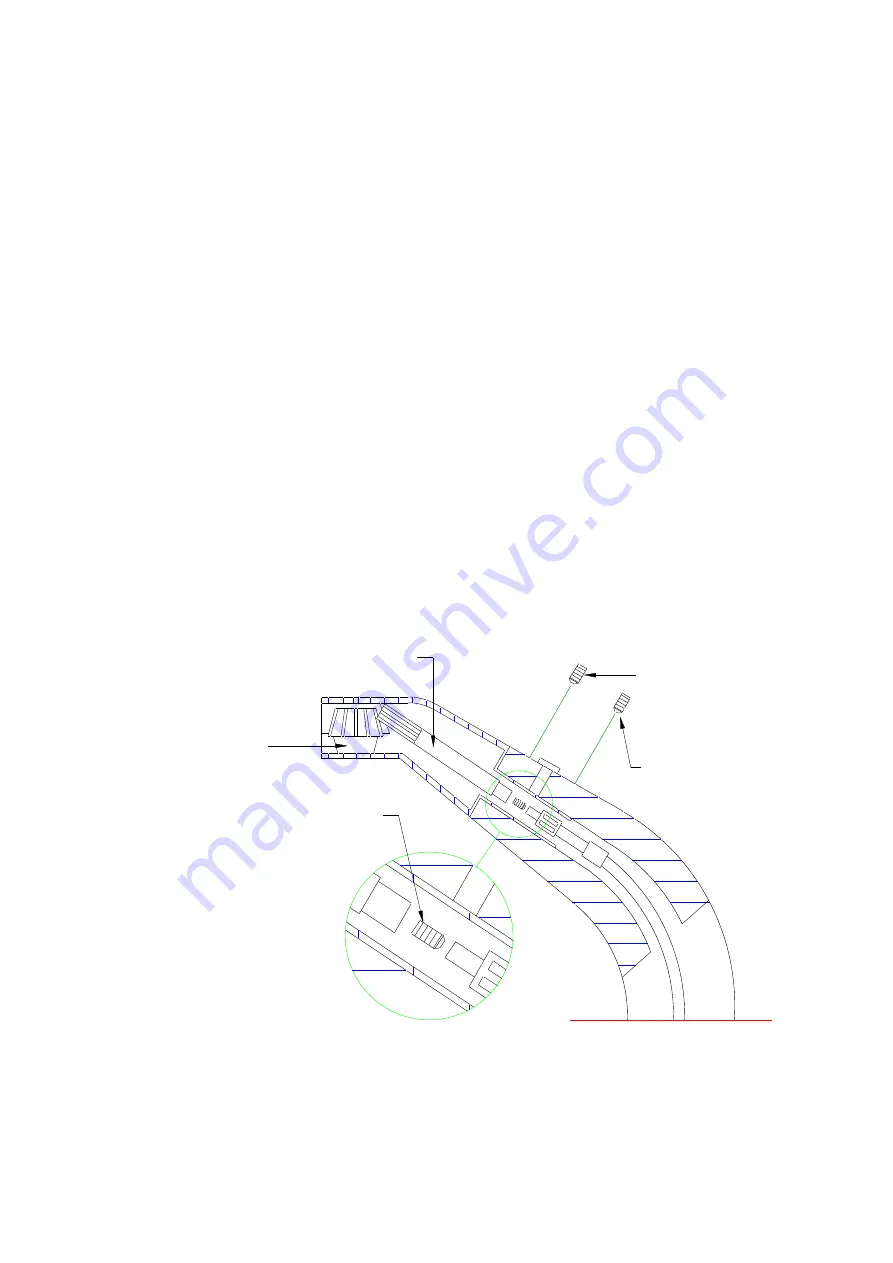
Drawing 14.
Rosellino ( N. 0533 )
Astina dentata ( N. 5506.00 )
Grano di regolazione ( N. 90503.5 )
Grano ( N. 90503.5 )
Grano ( N. 90504.5 )
Cogged pinion ( N. 5506.00 )
Grub screw
( N. 90503.5 )
Grub screw
( N. 90504.5 )
Whirl ( N. 0533 )
Setting screw ( N. 90531.5 )
Generated by Foxit PDF Creator © Foxit Software
http://www.foxitsoftware.com For evaluation only.

