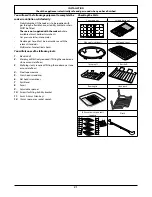
background image

INSTALLATION

Check the appliance is electrically safe and gas sound when you have finished.

24

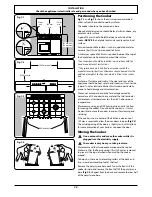
Conversion to Another Gas

If the appliance is to be converted to another gas do the 

conversion at this point. See the conversion section of these 

instructions.

Levelling

You are recommended to use a spirit level on a shelf in one of 

the ovens to check for level.
Place the cooker in its intended position taking care not to 

twist it within the gap between the kitchen units as damage 

may occur to the cooker or the units.
The front feet and rear rollers can be adjusted to level the 

cooker. To adjust the height of the rear of the cooker use the 

levelling tool supplied to turn the adjusting nuts at the front 

bottom corners of the cooker. To set the front turn the feet 

bases to raise or lower.
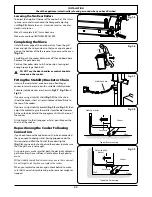
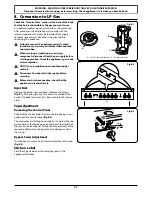
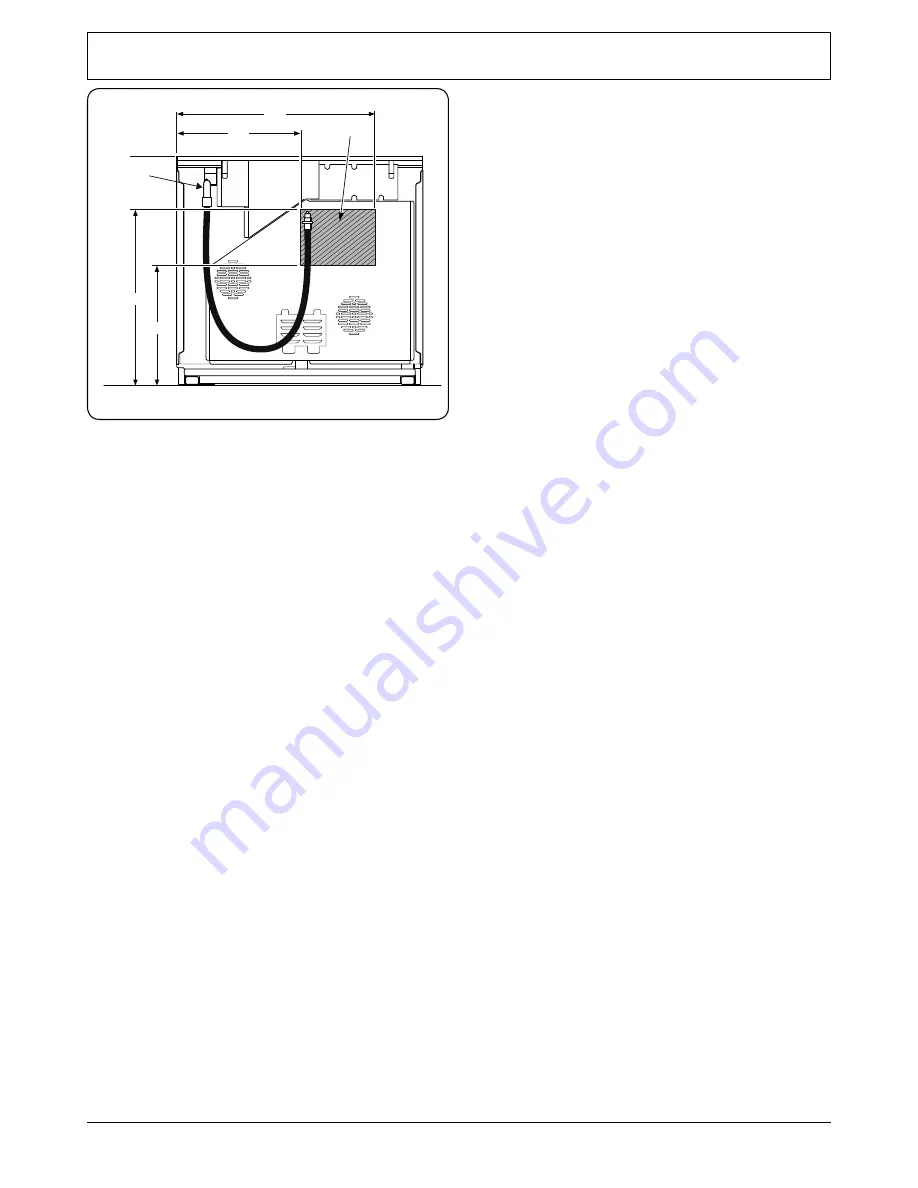
Gas Connection

This must be in accordance with the relevant standards.
The flexible hose (not supplied with the cooker) must be 

in accordance with the relevant standards. Hoses may be 

purchased at most builders’ merchants.
The gas supply needs to terminate with a side facing elbow 

with a down-facing bayonet.
The connector is located just below the hotplate level at the 

rear of the cooker. If in doubt contact your supplier.
The rear cover boxes limit the position of the supply point.
Because the height of the cooker can be adjusted and 

each connection is different, it is difficult to give precise 

dimensions.
Although a 900 mm hose can be used, a 1100 mm hose 

will allow slightly more flexibility in the positioning of the 

bayonet and make moving the cooker easier.
The hose should be fitted so that both inlet and outlet 

connections are vertical so that the hose hangs downwards in 

a ‘U’ shape. 
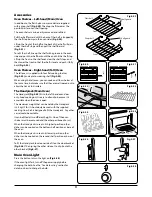
Ideally the hose supply connection should be within the 

shaded area ‘A’ 

(Fig.7-10)

.

Screw connect the threaded end of the hose into the gas 

inlet.
After completing the gas connection, make sure that the 

cooker is gas sound with a pressure test.

680

450

750

A

500

All dimensions in millimetres

Gas inlet

Fig.7-10

Summary of Contents for 100

Page 1: ...Professional 100 Dual Fuel Kitchener 100 Dual Fuel USER GUIDE INSTALLATION INSTRUCTIONS...

Page 2: ...0 C for a fan oven orgas mark 7 2 Pull the small sprigs off the rosemary branches and set aside with the garlic 2 Using the tip of a paring knife make up to 20 well spaced cuts into the flesh of the l...

Page 3: ...14 Grills 15 Control Panel and Doors 15 Ovens 16 The Tall Oven 16 Cleaning Table 17 Contents 6 Troubleshooting 18 7 Installation 20 Dear Installer 20 Safety Requirements and Regulations 20 Provision o...

Page 4: ...II...

Page 5: ...or allergy problems should vacate the area for this brief period If You Smell Gas DO NOT turn electric switches on or off DO NOT smoke DO NOT use naked flames DO turn off the gas at the meter or cylin...

Page 6: ...cooking on a hob with fat or oil can be dangerous and may result in fire n n NEVER leave a chip pan unattended Always heat fat slowly and watch as it heats Deep fry pans should be only one third full...

Page 7: ...flow of gas if the flame goes out When the igniter button is pressed in sparks will be made at every burner this is normal Do not attempt to disassemble or clean around any burner while another burne...

Page 8: ...ports You should also avoid using unstable and misshapen pans that may tilt easily and pans with a very small base diameter e g milk pans single egg poachers Fig 2 7 The minimum recommended pan diamet...

Page 9: ...e is non stick and metal cooking utensils e g spatulas will damage the surface Use heat resistant plastic or wooden utensils n n DO NOT put it crossways it will not fit properly and will be unstable F...

Page 10: ...rill is in use Young children should be kept away The grill pan trivet can be turned over to give two grilling positions Fig 2 18 n n Never close the grill door when the grill is on The Ovens The cloc...

Page 11: ...he beeper when it sounds turn the Adjusting knob counter clockwise The cook period which is the length of time you want the oven to cook for The stop time which is the time of day you want the oven to...

Page 12: ...y Fig 2 29 While still holding the Timer knob turned to the clock symbol turn the Adjusting knob clockwise until the key symbol and OF shows on the display Fig 2 30 Release the knobs The left hand ove...

Page 13: ...tton until the required stop time shows Fig 2 39 AUTO will show in the display Once the stop time is reached the beeper sounds To stop the beep turn the oven control knob to 0 first and then press onc...

Page 14: ...right hand oven can be operated as usual To Activate the Key Lock Make sure that the clock is in manual mode and cancel any active programs Hold the Minute Minder and Cook period buttons When On appe...

Page 15: ...en the door is open The maximum weight that can be held by the Handyrack is 5 5kg 12lb It should only be used with the supplied roasting tin which is designed to fit the Handyrack Any other vessel cou...

Page 16: ...n s wire shelves Other containers should be placed centrally Keep all trays and containers away from the back of the oven as overbrowning of the food may occur For even browning the maximum recommende...

Page 17: ...0 minutes according to size 2 3 hours 45 60 minutes 40 45 minutes 2 to 3 hours 20 30 minutes 15 20 minutes 15 20 minutes per 500g Steaks according to thickness Conventional Oven Temperature C Shelf Po...

Page 18: ...make sure that the notch lines up with the electrode or hole in the base Check that the burner head is level and that the cap is fitted centrally on the burner head Fig 5 1 The Wok Burner The wok bur...

Page 19: ...ails by two clips on each side Fig 5 6 For each side support the side rail with one hand and with the other hand lift the frame up and out of the side clips Fig 5 7 For safety push the side rails back...

Page 20: ...elf This does not stop all marks on the lining but helps to reduce the amount of manual cleaning needed The Cook Clean panels work better above 200 C If you do most of your cooking below this temperat...

Page 21: ...e all purpose cloth supermarket Sides and plinth Painted surface Hot soapy water soft cloth Splashback rear grille Enamel or stainless steel Hot soapy water soft cloth Cream cleaner with care if neces...

Page 22: ...oting If there is an installation problem and I don t get my original installer to come back to fix it who pays You do Service organizations will charge for their call outs if they are correcting work...

Page 23: ...e the oven shelves Unscrew the bulb cover by turning counter clockwise It may be very stiff Fig 6 2 Taking care to protect your fingers with a glove in case the bulb should shatter unscrew the old bul...

Page 24: ...e is not connected to a combustion products evacuation device Particular attention shall be given to the relevant requirements regarding ventilation All rooms require a window that can be opened or eq...

Page 25: ...nry drill bit only required if fitting the cooker on a stone or concrete floor 3 Wall plugs only required if fitting the cooker on a stone or concrete floor 4 Steel tape measure 5 Cross head screwdriv...

Page 26: ...nate kitchen furniture are particularly prone to heat damage and discolouration We cannot accept responsibility for damage caused by normal use of the cooker to any material that de laminates or disco...

Page 27: ...or Chain Unless otherwise stated a cooker using a flexible gas connector must be secured with a suitable stability device Suitable stability devices are shown in Fig 7 7 Fig 7 8 and Fig 7 9 If you ar...

Page 28: ...th the cooker must be in accordance with the relevant standards Hoses may be purchased at most builders merchants The gas supply needs to terminate with a side facing elbow with a down facing bayonet...

Page 29: ...nces may cause nuisance tripping so we recommend that the cooker is protected on an individual RCD Residual Current Device or RCBO Residual Current Breaker with Overload IF IN DOUBT PLEASE CONSULT A S...

Page 30: ...Professional Loosen the three screws along the front bottom edge of the cooker Hook the central keyhole over the central screw Twist and fit each end keyhole over their respective screws Tighten the f...

Page 31: ...operation Check the appliance is gas sound after completion n n DO NOT use reconditioned or unauthorised gas controls n n Disconnect from the electricity supply before servicing n n Before electrical...

Page 32: ...one of the left hand hotplate burner jets Lift off a burner head Fit the pressure gauge to the jet Turn on and light one of the other burners with a match Turn on and press in the control knob for the...

Page 33: ...Hz Code Colour b Blue br Brown bk Black or Orange r Red v Violet w White y Yellow g y Green yellow gr Grey Code Description A1 Grill control A2 Grill element right hand side A3 Grill element left hand...

Page 34: ...pass Screw Natural Gas 20mb L P Gas Injector Injector Wok burner 57 3 5kW internal 78 3 5kW 246g h internal 53 external 126 external 82 Large burner 40 3 0kW 134 3 0kW 210g h 87 Medium burner 32 1 7kW...

Page 35: ...een repaired by persons or organisations other than those authorised to act on behalf of AGA Rangemaster Exceptions Items not included under the free 3 year guarantee include pan supports griddles wok...

Page 36: ...fication design and production of products and thus alterations take place periodically Whilst every effort is made to produce up to date literature this booklet should not be regarded as an infallibl...

Reviews: