SERVICING - WARNING
Disconnect from electricity and gas before servicing. Check appliance is safe when you have finished.
30
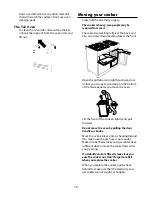
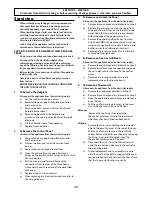
15. To Remove the Oven Outer Door Panel
a)
Open the oven door.
b)
Remove two screws ‘A’ and two screws ‘B’ from the
door.
c)
Remove the outer door panel.
d)
Undo the nuts that secure the handle to the door
panel. Fit the handle to the replacement door
panel.
e)
Fit the replacement panel to the oven inner door
making sure that the door insulation is correctly
located.
f)
Re-assemble in reverse order.
16. To Remove the Door Latch
a)
Remove the oven outer door panel as detailed in
Section 15.
b)
Remove the fixings that secure the latch assembly
to the inner door panel.
c)
Fit the replacement catch and re-assemble in
reverse order.
d)
Check correct operation of door.
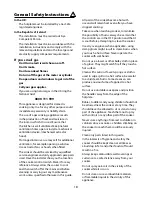
17. To Remove the Oven Door Seal
a)
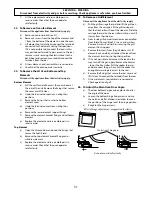
Open oven door. The seal is held in place by small
hooks on the rear face. At the corner pull seal
diagonally away from the door centre until that
hook is released.
b)
Proceed to the next hook and release it in a similar
way, and so on. Use force if the hooks are stiff, as
the old seal will be discarded.
c)
When fitting new seal, position the seal join at the
bottom. Hook the new seal in one of the corner
holes of the door, and proceed round the door
snapping in each hook in turn.
18. To Adjust the Oven Door Catch Keeper
a)
Open the oven door and slacken the locknut at the
keeper base.
b)
Adjust the keeper inward or outward as required,
until the desired door operation is obtained.
c)
Re-tighten the locknut.
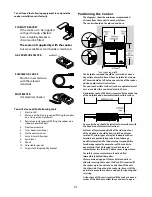
19. To Remove the Hotplate Spark Generator
Disconnect the appliance from the electricity supply.
a)
Pull the unit forward to access the cover boxes at
the appliance rear. Remove the fixings that secure
the cover and lift it clear.
b)
Undo the terminal connections noting their
positions.
c)
Undo the fixings that secure the spark generator
and remove the device.
20. To Remove the Hotplate Electrode Leads
Disconnect from the electricity supply.
Pull the unit forward to access the rear of the appliance.
a)
Remove the pan supports, hotplate accessories
and burner heads.
b)
Remove the hotplate as detailed in Section 1.
c)
Remove the cover box and disconnect all HT leads
at the generator.
d)
Remove the lower back panel and disconnect the
lead at the electrode.
e)
Pull the sleeved bundle of HT leads up through the
rear upright.
f)
Pull the appropriate lead from the sleeve and push
in the replacement.
g)
Replace the leads in the rear upright.
h)
Re-connect the leads at the generator and oven
electrode.
j)
Re-assemble in reverse order and check ignition.
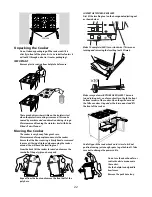
21. To Remove Oven Inner Back
a)
Open the oven door. For the LH oven unscrew
the 2 thermostat phial fixing screws. Remove the
fixings that secure the inner back to the oven rear.
b)
Lift the removable panel away.
c)
Re-assemble in reverse order. Ensure that the
retaining fixings are fully tightened.
22. To Replace an Oven Fan
Disconnect the appliance from the electricity supply.
a)
Pull the unit forward to access the cover boxes at
the rear of the appliance. Remove the fixings that
secure the cover and lift it clear.
b)
Remove the fan wiring, noting the connection
positions.
c)
Remove the inner back as detailed in Section 21.
d)
Hold the fan blades and undo the centre nut (LH
thread), brass washers, fan blade and circlip.
e)
Undo the fixings that retain the fan and remove it
from the cavity rear.

