4-Channel Digital Video Recorder
9
USB Port
A USB port on the front panel is provided to connect external hard disk, CD-RW or flash drives for video clip copying
or system upgrades. Position external drives close enough to the DVR so that you can make the cable connections,
usually less than 6 feet. Use the USB cable provided with the hard disk drive to connect it to the DVR.
A USB mouse (not supplied) can be connected to the USB port. You can use the mouse to navigate through the screens
and menus much like you would on a computer.
A USB to Serial converter can be connected to the USB port. Multiple text-in devices can be used with a USB to Serial
converter.
ID Button on Remote Control
NOTE: For simplicity, the button descriptions in this manual refer to the front panel buttons.
Turning on the Power
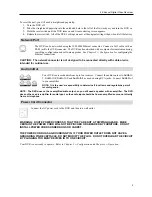
Connecting the power cord to the DVR turns on the unit. The unit takes approximately 60 seconds to initialize.
Initial Unit Setup
Before using your DVR for the first time, you will want to establish the initial settings. This includes items such as
time and date, display language, camera, audio, remote control, record mode, network and password. Your DVR can
be set up using various screens and dialog boxes.
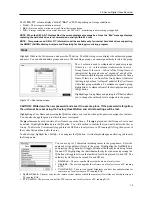
Throughout the screens you will see . Highlighting the and pressing the (Enter) button gives you the opportunity
to reset that screen to its default settings. After you are finished with any setup screen, you can highlight
Save
and
press the button to save the changes and exit the screen. If you do not wish to save the changes, highlight
Cancel
and press the button to exit the screen.
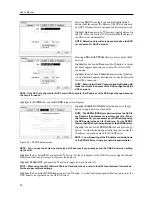
Press the
Menu
button or move the mouse pointer to the top of the screen and then select (Login) in the Live
Monitoring menu to enter the setup screens. The
Login
screen appears.
Figure 4
─
Infrared Remote Control.
If a DVR System ID is set to 0, the infrared remote control will control that DVR
without any additional operations. (Refer to the
Information
setup screen in this
chapter for further information on setting the System ID.) If the system ID is 1
to 4, you must to press the
ID
button on the remote control and then press the
number button (1 to 4) in order to control that DVR. If the System ID of two
or more DVRs is set to 0, those DVRs will react to the infrared remote control
at the same time.
Summary of Contents for 4-Channel
Page 1: ......
Page 2: ......
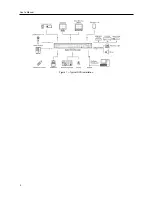
Page 10: ...User s Manual 2 Figure 1 Typical DVR installation...
Page 14: ...User s Manual 6...
Page 50: ...User s Manual 42...


