


2
Australia
Pease note
This instruction covers 4 diff erent models. Although the some of the
illustrations may look diff erent to your particular model we hope the
meaning is clear.
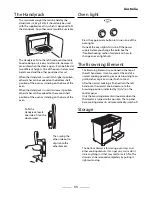
Be safe
Warning
Accessible parts will become hot in use. To avoid burns and scalds
children should be kept away
You need clean fresh air - so does your cooker. Burner fl ames produce
exhaust gases, heat and moisture. Make sure that the kitchen is well
ventilated: keep natural ventilation holes open or install a powered cooker
hood that vents outside. If you have several burners on or use the cooker
for a long time, open a window or turn on an extractor fan. For more detail
see the Installation Instructions.
We recommend you read ‘General Safety Instructions‘ (especially if you
have not used a dual fuel cooker before) where we describe some basic
guidelines on how to use a duel fuel cooker safely.
Gas and Electricity on
Make sure that the gas supply is turned on and that the cooker is wired in
and switched on. The cooker needs electricity.
Peculiar smells
When you fi rst use your cooker it may give off a slight odour. This should
stop after a little use.
Before using for the fi rst time, to dispel manufacturing odours, turn
the ovens to 240°C and run for an hour.
Make sure the room is well ventilated to the outside air, by opening
windows or turning on a cooker hood for example. We recommend
that people with respiratory or allergy problems should vacate the
area for this brief period.
Turn on the grill and run for 30 minutes with the grill pan in position,
pushed fully back, and the grill door open.
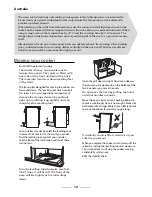
Installation
Failure to install the appliance correctly could invalidate any warranty or
liability claims and lead to prosecution
This appliance shall be installed in accordance with the regulations in
force and only in a well ventilated space. Read the instructions before
installing or using this appliance.
This appliance should not be installed in a boat or caravan.


