16
n
WARNING!
n
Take great care when removing the divider not to scratch
the inner glass door surface. Scratches in the glass can
cause stress and may cause the door to fail.
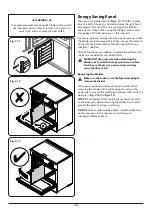
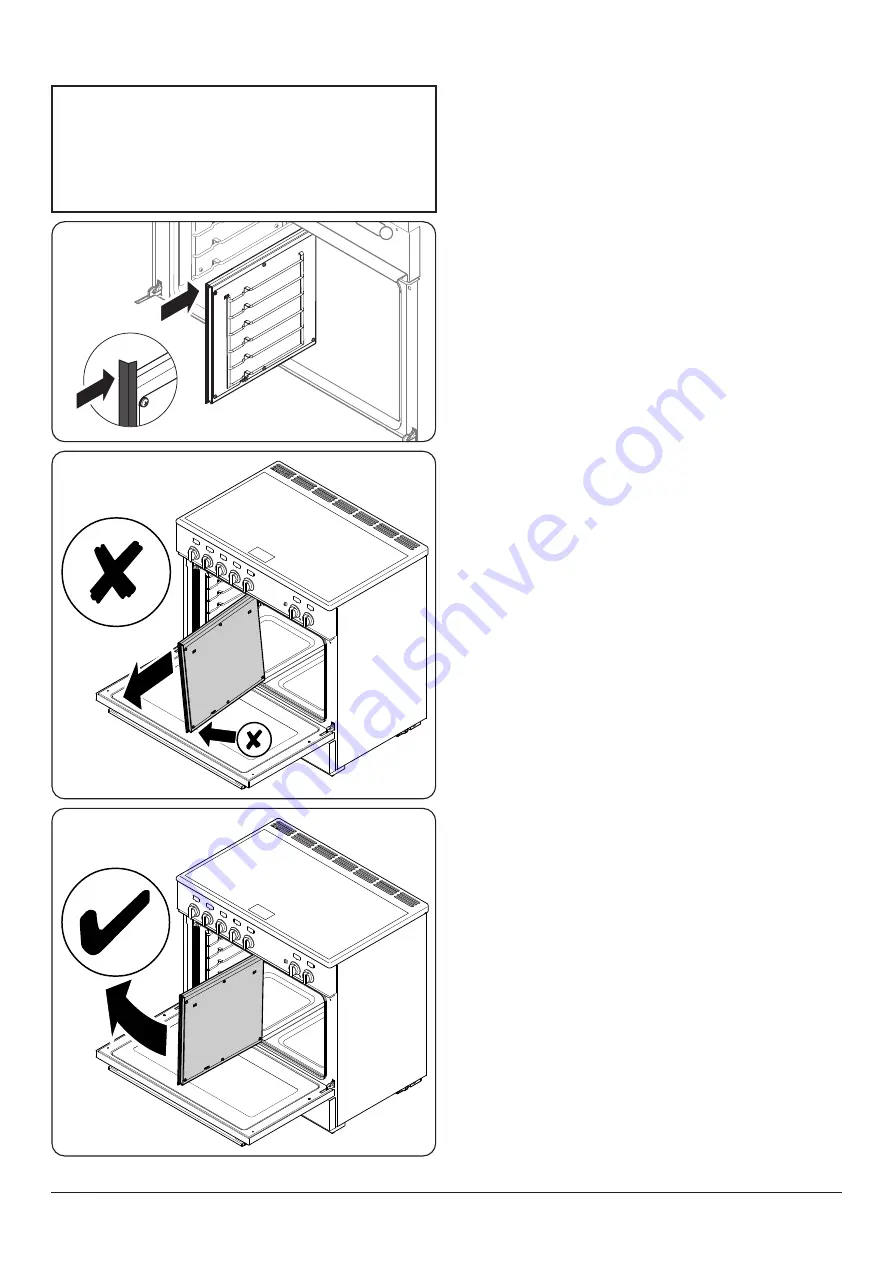
ArtNo.062-0005 - Removing the divider (wrong)
ArtNo.062-0004 - Removing the divider (right)
ArtNo.281-0150 - Oven Divider
Fig. 2.17
Fig. 2.18
Fig. 2.19
Energy Saving Panel
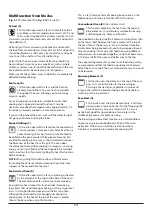
The oven has a divider feature (
). With this in place
only one half of the oven is heated and only the right-hand
side elements are used. This saves energy and is ideal for
cooking most foods. When using the divider, condensation
may appear in the left-hand oven – this is normal.
For very large loads, or large dishes for special occasions then
the divider can be removed. This brings into use the elements
on the left-hand side as well as those on the right when a
function is selected.
All oven functions are available in full and divided forms and
shelves are provided for use in both forms.
n
WARNING! Take great care when removing the
divider not to scratch the inner glass door surface.
Scratches in the glass can cause stress and may
cause the door to fail.
Removing the Divider
n
Make sure the cooker is cool before attempting to
remove the divider.
Fully open the door and remove the oven shelves. When
removing the divider, tilt it slightly upwards and grip the
underside to prevent the metal base making contact with the
door glass (
).
NOTE:
We recommend that you place a tea towel or similar
on the door glass before removing the divider. This should
prevent the door inner from scratching.
DO NOT
place or slide metallic objects, including cookware,
on the door glass as this may cause scratching and
subsequent failure to occur.
Summary of Contents for Classic FX 90 Induction
Page 2: ......
Page 4: ...ii...
Page 47: ......
Page 48: ...Clarence Street Royal Leamington Spa Warwickshire CV31 2AD England www falconworld com...

