B) Accessories
A) Features
1
2
C) Major Parts and Control Panel
D) Operations
1.Power cord 2.Sync cord 3.Fuse (2pcs)
4.Instruction booklet 5.Modeling lamp
1
2
3
4
5
6
7
8
Make sure the “Power” button and “Model” button are on “off” position.
And The power control dial is pointing at 1/8 position.
Connect the power cord and turn on the “Power” switch, then a red “Power
Light” will be on. When the unit is properly charged, the green “Ready
Light” will be on.
You can turn the modeling lamp on or turn off with the “Model” switch. You
can also adjust the power output by turning the dial from 1/8 to full.
There is a beeper indication during the recharging process.
After use, please turn off the “Model” switch first, then, the“Power”
switch.
9
10
11
12
13
17
18
16
15
14
1.
2.
3.
4.
5.
6.
7.
8.
9.
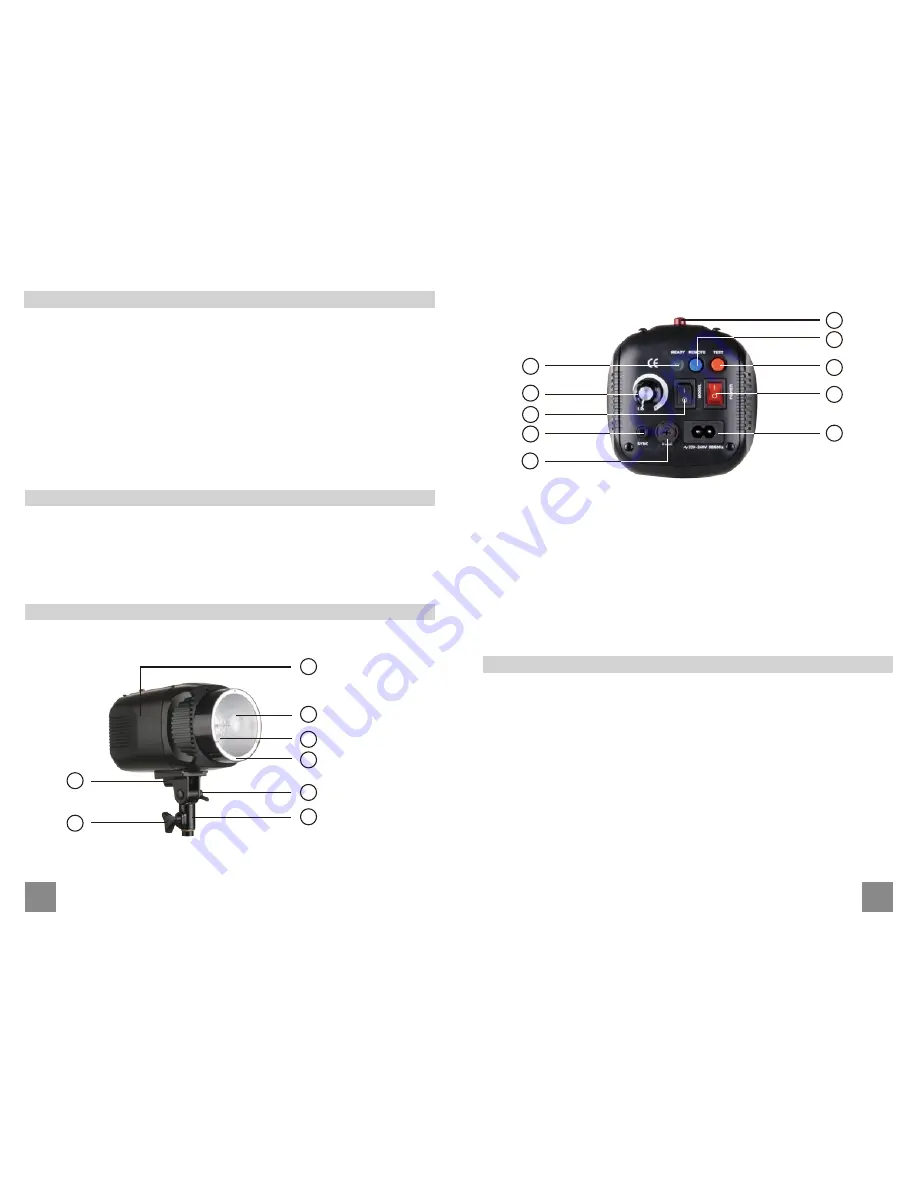
Body
Flash Tube
Modeling Lamp
Reflector
Stand Fixing Screw
Light Stand Holder
Angle Lock Screw
Umbrella Holder
Charging Indicator Light
1.
2.
3.
4.
5.
SS-M Series, with modern designed of housing are inevitable studio
flashes for professionals as well as amateurs. They have high compatibility
to our current accessories for SS series flashes such as softboxes,
reflectors, honeycombs, barndoors, etc. Moreover, the studio flash is
produced with heat resistant material and equipped with advanced circuitry
design, thus it is relatively stable and with short recharging time.
Test Button
Modeling Lamp On/Off Switch
Fuse Holder
AC Power Insert
Sync Socket
Power Control Dial
Remote On/Off Switch
Power On/Off Switch
10.
11.
12.
13.
14.
15.
16.
17.
18.
Photo Sensor


