26
7 - 8
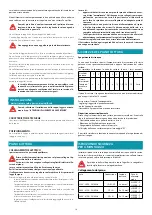
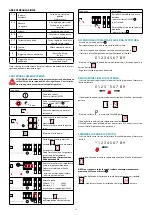
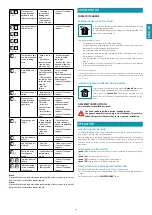
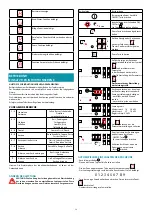
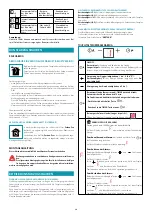
Cook
Fry
Potatoes, donuts, cakes
9
Fry, bring to the boil
Steaks, omelettes
Boil
P
Fry, bring to the boil
Bring to the boil big
quantities of water
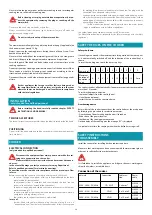
Remark: heating time of cooktops is shorter than the gas cookers.
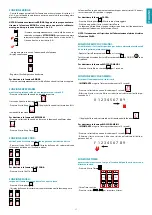
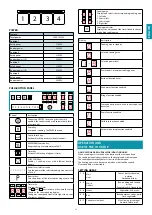
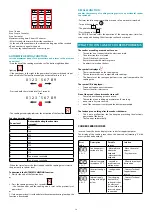
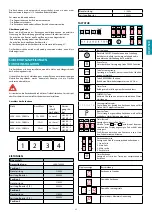
POWER CHANGE PROCEDURE
CAUTION: reducing power results in a limitation of the power le-
vels that can be set in individual areas. These limitations are auto-
matically managed by the device.
Sequence
description
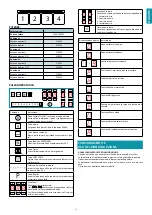
With the top switched off
Press the ON/OFF key
3 sec.
Within 3 seconds, press the ON/OFF
key
again.
The
key starts flashing
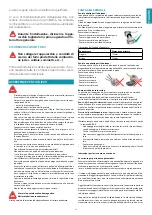
Press and hold the pause key
1
4
2
3
The cooking area displays show:
.
Press the four areas clockwise.
Release the pause key
The cooking area display shows the
symbol
alternating with the
parameter number
The Timer area displays the current
setting of parameter
The parameter for setting the
power is U0.
Press the Timer area to change the
set power value.
Press the power level selector:
- left to decrease the value,
- right to increase it
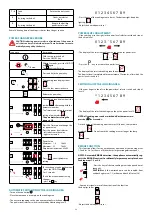
Power Value
Minimum: 1.4
2.8kW
Maximum: 3.7
7.4kW
Adjustment increment: 0.2kW
Press
to exit parameter
setting
2 sec.
To save changes and exit the menu:
- press the ON/OFF key
for 2 seconds.
To exit the menu without saving
changes:
- press the
key
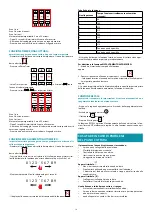
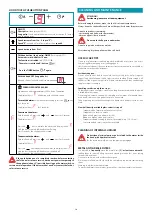
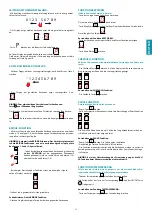
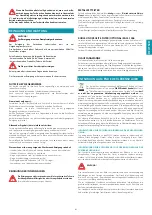
AUTOMATIC SWITCH-ON OF THE COOKING AREA
- Turn on the cooker top
- Place the saucepan, not empty, on the cooking area
- The key corresponding to the area is automatically switched on
- The power level selector switch is activated by illuminating level 0
0 1 2 3 4 5 6 7 8 9
- Press the key of the cooking area to be set. The bottom right-hand dot
lights up
- Adjust the desired power level.
POWER LEVEL ADJUSTMENT:
- Slide your finger to the right in the power level selector switch and stop at
the desired level.
0 1 2 3 4 5 6 7 8 9
- The display of the selected cooking area shows the set power level:
-->
- Press the
key to activate the booster level.
The display of the selected cooking area shows
.
The booster level is maintained for a maximum of 5 minutes, after which the
power level is raised to 9.
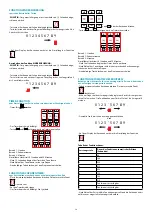
SWITCHING OFF THE COOKING AREA:
- Slide your finger to the left in the power level selector switch and stop at
level 0.
0 1 2 3 4 5 6 7 8 9
- The display of the selected cooking area shows the power level 0:
NOTE: all cooking areas can be switched off at the same time:
press key
for 2 seconds..
On the display of the cooking areas that are still too hot, the symbol is
displayed
. Do not touch the cooking areas as long as the lamp
is on.
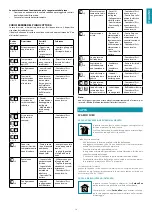
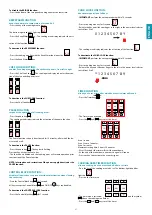
BRIDGE FUNCTION:
- This function allows for the simultaneous operation of the cooking areas:
1-2 and/or 3-4; for the use of fish kettles or large rectangular saucepans.
NOTES: Automatic BRIDGE detection: the appliance automatically sug-
gests the BRIDGE function if a sufficiently large saucepan is placed over
cooking areas 1-2 or 3-4.
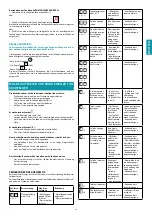
- Press the keys of the two cooking areas to be paired simul-
taneously.
CAUTION:
only the indicated pairs can be coupled: front
and back right area (1-2) or front and back left area (3-4).
- An acoustic signal warns of the activation of the function,
the displays show:
- Adjust the desired power level.
Summary of Contents for Brera
Page 3: ...3 241 394 197 650 250 51 350 400 416 A A 111 700 416 250 160 400 450 A A ISLAND WALL...
Page 62: ...62 8...
Page 63: ...63 Falmec 120mm Bridge 230mm...
Page 64: ...64 BRIDGE 5 PowerFlex 1 5 70 C III...
Page 71: ...71 TIMER 15 TIMER 4s 2000 5 2 5 3 5 3 5 T V F 1 KACL 1006 18 3 200 C 1 1...
Page 72: ...72 RAEE RAEE...
Page 113: ...113 113 NOTE NOTES...
Page 114: ...114 114 NOTE NOTES...
Page 115: ...115 115 NOTE NOTES...

