background image

27

ENGLISH

SAFETY INSTRUCTIONS AND WARNINGS

INSTALLATION WARNINGS

TECHNICAL SAFETY

Installation operations are to be carried out by skilled and qualiied install-
ers in accordance with the instructions in this booklet and in compliance 
with the regulations in force. 

• 

Before installing the hood, check the integrity and function of each part. Should 
anomalies be noted, do not proceed with installation and contact the Dealer.

• 

Do NOT install the hood if an aesthetic defect has been detected. Put it back into 
its original package and contact the dealer. No claim can be made for aesthetic 
defects once the hood has been installed.

• 

During installation, always use personal protective equipment (e.g. accident-prevention 
shoes) and adopt prudent and proper conduct.

• 

The components of the ixing kit (supplied with the hood) required to ix the 
safety chains are only to be used on masonry walls: should it be necessary to use 
them on walls of diferent material, assess other ixing systems, keeping the wall's 
strength and the weight of the hood in mind 

(indicated in the technical speciications 

inserted in the irst part of this booklet). 

• 

Keep in mind that installations with diferent types of ixing systems from those supplied, 
or which are not compliant, can cause electrical and mechanical seal danger. 

• 

Do not modify the electrical, mechanical and functional structure of the equipment.

• 

Do the install the hood outdoors and do not expose it to atmospheric agents (rain, wind, 
etc.)

• 

After the stainless steel hood has been installed, it will need to be cleaned to remove any 
residues from the protection adhesive as well as any grease and oil stains which, if not 
removed, can cause irreversible damage to the hood surface. To do so the manufacturer 
recommends using the supplied moist wipes, which are also available sold separately.

ELECTRICAL SAFETY

The electrical system to which the hood is to be connected must be accord-
ing to standard and compulsorily supplied with earthed connection in 
compliance with safety regulations in the country of use. It must also com-
ply with European standards regarding radio antistatic properties. 

• 

Before installing the hood, check that the electrical mains power supply corresponds 
with what is reported on the identiication plate located inside the hood.

• 

The socket used to connect the installed equipment to the electrical power supply must 
be within reach: if this is not possible, install a mains switch in an accessible position in 
order to disconnect the hood when required.

• 

Any changes to the electrical system required to install the hood must be carried out by 
a qualiied electrician. 

• 

It is dangerous to change, or try to change, the features of this equipment. Do not try 
to solve the problem yourself in the event of equipment malfunction, but contact the 
Dealer or an authorised Servicing Department for repairs.

• 

When installing the hood, disconnect the equipment by removing the plug or 
switching of the main switch. 

FUMES DISCHARGE SAFETY

• 

Do not connect the equipment to discharge pipes of fumes produced from com-
bustion (for example boilers, ireplaces, etc.)

• 

Before installing the hood, ensure that all standards in force regarding discharge of air out 
of the room have been complied with. 

USER WARNINGS

GENERAL WARNINGS

These warnings have been drawn up for your personal safety and those of 
others. You are therefore kindly asked to read the booklet carefully in its 
entirety before installing and using the equipment or carrying out clean-
ing operations. 

• 

The Manufacturer declines all responsibility for any damage caused directly, or 
indirectly, to persons, things and pets as a consequence of failing to comply with 
the safety warnings indicated in this booklet.

• 

It is imperative that this instructions booklet is kept together with the equipment 
for any future consultation. If the equipment is sold or transferred to another per-
son, make sure that the booklet is also supplied so that the new user can be made 
aware of the hood's operation and relative warnings. 

• 

Installation operations are to be carried out by a skilled and qualiied installer in 
accordance with the instructions in this booklet and in compliance with the reg-
ulations in force. 

• 

DO NOT use the hood if the power supply cable or other components are dam-
aged. 

Disconnect the hood from the electrical power supply and contact the Dealer 

or an authorised Servicing Department for repairs. Insist on original spare parts. 

Do not 

personally try to carry out repairs or replacements. Interventions carried out by in-
competent and unauthorised persons can cause damage, even serious, to things 
and/or persons not covered by the Manufacturer's warranty.


• 

Do not modify the electrical, mechanical and functional structure of the equipment. Any 
changes to the electrical system required to install the hood must be carried out by a 
qualiied electrician. 

INTENDED USE

• 

The equipment is solely intended to be used to extract fumes generated from 
cooking food in non-professional domestic kitchens

: any other use is improper, can 

cause damage to persons, things and pets and exempts the Manufacturer from any li-
ability. 

• 

The equipment can be used by children above the age of 8 and by persons with reduced 
physical, sensory and mental abilities, or with no experience or knowledge, as long as 
they do so under supervision or after having received relative instructions regarding safe 
use of the equipment and understanding of the dangers connected to it. Children are 
not to play with the equipment. Cleaning and maintenance operations intended for the 
user must not be carried out by children without supervision.

• 

USE AND CLEANING WARNINGS

• 

Before cleaning or carrying out maintenance operations, disconnect the equip-
ment by removing the plug or switching of the main switch.

• 

Do not use the hood with wet hands or bare feet.

• 

Always check that all electrical parts (lights, extractor fan) are of when the equipment 
is not used. 

• 

Check the deep-fryers during use: Overheated oil can catch ire.

• 

Do not light naked lames under the hood.

• 

Do not lambé foods under the hood.

• 

Never use the hood without the metal anti-grease ilters: in this case, grease and dirt will 
deposit in the equipment and compromise its operation.

• 

Accessible parts of the hood can be hot if used together with cooking appliances.

• 

Do not carry out any cleaning operations when parts of the hood are still hot.

• 

There can be a risk of ire if cleaning is not carried out according to the methods and 
products indicated in this booklet.

• 

Disconnect the main switch when the equipment is not used for long periods of time.

If other appliances that use gas or other fuels are being used at the same time 
(boiler, stove, ireplaces, etc.), make sure the room where the fumes are extracted 
is well-ventilated, in compliance with the current regulations.

WARNINGS IN CASE OF MALFUNCTION

• 

DO NOT use the hood if the power supply cable or other components are dam-
aged. 

Disconnect the hood from the electrical power supply and contact the Dealer 

or an authorised Servicing Department for repairs. Insist on original spare parts. 

Do not 

personally try to carry out repairs or replacements. Interventions carried out by in-
competent and unauthorised persons can cause damage, even serious, to things 
and/or persons not covered by the Manufacturer's warranty.


The Manufacturer reserves the right to make changes to the equipment at any time and 
without prior notice. Printing, translation and reproduction, even partial, of this manual are 
bound by the Manufacturer's authorisation. 
Technical information, graphic representations and speciications in this manual are for infor-
mation purposes and cannot be divulged.
This manual is written in Italian. The Manufacturer is not responsible for any transcription or 
translation errors.

INSTALLATION

(only intended for personnel qualiied to install the hood) 

Before installing the hood, carefully read Chap. "Safety instructions and 
warnings" on page 27.

TECHNICAL FEATURES

The technical speciications are reported on the identiication plate located inside the hood.

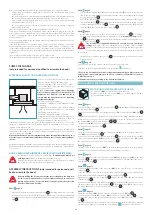
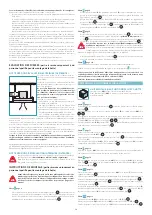
POSITIONING

The recommended distance between the highest part of the cooker and the lowest part of 
the hood is approximately 110 cm (43.3").
In certain cases, this distance can be increased up to a maximum of approximately 150 cm 
(59"), with a slight decrease in the eiciency of the device.
The minimum installation distance must not be less than 65 cm (25.5"), as provided by the 
standard, also according to an interpretation of standard EN60335-2-31 dated 11-07-2002 by 
TC61 (sub-clause 7.12.1 meeting 15 agenda item 10.11).
Should the instructions for the gas cooker specify a greater distance, take this into consid-
eration.
Do not install the hood outdoors and do not expose it to atmospheric agents (rain, wind, 
etc.)

ELECTRICAL CONNECTION

(only intended for personnel qualiied to install the hood)

Disconnect the equipment from electrical mains power supply before car-
rying out any operations on the hood.
Make sure that the wires inside the hood are not disconnected or cut. 
Should this occur, contact your nearest Servicing Department. Refer to 

qualiied personnel for electrical connections.
Connection must be carried out in compliance with the provisions of law in force. 

Summary of Contents for stella

Page 1: ...INSTRUCTIONS BOOKLET DE GEBRAUCHSANWEISUNG FR MODE D EMPLOI ES MANUAL DE INSTRUCCIONES RU PL INSTRUKCJA OBS UGI NL HANDLEIDING PT MANUAL DE INSTRU ES DK BRUGSANIVSNINGER SE INSTRUKTIONSBOK FI OHJEKIRJ...

Page 2: ...XTERNE MOTOREINHEIT MIT FLANSCH FR UNIT MOTEUR DISTANCE AVEC BRIDE ES UNIDAD DE MOTOR A DISTANCIA CON BRIDA RU PL ZDALNA JEDNOSTKA SILNIKA Z KO NIERZEM STELLA 90 21 KG STELLA 120 27 KG NL REMOTE MOTOR...

Page 3: ...UNIT PLACED ON THE HOOD DE MOTOREINHEIT AUF ABZUGSHAUBE FR UNIT MOTEUR POSITIONN E SUR LA HOTTE ES UNIDAD DE MOTOR SITUADA SOBRE LA CAMPANA EXTRACTORA RU PL JEDNOSTKA SILNIKA NA OKAPIE NL MOTORGROEP...

Page 4: ...UGSHAUBE FR UNIT MOTEUR SLIM POSITIONN E SUR LA HOTTE ES UNIDAD DE MOTOR SLIM SITUADA SOBRE LA CAMPANA EXTRACTORA RU SLIM PL JEDNOSTKA SILNIKA SLIM NA OKAPIE NL SLIM MOTORGROEP OPGESTELD OP DE KAP PT...

Page 5: ...A 90 23 KG STELLA 120 29 KG ES UNIDAD DE MOTOR A DISTANCIA CON KIT CONDUCTOR PARA TUBOS RECTANGULARES OPCIONAL RU PL ZDALNA JEDNOSTKA SILNIKA Z ZE STAWEM WYCI GOWYM DO RUR PROSTOK TNYCH OPCJA NL REMOT...

Page 6: ...L MOTOR BAJO FAL SO TECHO PARA INSTALACI N SOBRE LA CAMPANA EXTRACTORA RU PL KARTA TECHNICZNA SILNIKA PODDA CHOWEGO DO ZAINSTALOWANIA NA OKAPIE NL TECHNISCHE FICHE MOTOR ONDER DAK VOOR INSTALLATIE OP...

Page 7: ...7 800 m3 h 950 m3 h 9 mm...

Page 8: ...S O F F I T T O 2 m i n 6 0 m m min 60 mm 1 controsoffitto false ceiling soffitto ceiling F A L S E C E I L I N G C O N T R O S O F F I T T O G G 3 controsoffitto false ceiling soffitto ceiling 4 bia...

Page 9: ...9 X Y X 1 2 Y 4 3 9 mm C...

Page 10: ...S page p g str p g side sid sivu side 13 pag page S page p g str p g side sid sivu side 18 pag page S page p g str p g side sid sivu side 11 pag page S page p g str p g side sid sivu side 16 C1 RU PL...

Page 11: ...F ABZUGSHAUBE FR UNIT MOTEUR POSITIONN E SUR LA HOTTE ES UNIDAD DE MOTOR SITUADA SOBRE LA CAMPANA EXTRACTORA RU PL JEDNOSTKA SILNIKA NA OKAPIE NL MOTORGROEP OPGESTELD OP DE KAP PT UNIDADE DE MOTOR POS...

Page 12: ...12 120 mm 120 mm M M L UM UM L 2 3 1 1 V1 x8 V2 x4 3 V2 x4 2 V1 x8 A I R A I R E F 1 L M 2 H G UM G...

Page 13: ...13 UM F 15 950 m3 h 150mm 1 2 3 G V3 6 Smontaggio OK Disassembly G 5 4 x2 H1 2 CM CE 1 V5 x8 V4 3 H2...

Page 14: ...SHAUBE FR UNIT MOTEUR SLIM POSITIONN E SUR LA HOTTE ES UNIDAD DE MOTOR SLIM SITUADA SOBRE LA CAMPANA EXTRACTORA RU SLIM PL JEDNOSTKA SILNIKA SLIM NA OKAPIE NL SLIM MOTORGROEP OPGESTELD OP DE KAP PT UN...

Page 15: ...15 1 2 L M H G SLIM FR 217mm 87mm 800 m3 h 1 2 3 5 4 x2 G V3 7 Smontaggio OK Disassembly G 6 CM M N1...

Page 16: ...16 3 V4 1 V5 x4 V6 x4 CM CE 2 N2...

Page 17: ...DAD DE MOTOR A DISTANCIA CON KIT CONDUCTOR PARA TUBOS RECTANGULARES OPCIONAL RU PL ZDALNA JEDNOSTKA SILNIKA Z ZE STAWEM WYCI GOWYM DO RUR PROSTOK TNYCH OPCJA NL REMOTE MOTORGROEP MET GELEI DERKIT VOOR...

Page 18: ...18 1 V5 x8 CUE CE 2 V4 3 G 5 FR 1 217mm 87mm CUE 2 3 x2 4 G V3 6 Smontaggio OK Disassembly CUE Q2 Q1...

Page 19: ...DE EXTERNE MOTOREINHEIT MIT FLANSCH FR UNIT MOTEUR DISTANCE AVEC BRIDE ES UNIDAD DE MOTOR A DISTANCIA CON BRIDA RU PL ZDALNA JEDNOSTKA SILNIKA Z KO NIERZEM NL REMOTE MOTORGROEP MET FLENS PT UNIDADE DE...

Page 20: ...20 CUE CE 1 V4 2 S2 T MAGNETE MAGNET 3 1 2 U...

Page 21: ...ti e qualiicate possono provocare danni anche molto gravi a cose e o persone non coperti da garanzia del Costrut tore Non modiicare la struttura elettrica meccanica e funzionale dell apparecchiatura O...

Page 22: ...eso della cappa nelle varie conigurazioni di montaggio riportato nelle schede tecniche inserite nelle prime pagine di questo li bretto Fase Apag 8 Praticare un foro sul controsoitto come indicato in F...

Page 23: ...a URE pu avvenire mediante la langia FC o il kit convogliatore aria per tubi rettangolari CT opzionale Seguire le istruzioni corrispondenti all installazione desiderata Collegamento tra cappa e unit r...

Page 24: ...azione viene confermata da tre brevi lampeggi del display Il nuovo codice annulla e sostituisce il precedente codice di trasmissione di default memorizzato in fabbrica Ricollegare inine la cappa alla...

Page 25: ...della cappa con liquidi o solventi Non usare prodotti contenenti abrasivi Efettuare tutte queste operazioni scollegando preventivamente l appa recchio dalla rete elettrica FILTRI METALLICI ANTIGRASSO...

Page 26: ...to reso iscalmente obbligatorio che comprovi la data d acquisto della cappa In caso necessiti intervenire per anomalie di funzionamento si prega di contattare un Centro di Assistenza Tecnica autorizza...

Page 27: ...tions carried out by in competent and unauthorised persons can cause damage even serious to things and or persons not covered by the Manufacturer s warranty Do not modify the electrical mechanical and...

Page 28: ...booklet Should the plasterboard have reinforced proiles keep a minimum distance of 60mm from the drilling perimeter Fig 1 Phase Bpage 8 Check that the supplied laps H of the protection template G are...

Page 29: ...air conveyor kit for rectangular pipes CT OPTIONAL The conveyor kit for rectangular pipes CT enables connection of the hood to an under roof URS or outdoor URE remote motor unit by means of suitable r...

Page 30: ...GHTING The range hood is equipped with high eiciency low con sumption LED spotlights with extremely long duration un der normal use conditions The light intensity is adjustable via trimmer WARNINGS WH...

Page 31: ...ed using a damp cloth slightly moistened with neutral liquid detergent or denatured alcohol Finish of cleaning by rinsing well and drying with soft cloths CLEANING THE WHITE FINISH STEEL HOOD To clean...

Page 32: ...Komponenten besch digt sind darf die Abzugshaube NICHT verwendet werden Die Abzugshaube von der Stromversorgung trennen und den H ndler oder den autorisierten Kundendienst f r die Reparatur kontaktie...

Page 33: ...erden In dieser Ausf hrung str mt die Luft durch die kombinierten Carbon Zeo Filter wo sie gereinigt und anschlie end in den K chenraum zur ckgeleitet wird MONTAGEANLEITUNG dieser Abschnitt ist dem qu...

Page 34: ...ach URS bwz Au eneinheit URE kann mit dem Flansch FC oder dem optionalen Bausatz zur Kanalisierung von Rechteckrohren CT erfol gen Die Bedienungsanleitung f r die gew nschte Installationsweise befolge...

Page 35: ...ges kurzes Blinken des Displays best tigt Der neue Code l scht und ersetzt den vorherigen standardm ig im Werk gespeicherten bertragungscode Die Abzugshaube wieder an das Stromnetz anschlie en und pr...

Page 36: ...euchten Lappen mit neutralem Reinigungsmittel oder mit denaturiertem Alkohol ausgef hrt werden Am Ende der Reinigung die Abzugshaube mit weichen T chern sorgf l tig abwischen und abtrocknen REINIGUNG...

Page 37: ...du Fabricant Ne pas modiier la structure lectrique m canique et fonctionnelle de l appareil Toute ventuelle modiication au circuit lectrique n cessaire pour installer la hotte devra tre efectu e uniq...

Page 38: ...anuel Phase Apage 8 Percer un trou dans le faux plafond comme indiqu sur la Fig 2 pour les dimensions du trou percer voir les iches techniques ins r es dans les premi res pages de ce ma nuel Si des pr...

Page 39: ...la hotte et l unit distance au moyen du kit convoyeur d air pour tuyaux rectangulaires CT EN OPTION Le kit convoyeur d air pour tuyaux rectangulaires CT permet de raccorder gr ce un tuyau appropri se...

Page 40: ...dans la radiocommande la m morisation est conirm e par trois brefs clignotements de l cran Le nouveau code annule et remplace la pr c dent code de transmission m moris par d faut en usine Rebrancher...

Page 41: ...mbib de d tergent neutre liquide ou de l alcool d natur Terminer le nettoyage en rin ant et en essuyant soigneusement avec des chifons doux NETTOYAGE DE LA HOTTE DANS LA VERSION EN ACIER AVEC FINITION...

Page 42: ...a estructura el ctrica mec nica y de funcionamiento del equipo Solo un electricista cualiicado puede realizar los cambios que sean necesarios en la instalaci n el ctrica para instalar la campana DESTI...

Page 43: ...incluidas en las primeras p ginas de este manual En el caso de que se dispongan periles de refuerzo en el interior del pladur mantenga una distancia m nima de 60 mm a partir del per metro del agujero...

Page 44: ...po de instalaci n deseado Conexi n entre la campana y la unidad de motor a distancia con el kit de transportador de aire para tubos rectangulares CT OPCIO NAL El kit de transportador de aire para tubo...

Page 45: ...alla El nuevo c digo anula y sustituye el c digo de transmisi n predeterminado anterior memorizado en la f brica Vuelva a enchufar la campana a la red el ctrica comprobando que las luces y el motor es...

Page 46: ...neutro o alcohol desnaturalizado Termine la limpieza enjuagando bien y secando con pa os suaves LIMPIEZA DE LA CAMPANA EN VERSI N ACERO CON ACABADO BLANCO La limpieza de la campana debe realizarse nic...

Page 47: ...47 8 47 110 43 3 150 59 65 25 5 EN60335 2 31 11 07 2002 TC61 7 12 1 15 10 11...

Page 48: ...arbon zeo A 8 2 60 1 B 8 H G 1 G 2 3 G 4 C 9 X Y 1 X Y 2 9 3 4 C1 10 U 20 URS URE UM UM UM D 11 FC 1 FM UM 2 FL UM 3A 3B FL FLF SM 3A 3B UM 4 E 11 L M UM 1 2 8 V1 L M UM 4 V2 3 F 12 UM G 12 UM L M 1 H...

Page 49: ...4 V5 4 V6 1 CM SLIM CE 2 V4 3 C1 10 URS URE URS URE URS URE URS URE FC CT CT CT URS URE CT O 17 FC 1 L M CT 2 3 8 V1 L M CT 4 V2 4 P 17 L M 1 H G 2 Q1 18 TC URS URE FR 1 2 3 CUE URS URE 4 G 5 V3 G 6 Q...

Page 50: ...50 15 30 51 Stella 4 5 433 92 1 2 1 4 5 5 2 2 10 5 2 ON OFF 1 1 2 3 4 4 7 3 1 1 2 3 4 1 15...

Page 51: ...51 15 1 2 3 4 4 7 3 1 2 3 15 Magic Steel 1 55 C T 20 U 20 RAEE RAEE...

Page 52: ...szystkie operacje wykonywane przez osoby niekompetentne i niewykwaliikowane mog spowodowa szkody nawet bardzo powa ne dla mienia i lub os b kt re nie s obj te gwarancj producenta Nie nale y zmienia st...

Page 53: ...echnicznych na pierwszych stronach niniejszej instrukcji Je li w p ycie gipsowej znaj duj si proile wzmacniaj ce wzgl dem obwodu otworu nale y zachowa minimaln odleg o 60 mm Rys 1 Faza B str 8 Sprawdz...

Page 54: ...CT OPCJA Zestaw ssawy powietrza dla prostok tnych przewod w rurowych CT s u y do pod czania za pomoc specjalnego rurowego przewodu o przekroju prostok tnym okapu ze zdaln jednostk silnika pod suitem U...

Page 55: ...nie wygenerowany i zapisany w systemie zdalnego sterowania nowy kod transmisji danych jego zapami tanie zostanie zasyg nalizowane trzema kr tkimi migni ciami wy wietlacza Nowy kod anuluje i zast puje...

Page 56: ...m za pomoc mi kkiej ciereczki CZYSZCZENIE OKAPU W WERSJI ZE STALI Z BIA YM WYKO CZENIEM Okap nale y czy ci wy cznie mi kk szmatk zwil on wod z dodatkiem agodnego myd a Czyszczenie zako czy dok adnym w...

Page 57: ...de veroorzaken die zelfs zeer ernstig kan zijn aan voorwerpen en of personen In dit geval is deze schade niet door de garantie van de fabrikant gedekt Breng geen wijzigingen aan op de elektrische mech...

Page 58: ...se montageconiguraties is te vinden in de techni sche iches op de eerste pagina s van deze handleiding Fase Apag 8 Boor een gat in het valse plafond zoals aangeduid wordt in Afb 2 zie voor de afmeting...

Page 59: ...m lucht te leiden met rechthoekige buizen CT Volg de instructies die met de gewenste installatie overeenstemmen Aansluiting tussen kap en remote groep via de OPTIONELE kit om lucht te leiden met recht...

Page 60: ...vervangt de vorige default transmissiecode die in de fabriek in het geheugen was opgeslagen Sluit de kap ten slotte opnieuw op het elektriciteitsnet aan en controleer of de lampen en de motor uit zij...

Page 61: ...ap met vloei stofen of oplosmiddelen te reinigen Gebruik geen producten die schurende stofen bevatten Al deze handelingen moeten worden uitgevoerd nadat het toestel preven tief van het elektriciteitsn...

Page 62: ...adas podem provo car danos inclusive muito graves a pessoas e ou bens materiais n o cobertos pela garantia do fabricante N o modiicar a estrutura el trica mec nica e funcional da aparelhagem Toda as m...

Page 63: ...nual Fase Ap g 8 Fazer um furo no revestimento do teto como indicado na Fig 2 para as dimens es do furo ver as ichas t cnicas inseridas nas primeiras p ginas deste manual Caso estejam presentes peris...

Page 64: ...dade remota atrav s do kit transporta dor de ar para tubos retangulares CT OPCIONAL O kit transportador para tubos retangulares CT permite a liga o atrav s de tubos adequados com sec o retangular do e...

Page 65: ...igo de transmiss o a memoriza o conirmada por tr s breves intermi t ncias do ecr O novo c digo anula e substitui o precedente c digo de transmiss o de defeito memorizado em f brica Voltar a ligar o ex...

Page 66: ...Para terminar a limpeza enxaguar cuidadosamente e secar com panos macios LIMPEZA DO EXAUSTOR EM VERS O DE A O ACABAMENTO BRANCO A limpeza do exaustor deve ser realizada com gua e sab o neutro utilizan...

Page 67: ...egen h nd Indgreb som er udf rt af inkompetente og ukvaliicerede personer kan medf re endog meget alvorlige skader p ejendom og personer der ikke d kkes af Fabri kantens garanti Udf r aldrig ndringer...

Page 68: ...om hullets dimensioner i de tekniske tegninger p de f rste sider i denne vejledning Hvis der an vendes forst rkningsproiler internt i gipspladerne skal der opretholdes en afstand p mindst 60 mm fra b...

Page 69: ...udtr kskittet til rektangul re r r CT EKSTRAUDSTYR Udtr kskittet til rektangul re r r CT tillader tilslutning via egnede r r med rektangul rt tv rsnit af emh tten med en remote motorenhed under loftet...

Page 70: ...ring bekr ftes af tre korte blink p displayet Den nye kode an nullerer og erstatter den tidligere transmissionskode indstillet som default p fabrikken Forbind tilslut emh tten til lysnettet igen og ko...

Page 71: ...tureret alkohol Afslut reng ring med en grundig skylning og t rring med en bl d klud RENG RING AF EMH TTEN I ST LVERSIONEN MED HVID FINISH Emh tten reng res blot med vand og mild s be ved hj lp af en...

Page 72: ...r kompetenta eller kvaliicerade kan orsaka skador ven mycket allvarliga p f rem l och eller per soner som inte t cks av Tillverkarens garanti Modiiera inte apparatens elektriska mekaniska och funktio...

Page 73: ...skall man h lla ett minimiavst nd p 60 mm fr n h lets omkrets Fig 1 Fas Bsid 8 Kontrollera att lamellerna H p skyddsm nstret G som levereras tillsammans r b jda p motsatt sida mot den dubbelsidigt sj...

Page 74: ...ufttransport rssatsen f r rektangul ra r r CT m jligg r anslutning med hj lp av l mplig r rledning med rektangul rt snitt av k pan med en j rrmotorenhet under taket URS eller externt URE Transport rss...

Page 75: ...p displayen bekr ftar att lagringen har skett Den nya koden annullerar och ers tter den f reg ende fabriksinst llda standard verf ringsko den teranslut slutligen k pan till eln tet Kontrollera att lju...

Page 76: ...fuktats l tt med ett neutralt reng ringsmedel eller med denatu rerad sprit Avsluta reng ringen med en noggrann sk ljning och torkning med mjuka trasor RENG RING AV K PAN I VERSION ST L VIT FINISH Ren...

Page 77: ...yksin ep p tevien ja asiaa tuntemattomien henkil iden suorittamat korjaukset voivat aiheuttaa vahinkoja vakaviakin omaisuudelle ja tai henkil ille mik ei kuulu val mistajan takuun piirin l muokkaa la...

Page 78: ...kuva 1 Vaihe Bsivu 8 Tarkista ett mukana tulevan turvakehikon G siivekkeet H on taitettu tarrapuolen vas takkaiselle puolelle jos n in ei ole taita ne k ytt m ll sopivia v lineit esim pihtej kuva 1 P...

Page 79: ...kuvun liit nn n sopivan putkiston avulla jossa on suorakulmainen halkaisija v likaton kauko moottoriyksikk n URS tai ulkoiseen yksik URS URE k n URE Suorakulmaisille putkille tarkoitettu ilmanjohdinsa...

Page 80: ...n lyhyen vilkun kautta Uusi koodi poistaa ja korvaa aiemman tehtaalla tallennetun tiedonsiirron oletuskoodin Liit lopuksi liesikupu s hk verkkoon varmistaen ett valot ja moottori ovat sammuneet 2 KAUK...

Page 81: ...netta tai metyylialkoholia P t puhdistus huolellisella huuhtelulla ja kuivauksella k ytt en pehmeit liinoja VALKOPINTAISEN TER KSISEN KUVUN PUHDISTAMINEN Liesikupu on puhdistettava ainoastaan vedell j...

Page 82: ...soner som ikke er kompetente eller kvaliiserte kan for rsake skader selv meget alvor lige p ting og eller personer som ikke er dekket av garantien til produsenten Ikke endre elektrisk mekanisk eller f...

Page 83: ...Aside 8 Bore et hull i undertaket som vist i Fig 2 for hulldimensjonene se de tekniske spesi ikasjonene angitt p de f rste sidene i heftet Dersom forsterkningsproiler anordnes i gipsplatene hold en m...

Page 84: ...r r CT EKSTRAUTSTYR Transport r settet for rektangul re r r CT muliggj r forbindelsen gjen nom egnede r r med rektangul rt snitt av ventilatorhetten med en jern plassert motorenhet under tak URS elle...

Page 85: ...isplayet Den nye koden annullerer og erstatter den forrige overf ringskoden lagret i fabrikken Til slutt kobles ventilatorhetten til str mnettet mens man sjekker at motor og lys er sl tt av 2 TILSLUTN...

Page 86: ...ut fuk tet med n ytralt vaskemiddel eller r dsprit Fullf re rengj ringen med en grundig skylling og t rking med en myk klut RENGJ RING AV VENTILATORHETTE I VERSJON UTF RT I HVIT ST LFINISH Rengj ring...

Page 87: ...NOTE NOTES...
Page 88: ...FALMEC S p A 31029 VITTORIO VENETO Treviso ITALY Zona Industriale Via dell Artigianato 42 www falmec com Cod 110031004 ED 00 2016 Codice Code Matricola Serial Number...

Reviews: