P.9
With the software and driver loaded, your computer rebooted and the
ViewCatcher connected to your PC, you are now ready to run the Ulead
Photo Express software to download and share images.
Ulead Photo Express allows you to capture, print, and e-mail images,
and create custom cards, messages, and greetings. You will find the
ViewCatcher camera listed asTheCamera90 within the software program.
Refer to the manual loaded on your hard drive(Start/Programs/Ulead
Photo Express) and the on screen Help menu for more information about
the program.
NOTE:
For best image viewing, set your PC monitor to 16-bit or 24-bit color.
Ulead Photo Express is a proprietary program, and may not be sold,
licensed or distributed without the express written consent of Ulead.
For more information about Ulead Photo Express you may visit the
Ulead website at www.ulead.com/pe.
7-4.Click the OK button in the next window.
7-5.Windows again asks for the installation disk. Click the OK Button.
7-6.Windows is now looking for another system file. Repeat steps 2-4.
7-7.Windows is now looking for an initialization file(filename.ini).
Repeat steps 2-4.
7-3.If necessary, navigate to your CD driver, open the Driver folder and
then click the open button.(Please notice that Windows may already
be in this folder. The needed files are all located in the D:\Driver
folder. Most CD drives are assigned as drive D. Please substitute
your CD driver letter for D as appropriate for your CD driver.)
P.4
4. How To Use Your Camera
Attention!!:
- Remove the batteries when not using the camera.
Failure to do so will result in losing pictures and dead battery after
several days.
- When batteries are removed, memory of pictures can maintain for
90 seconds. Batteries must be replaced within 90 seconds to avoid
losing pictures. Be sure the ViewCatcher is OFF before charging
the batteries.
Inserting Batteries
Lift the battery compartment lid Fig. 1 and insert two AAA size
batteries.
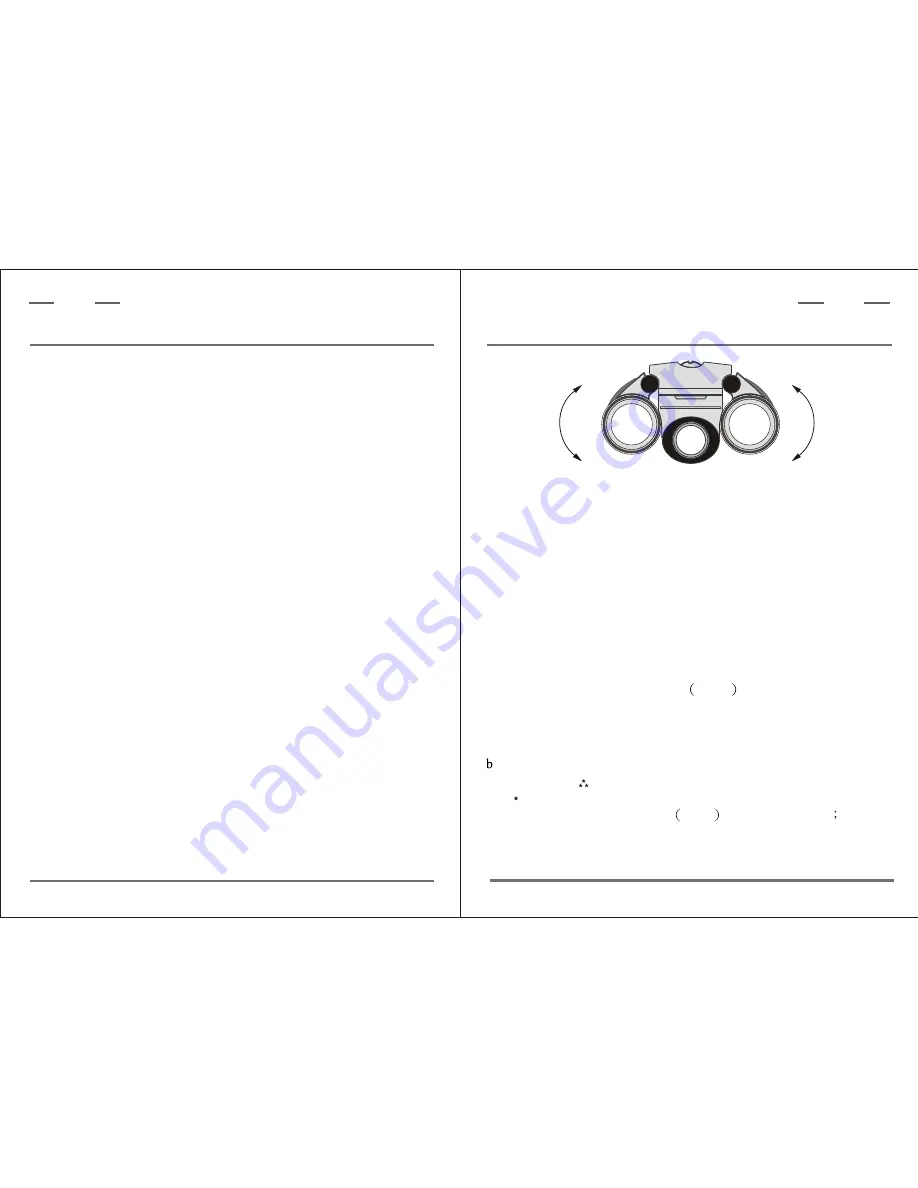
Fig.2:Adjustment of interpupillary Distance (IPD).
Taking Pictures
a. Press the power/ mode button to turn on the camera.
. Select a picture resolution mode by pressing the power/mode button,
to show the " " screen for 640x480 high resolution mode and the
" " screen for 320x240 resolution mode.
Use the shutter/ select button Fig.1
to select a mode
a beep
will sound to confirm the selection. The mode selected will show on
the LCD. See "Digital Camera Modes" for more information.
ViewCatcher
D i g i t a l
ViewCatcher
D i g i t a l


