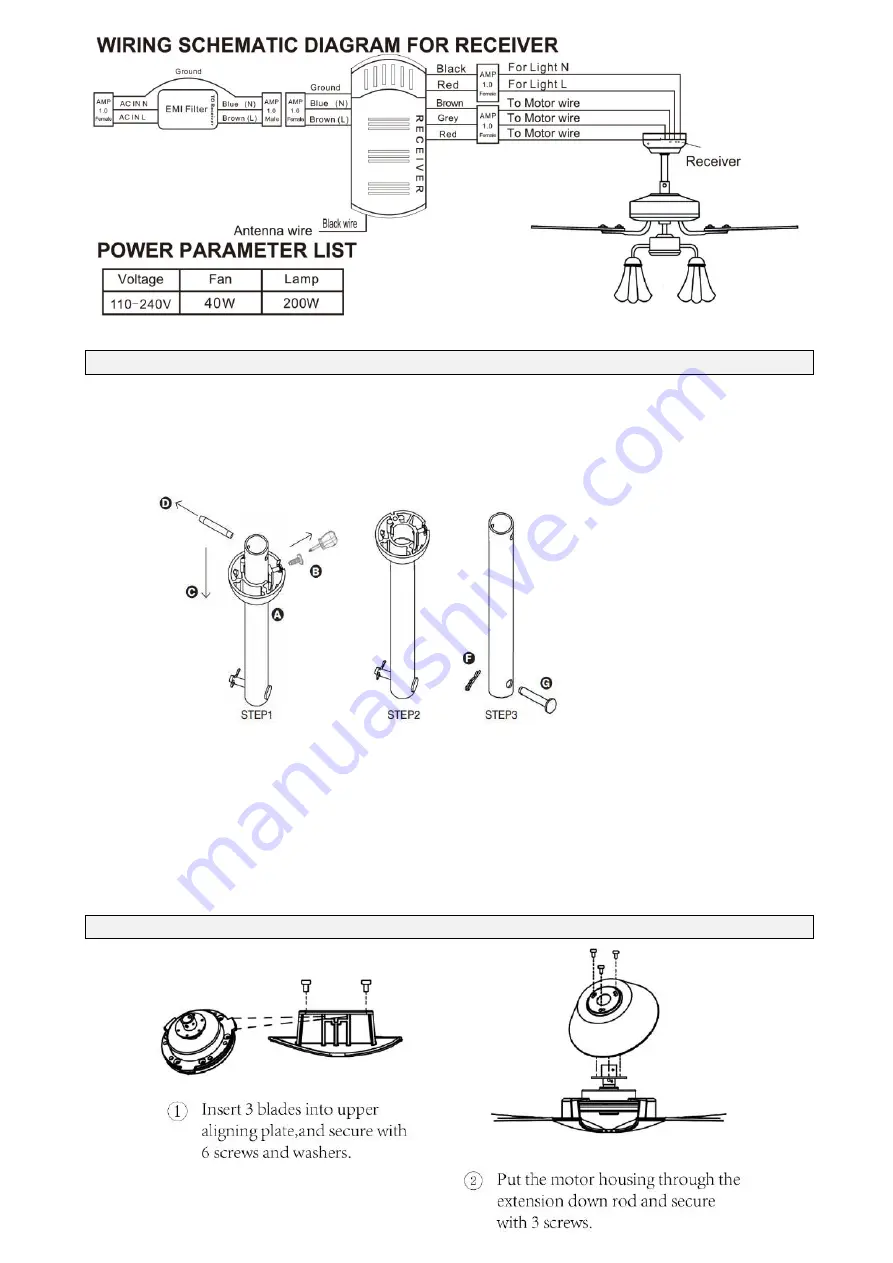
DISASSEMBLY OF ROD AND BALL
STEP 1: From one end of the downrod (A), unscrew the holding screw (B), slide the ball down (C) remove the
ball-pin (D).
STEP 2: Slide the ball up and totally off the downrod. Keep all pieces to reassemble later.
STEP 3: From the other end of the downrod , remove the cotter-pin (F), and slide out the cross-pin (G). Again,
keep all pieces for reassembly later.
STEP 4: Feed the main motor wire plug up through the inside of the downrod (A) then insert the downrod into
the motor bush (I). Cross screws may need to be loosened.
STEP 5: Gently push the cross-pin (G) through the holes aligned with the base of the motor bush and
downrod. CAUTION: DO NOT force the cross-pin, gently wiggle and rotate it until it glides through both holes.
STEP 6: Replace the cotter-pin (F) on the other side of the cross-pin to secure the downrod to the motor
bush.
STEP 7: Tighten up both cross screws (J) to make the downrod rigid in the motor bush.
INSTALLATION STEPS


