background image

16 

4. ASSEMBLY 

 
WARNING  :  Before  assembling  your  appliance,  carefully  read  the  safety  instructions 
in this manual.


1. Assemble the rear base (8) and the front base (5), making sure that the power cord (6) is 
properly positioned in the center of the two bases. 
 
2. Secure the assembly of the base with the fan by inserting and screwing the screws under 
the base (16). 
 
3. Secure the power cord below the base (15) with the small plastic part. 


5. OPERATING INSTRUCTIONS 


WARNING : Before using your appliance, carefully read the safety instructions in this 
manual.


                 Control panel overview   

                              Remote control overview 


Plug  in  the  power  cord. Then  using  the  control  panel  or  remote  control  (requires  2  AAA 
batteries, see section REPLACING THE BATTERIES for more information) : 
 

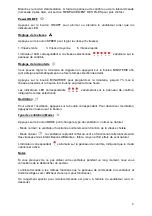
Power ON/OFF


Press the ON/OFF button to turn on or turn off your fan. 
 

Speed setting


Press the SPEED button to adjust the speed (5 speeds) : 
 
1. Low speed                 3. Medium speed             5. High speed 
    
The corresponding LED                         on the control panel to the speed selected will light 
up. 
 

Timer


You can set the timer by pressing the TIMER button so that the fan turns off automatically 
after the selected time has been reached. 
 
Press the TIMER button to set the timer, up to 7 hours. 
 
Each time the button is pressed the timer increases by one hour. 
 
The corresponding LED                    on the control panel will light up, indicating the selected 
time. 

Summary of Contents for X01A-DC

Page 1: ...t cette notice avant d utiliser votre appareil et conservez là soigneusement pour référence ultérieure Pour une utilisation correcte et en toute sécurité veillez à bien lire les consignes de sécurité FANELITE thanks you for choosing this product This very innovative and very design product has been designed to ensure maximum comfort and safety Please read this manual carefully before using your ap...

Page 2: ...ppareil Il est conseillé de conserver cette notice dans un lieu sûr pour consultation extérieure Cet appareil est conçu et prévu exclusivement à une utilisation domestique et sur une surface plane et sèche De par sa construction cet appareil n est pas prévu pour une utilisation à l extérieur usage intérieur uniquement Retirez tous les éléments de l emballage et retirez les rubans adhésifs empêchan...

Page 3: ...proximité de l appareil sans surveillance ni des personnes handicapées Ne laissez pas les enfants jouer avec les sachets en polyéthylène ou le film d emballage risque d étouffement Ne laissez jamais d enfants en bas âge des personnes âgées ou malades dans le courant d air de l appareil Conservez l appareil dans un endroit frais et sec hors de la portée des enfants personnes âgées et handicapés Pou...

Page 4: ...it pas être utilisé dans des emplacements où la présence de vapeurs inflammables ou de poussières explosives est probable Inspectez rigoureusement l appareil et ne l utilisez pas s il est endommagé ou si vous voyez une quelconque détérioration N utilisez pas cet appareil s il présente un dysfonctionnement ou si son cordon d alimentation ou sa fiche est endommagé N utilisez pas cet appareil si ses ...

Page 5: ... Enlevez les piles de l appareil avant de jeter celui ci lorsqu il n est plus fonctionnel ou durant de longues périodes d inutilisation N essayez jamais d ouvrir les piles Les piles ne doivent pas être exposées à une chaleur excessive Vérifiez que le panneau du compartiment des piles est correctement fermé Danger d explosion si la pile n est pas remplacée correctement Remplacez les piles uniquemen...

Page 6: ...é ou aux normes techniques ou de sécurité en vigueur dans le pays où il est utilisé Non respect des consignes précautions de sécurité et instructions stipulées dans la notice d utilisation Un cas de force majeure sinistre incendie inondation etc foudre etc Une modification ou réparation du produit non effectuée par un professionnel qualifié Utilisation de pièces et accessoires non compatible avec ...

Page 7: ...d alimentation 6 dans le passage prévu au centre des deux bases 2 Assemblez la base et le ventilateur en insérant et en vissant les vis sous la base 16 3 Placez le cordon d alimentation dans son emplacement 15 et fixez le à l aide du petit crochet prévu à cet effet 5 UTILISATION ATTENTION Avant d utiliser votre appareil lisez scrupuleusement les consignes de sécurité présentes dans cette notice Ap...

Page 8: ...ants s allumeront sur le panneau de contrôle indiquant le temps sélectionné Oscillation Pour activer l oscillation appuyez sur le bouton correspondant Pour désactiver l oscillation appuyez de nouveau sur le bouton Type de ventilation Mode Appuyez sur le bouton MODE pour change le type de ventilation normal ou naturel Mode normal le ventilateur fonctionne normalement en fonction de la vitesse chois...

Page 9: ... sécurité présentes dans cette notice Nous vous recommandons de maintenir votre appareil propre et de le nettoyer au minimum une fois par mois Il est recommandé de vérifier périodiquement l état du cordon d alimentation Son remplacement requiert le cas échéant l emploi d un outil spécial s adresser à un centre après vente agréé même pour les réparations éventuelles En cas de longues périodes d inu...

Page 10: ... l emballage vous indique cela Les matériaux sont recyclables conformément à leur marquage Vous apporterez une large contribution à la protection de l environnement par le biais du recyclage de la réutilisation matérielle ou par les autres formes de réutilisation des appareils usagés Veuillez vous adresser à votre municipalité pour connaître la déchetterie compétente 10 INFORMATION COMPLEMENTAIRE ...

Page 11: ...g your appliance It is advisable to keep this manual in a safe place for external consultation This appliance is designed and intended exclusively for domestic use and on a flat and dry surface Due to its construction this device is not intended for outdoor use indoor use only Remove all items from the package and remove the adhesive tapes preventing operation of the appliance before use Assemble ...

Page 12: ...sons with disabilities Never leave children play with polythene bags or wrapping film risk of choking Never leave infants elderly or sick people in the airflow of the appliance Keep the appliance in a cool dry place out of the reach of children the elderly and the disabled For safety reasons never leave the appliance unattended while it is working If the power cable is damaged it must be replaced ...

Page 13: ... see any deterioration Do not use the appliance if it malfunctions or if its power cord or plug is damaged Do not use the appliance if its blades protective grilles power cord or plug are damaged if the fan is not working properly if it has been dropped or if it has been damaged in any other way Contact an authorized service center to have the appliance serviced and repaired In the event of abnorm...

Page 14: ...bring used batteries to a dedicated recycling center where they will be treated in an environmentally friendly manner Any intervention on the appliance by an unqualified person is prohibited 2 GUARANTEE Contact your distributor to find out its guarantee terms All FANELITE appliances are guaranteed against manufacturing and parts defects insofar as they are working under normal operating conditions...

Page 15: ...th the product or defective Immediate or delayed damages resulting from improper handling during transport mishandling falling shock contact with water sand or any other substance etc Improper treatment of the product due to inappropriate environment poor aeration exposure to moisture or strong heat vibration non adapted power supply surge etc Whether with respect to the purchaser installer or any...

Page 16: ...control overview Plug in the power cord Then using the control panel or remote control requires 2 AAA batteries see section REPLACING THE BATTERIES for more information Power ON OFF Press the ON OFF button to turn on or turn off your fan Speed setting Press the SPEED button to adjust the speed 5 speeds 1 Low speed 3 Medium speed 5 High speed The corresponding LED on the control panel to the speed ...

Page 17: ...vated Notes If you are not going to use your fan for a long time we advise you to disconnect the appliance from the AC power The remote control has the same functions than the control panel of the fan and must be directed to the fan s display to operate There is a special storage for the remote control at the back of the fan see below 6 REPLACING THE BATTERIES WARNING Before replacing the batterie...

Page 18: ...kg Power 25 Watts Height 44 in 110 cm Number of speeds 5 9 ENVIRONMENT PROTECTION Instructions on environment protection Do not dispose of this product in the usual household garbage at the end of its life cycle hand it over a collection point for the recycling of electrical and electronic appliances The symbol on the product the instructions for use or the packing will inform about the methods of...

Page 19: ...19 ...

Page 20: ...20 www fanelite com ...

Reviews: