


30
8.
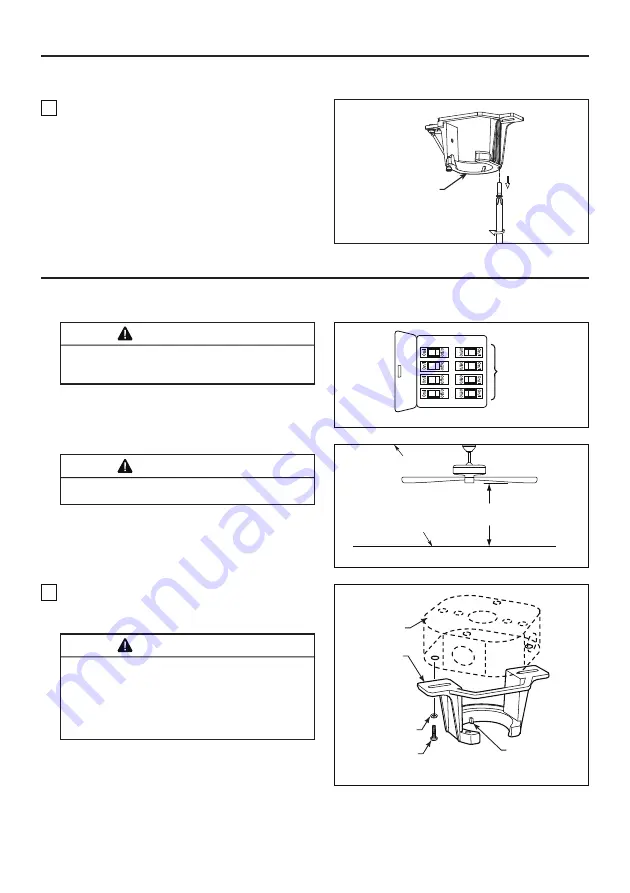
Extraiga una de los tornillos de hombro en el
soporte del gancho y guarde los tornillos para pasos
posteriores. Afloje el segundo tornillo de hombro sin
extraiga completamente. (Figura 8)
Cómo ensamblar el ventilador de techo (cont.)
Figura 8
Unidad del soporte
de suspensión
Cómo colgar el ventilador de techo
1.
Fije bien la abrazadera para colgar a la caja de
salida (no se incluye) con los tornillos y las arandelas
provistas con la caja de salida. (Figura 3)
NOTA:
Si no está seguro de si la caja de salida tiene
conexión a tierra, pida consejo a un electricista
certificado, ya que debe tener conexión a tierra para
un funcionamiento seguro.
Figura 1
Figura 2
Figura 3
ADVERTENCIA
Para evitar una posible descarga eléctrica, asegúrese
de cortar la alimentación eléctrica de la caja de fusibles
principal antes de colgar el ventilador. (Figura 1)
ADVERTENCIA
La caja de salida debe estar bien asegurada. La
abrazadera para colgar debe estar bien asentada contra
la caja de salida. Si la caja de salida está empotrada,
retire el panel hasta que la abrazadera haga contacto
con la caja. Si la abrazadera y/o la caja de salida no
están bien aseguradas, el ventilador podría tambalearse
o caerse.
ADVERTENCIA
Debe colgar el ventilador a una distancia mínima de
2,13 m desde las aspas hasta el piso. (Figura 2)
Principal Caja
De Fusibles
EI Techo
EI Piso
Caja de salida
Abrazadera
para colgar
Arandela Plana
Lengüeta
Tornillos (2)
suministrados con
la caja de salida
No
menos de 2,13 m


