11
How to Assemble Your Ceiling Fan Blades and Cap (continued)
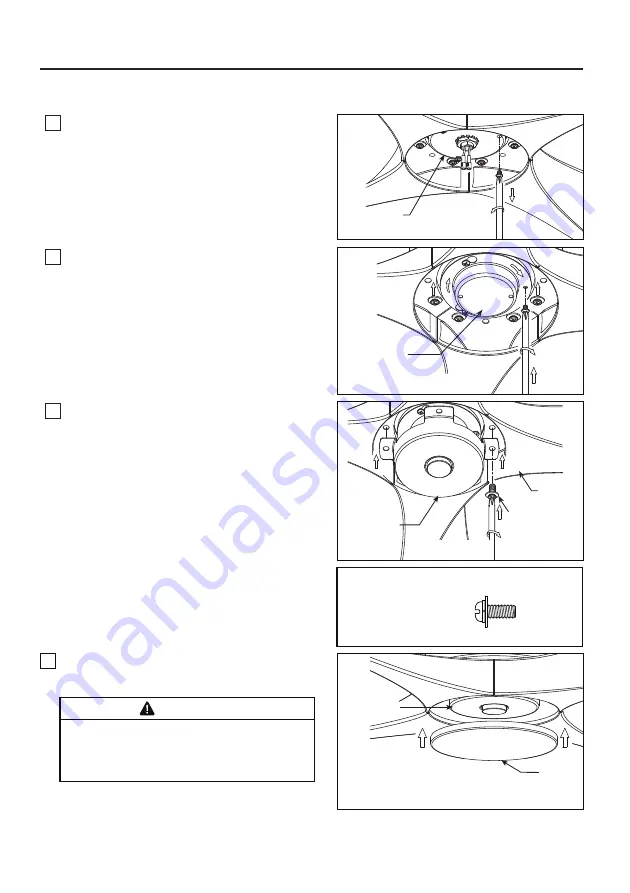
2.
Remove one of the three screws in the support
bracket at the bottom of the motor assembly. Retain
the screw for later and slightly loosen the remaining
two screws. (Figure 2)
Figure 5
Steel Cap
Figure 4
Figure 2
Figure 3
Light Kit
Wire Cover
Motor Assembly
Switch Housing
Cover
3.
Assemble the light kit wire cover to the motor
assembly using the two key slots. Replace the
removed screw and secure all three screws.
(Figure 3)
4.
Assemble the switch housing cover to the bottom
of the blade using the
1/4
˝
-20
pan head screw with
lock washer/flat washer from the hardware bag.
(Figure 4)
Blade
5.
Attach the steel cap to the switch housing cover,
which is held in place by a magnet. (Figure 5)
WARNING
To avoid injury to you hand, please be careful when
installing the steel cap to magnet on the switch housing
cover as the strength of the magnet will quickly attract
the cap, causing it to snap down, possibly pinching or
crushing your hand.
Switch Housing
Cover
1/4″-20
Pan Head Screw
With Lock Washer/
Flat Washer
HARDWARE USED:
X 4
1/4″-20 Pan Head Screw
With Lock Washer/
Flat Washerr


