
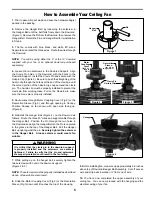
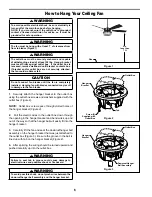
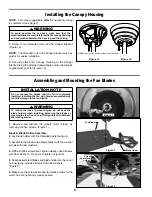

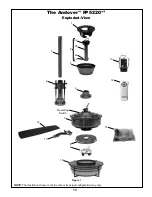


Figure 1
8
Assembling and Mounting the Fan Blades
1.
Remove and discard the (steel) motor “stops” by
removing the five screws. (Figure 1)
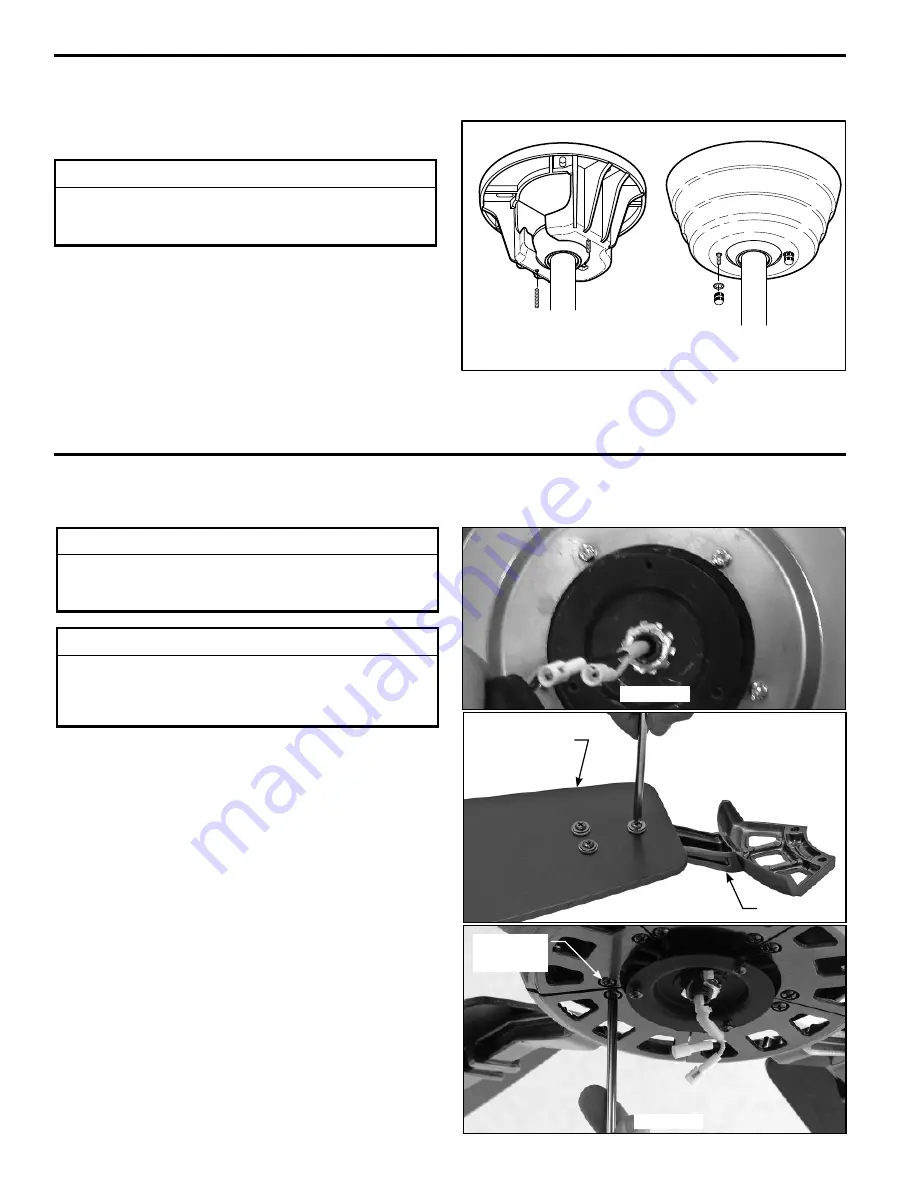
Blade & Blade Holder Assembly:
2.
Lay blade holder with the threaded posts facing up.
3.
Assemble the blade to the blade holder with the washer
screws with fiber washers.
4.
With a Phillips screwdriver, tighten washer-head screws
with fiber washers. Do not over-tighten. (Figure 2)
5.
Attach assembled blades and blade holders to the motor
hub using the provided screws with lock washers.
(Figure 3)
6.
Make sure the screws securing the blade holders to the
motor hub are tight and properly seated.
Figure 3
Fan Blade
Installing the Canopy Housing
1.
Screw in two threaded rods into the Hanger Bracket
(Figure 1a).
NOTE:
The threaded rods in the hanger bracket serve as
guides for easier installation.
2.
Securely attach the Canopy Housing to the Hanger
Bracket using the external lockwashers and knurled knobs
supplied with your fan (Figure 1b).
Figure 1a
Figure 1b
NOTE:
Supply wires and fan wires omitted for clarity.
NOTE:
This step is applicable
after
the necessary wiring
is completed. (see page 7)
Screw
(2 per blade
holder)
Figure 2
Blade Holder
▲
WARNING
To avoid possible fire or shock, make sure that the
electrical wires are completely inside the canopy housing
and not pinched between the housing and the ceiling.
INSTALLATION NOTE
Do not connect fan blades until the fan is completely
installed. Installing the fan with blades assembled may
result in damage to the fan blades.
▲
WARNING
To reduce the risk of personal injury, do not bend the
blade holders when installing, balancing the blades or
cleaning the fan. Do not insert foreign objects in between
the rotating blades.
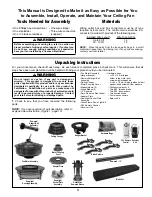
Summary of Contents for Andover FP5220 Series
Page 15: ......


