background image

4

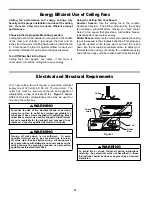
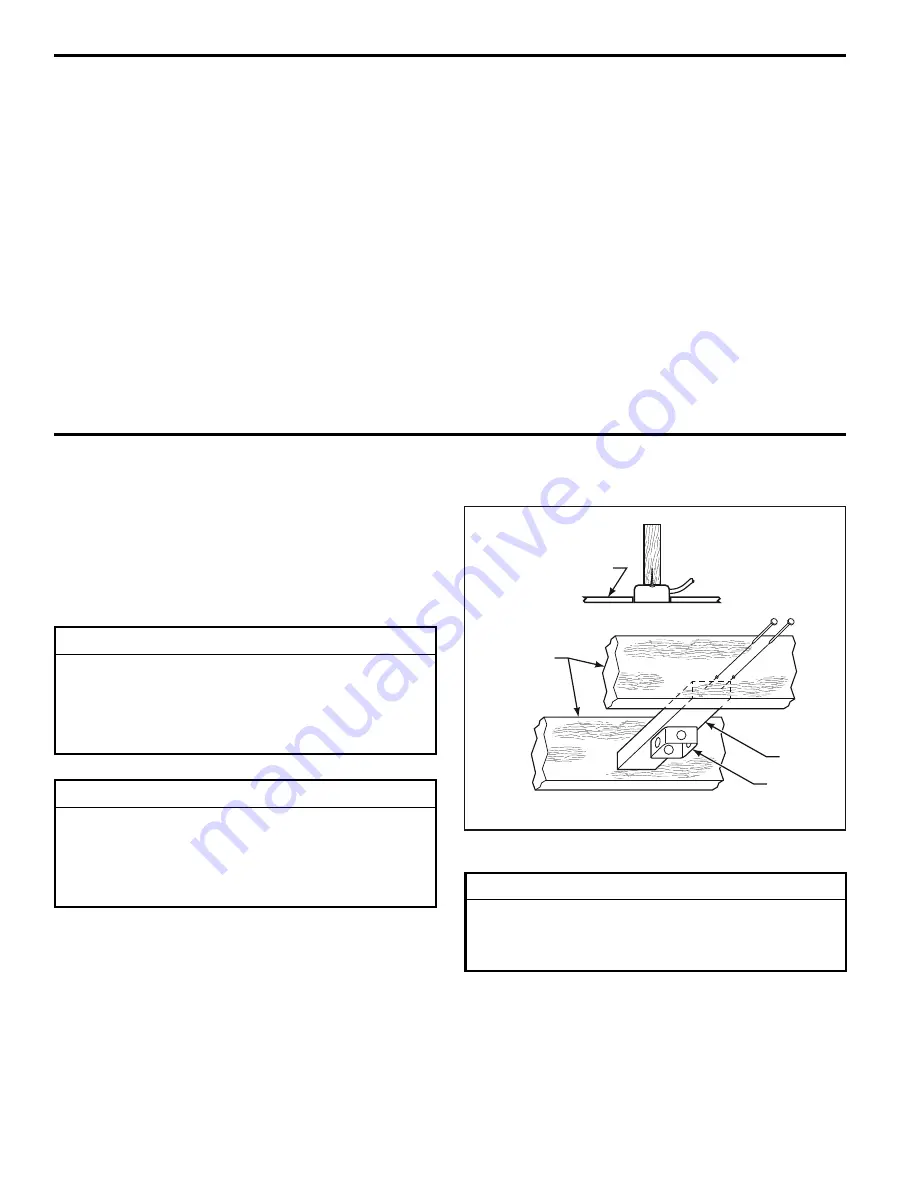
Your new ceiling fan will require a grounded electrical 
supply line of 120 volts AC, 60 Hz, 15 amp circuit.  The 
outlet box must be securely anchored and capable of 
withstanding a load of at least 50 lbs.  

Figure 1

 depicts 

different structural configurations that may be used for 
mounting the outlet box.

Ceiling

Ceiling

Joists

Figure 1

WARNING

To avoid fire or shock, follow all wiring instructions 

carefully.  Any electrical work not described in these 

instructions should be done or approved by a licensed 

electrician.

WARNING

Turning off wall switch is not sufficient.  To avoid 

possible electrical shock, be sure electricity is turned 

off at the main fuse box before wiring.  All wiring must 

be in accordance with National and Local codes and the 

ceiling fan must be properly grounded as a precaution 

against possible electrical shock.

WARNING

To reduce the risk of fire, electrical shock, or personal 

injury, mount fan to outlet box marked acceptable for 

fan support. Use screws supplied with outlet box.  Most 

outlet boxes commonly used for support of light fixtures 

are not acceptable for fan support and may need to be 

replaced.  Consult a qualified electrician if in doubt.

Electrical and Structural Requirements

Energy Ef

fi

 cient Use of Ceiling Fans

Ceiling fan performance and energy savings rely 
heavily on the proper installation and use of the ceiling 
fan.  Here are a few tips to ensure efficient product 
performance.

Choosing the Appropriate Mounting Location

Ceiling fans should be installed, or mounted, in the middle 
of the room and at least 7 feet above the floor and 18 
inches from the walls. If ceiling height allows, install the fan 
8 - 9 feet above the floor for optimal airflow. Consult your 
Fanimation Retailer for optional mounting accessories.

Turn Off When Not in the Room

Ceiling fans cool people, not rooms. If the room is 
unoccupied, turn off the ceiling fan to save energy.

Using the Ceiling Fan Year Round
Summer Season:

 Use the ceiling fan in the counter-

clockwise direction.  The airflow produced by the ceiling 
fan creates a wind-chill effect, making you “feel” cooler. 
Select a fan speed that provides a comfortable breeze, 
lower speeds consume less energy.

Winter Season:

 Reverse the motor and operate the ceiling 

fan at low speed in the clockwise direction. This produces 
a gentle updraft, which forces warm air near the ceiling 
down into the occupied space.Remember to adjust your 
thermostat when using your ceiling fan - additional energy 
and dollar savings could be realized with this simple step!

2

˝

 x 4

˝

Outlet

Box

Summary of Contents for Involution FP4520 Series

Page 1: ...OWNER S MANUAL READ AND SAVE THESE INSTRUCTIONS Model No FP4520 The Involution Ceiling Fan Net Weight 9 07 kg 20 lbs...

Page 2: ...tain amount of wobble is normal and should not be considered a problem or a defect LIMITED LIFETIME WARRANTY Extends to the original purchaser of a Fanimation Fan Important Safety Instructions WARNING...

Page 3: ...ver Assembly Wood Blades 2 CW40 Wall Control Adapter Cup Assembly Hardware Bags CW40 Wall Control Fan Motor Assembly Lower Cover Assembly Downrod Hanger Ball Assembly Hanger Bracket One Phillips head...

Page 4: ...n doubt Electrical and Structural Requirements Energy Efficient Use of Ceiling Fans Ceiling fan performance and energy savings rely heavily on the proper installation and use of the ceiling fan Here a...

Page 5: ...Cover on fan shown with open side facing up Figure 3 5 Reinstall the Hanger Ball Figure 1 on the Downrod as follows Route the three 80 wires and cable through the Hanger Ball Position the Pin through...

Page 6: ...Figure 2 Outlet Box Hanger Bracket Outlet Box Hanger Bracket Screw 2 Supplied with Outlet Box Tab Downrod Hanger Ball Assembly WARNING Failure to seat tab in groove could cause damage to electrical w...

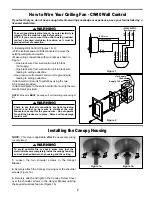
Page 7: ...pleted WARNING To avoid possible fire or shock make sure that the electrical wires are completely inside the canopy housing and not pinched between the housing and the ceiling 1 Loosen the two shoulde...

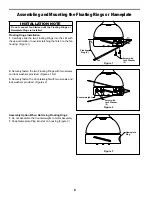
Page 8: ...ashers provided Figures 1 2 3 Securely fasten the Counterweight with two screws and lock washers provided Figures 2 Assembly Option When Not Using Floating Rings 1 Do not assemble the Counterweight to...

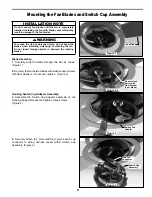
Page 9: ...he color matching 9 pin switch cup connector to wiring harness socket within Switch Cup assembly Figure 4 Figure 3 Fan Blade Switch Cup Adapter Switch Cup Assembly Main Fan Connector Figure 2 Washer H...

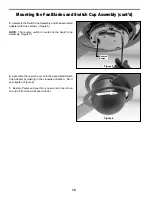
Page 10: ...cated on the Switch Cup Assembly Figure 5 6 Assemble the Lower Cover onto the assembled Switch Cup Adapter by twisting in the clockwise direction Don t over tighten Figure 6 7 Restore Power and your f...

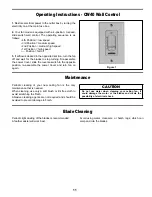
Page 11: ...box by turning the electricity on at the main fuse box 2 Your fan model is equipped with a 4 position 3 speed slide switch wall control The operating sequence is as follows 4th Position low speed 3rd...

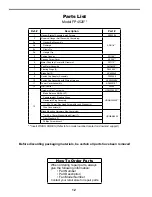
Page 12: ...bly P452005 10 Switch Cup Assembly with Wiring Harness AP452006BL 11 Lower Cover Assembly AP452070 12 Wall Control CW40 13 Hardware Bag Containing HDWFP4520 Blade Balance Kit BALKT HDWHW4520 Counterwe...

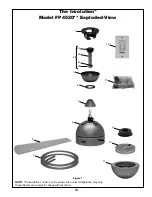
Page 13: ...olution Model FP4520 Exploded View 1 3 4 2a 2b 2c 2d 2 NOTE The illustration shown is not to scale or its actual configuration may vary Product parts are subject to change without notice Figure 1 7 11...

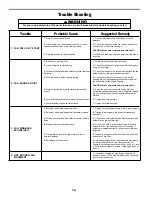
Page 14: ...other or against the interior wall of the switch housing CAUTION Make sure main power is turned off 5 Some fan motors are sensitive to signals from solid state variable speed controls Solid state con...

Page 15: ......

Page 16: ...Copyright 2008 Fanimation 2008 01 10983 Bennett Parkway Zionsville IN 46077 888 567 2055 FAX 866 482 5215 Outside U S call 317 733 4113 Visit Our Website www fanimation com...

Reviews: