background image

35

Modelo FPS8553

Ilustración del despiece

NOTA: La ilustración que se muestra no está hecha a escala y su c guración real y/o terminación puede variar.

1

2

3

10

9

8

4

5

6

7

10

10

™  

Kwartet

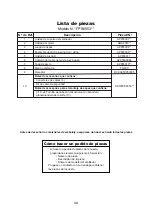
Summary of Contents for KWARTET FPS8553 Series

Page 1: ... EST Monday Friday Date Code For best and quickest service please provide date code You can find the date code on the carton hand held remote inside of the battery compartment receiver or ceiling bracket Purchase Date ATTACH YOUR RECEIPT HERE AND REGISTER YOUR FAN AT FANIMATION COM READ AND SAVE THESE INSTRUCTIONS MODEL FPS8553 Español p 19 TM CEILING FAN KWARTET ...

Page 2: ...ductor of a fan is identified for equipment grounding then it should be connected to an equipment grounding conductor CAUTION Changes or modifications not expressly approved by the party responsible for compliance could void the user s authority to operate the equipment WARNING TO REDUCE THE RISK OF ELECTRIC SHOCK THIS FAN MUST BE INSTALLED WITH A GENERAL USE ISOLATING WALL CONTROL SWITCH WARNING ...

Page 3: ...an or Fanimation 7 Fanimation reserves the right to modify or discontinue any product at any time and may substitute any part under this warranty 8 Under no circumstances may a fan be returned without prior authorization from Fanimation The receipt of purchase must accompany authorized returns and must be sent freight prepaid to Fanimation The fan to be returned must be properly packed to avoid da...

Page 4: ...rrupted 4 Tools Needed for Assembly Not Included One Phillips head screwdriver One blade screwdriver One stepladder One wire stripper 1 Check to see that you have received the following parts NOTE If you are uncertain of part description refer to exploded view illustration WARNING Do not install or use fan if any part is damaged or missing This product is designed to use only those parts supplied ...

Page 5: ...stall the fan 8 9 feet from floor to the blade for optimal airflow Consult your Fanimation Retailer for optional mounting accessories Turn Off When Not in the Room Ceiling fans cool people not rooms If the room is unoccupied turn off the ceiling fan to save energy Your new ceiling fan will require a grounded electrical supply line of 120 volts AC 60 HZ 15 Amp Circuit Electrical code requires use o...

Page 6: ...d takes the place of wooden blocking To avoid fire or shock follow all wiring instructions carefully Any electrical work not described in these instructions should be done or approved by a licensed electrician Figure 3 CEILING JOIST CEILING OUTLET BOX To reduce the risk of fire electric shock or personal injury mount to outlet box marked acceptable for fan support of 15 9 kg 35 lbs or less and use...

Page 7: ...tain for later Figure 4 Outlet Box Ceiling Bracket Assembly Figure 5 Wood Member 2 x 4 Approx Ceiling Joist Ceiling Outlet Box Ceiling Support Cable Ceiling Bracket NOTE Supply wires and fan wires omitted for clarity NOTE Supply wires and fan wires omitted for clarity NOTE Supply wires and fan wires omitted for clarity Figure 4 Figure 2 Floor No Less Than 7 Feet Ceiling 3 Using the 3 8 x 2 lag bol...

Page 8: ... Green Wire Ground from Supply Black Wire from Receiver Black Wire from Supply White Wire from Motor Green Wire Ground from Motor Blue Wire from Motor NOTE Supply wires and fan wires omitted for clarity Ceiling Bracket Assembly 5 Hang the motor assembly from the ceiling bracket assembly using the hook on the ceiling bracket assembly and the cable loop from the motor assembly as shown Figure 6 Figu...

Page 9: ...safety cable Figure 9 NOTE Supply wires and fan wires omitted for clarity Motor Assembly Safety Cable Ceiling Support Cable Attach the safety cable to ceiling support cable HARDWARE USED Ceiling Support Cable Clamp W Screw x 1 1 Align the wide tab of motor assembly to the wide notch of ceiling bracket Carefully secure the motor housing onto the mounting slots on ceiling bracket by twisting in a cl...

Page 10: ...balancing or cleaning the fan Do not insert foreign objects in between the rotating blades 3 16 24 Truss Head Screw With Spring Washer Flat Washer X 12 HARDWARE USED 2 Assemble the light kit wire cover to the motor assembly using the two key slots Replace the removed screw and secure all three screws Figure 2 3 Assemble the steel cap to the motor assembly by twisting in a clockwise direction Figur...

Page 11: ...our light kit Figure 8 Light Kit Light Kit LED Assembly CAUTION The light source is designed for this specific application and can overheat if serviced by untrained personnel If any servicing is required the product should be returned to an authorized service facility for examination or repair Figure 5 Glass 8 Secure the glass to light kit by twisting in a clockwise direction Twist the glass gradu...

Page 12: ... this fan with a variable Rheostat wall controller or dimmer switch Doing so could result in damage to the ceiling fan s remote control unit 12V 23A Battery 1 pcs Figure 3 3 To make fan operational install 23A 12V battery included in hand held remote transmitter with fan power off Then follow the remote code setting process If not used for long periods of time remove battery to prevent damage to t...

Page 13: ...5 Indicator LED light fan speed button Turns fan off Fan Speed Turns fan on and turns speed up Turns fan on and turns speed down Light button Turn ON OFF the light Press to turn on the light and hold to dim or brighten light to desired level then release Press this button to switch color temperature when the light is on Sleep Timer Tap and the fan and light will turn off after 1 hour Tap and the f...

Page 14: ... are snug not over tight For your own safety turn off power at fuse box or circuit breaker before trouble shooting your fan 1 FAN WILL NOT START 2 FAN SOUNDS NOISY 3 FAN WOBBLES EXCESSIVELY 1 Fuse or circuit breaker blown 2 Loose power line connections to the fan or loose switch wire connections in the switch housing 3 Dead battery in remote control 4 Make sure reverse switch position is all the w...

Page 15: ...epair parts 1 2 3 4 5 7 6 AP855301 AMA8553 AP855304 AP855308 AP855311 AP855309BL AP855310 TR800 RCCA050050005 8 Light Kit Wire Cover Assembly Steel Cap Assembly Hand held Remote Receiver 9 10 HDWFPS8553 Light Kit Glass Assembly LED Assembly Wire Connector 4 Safety Cable Kit Hardware Bag Containing Blade Mounting Hardware Bag Containing Blade Set Motor Assembly Ref Description Part Ceiling Bracket ...

Page 16: ...OTE The illustration shown is not to scale or its actual configuration may vary Product parts are subject to change without notice Model FPS8553 Exploded View Illustration 1 2 3 10 9 8 4 5 6 7 10 10 Kwartet ...

Page 17: ......

Page 18: ...2020 12 V 01 Copyright 2020 Fanimation 10983 Bennett Parkway Zionsville IN 46077 Phone 888 567 2055 Outside U S 317 733 4113 FAX 866 482 5215 FANIMATION COM ...

Page 19: ... de compra ADJUNTE SU RECIBO AQUÍ Y REGISTRE SU VENTILADOR EN FANIMATION COM LEA Y GUARDE ESTAS INSTRUCCIONES Peso neto 7 81 kgs 17 18 lbs Para ofrecer un servicio rápido y de calidad por favor suministre el código de fecha Puede encontrar el código de fecha en el paquete en el mando a distancia dentro del compartimento de las pilas en el receptor o unidad de soporte del ventilador VENTILADOR DE T...

Page 20: ...cto está diseñado para ser usado sólo con las piezas suministradas o los accesorios indicados específicamente para el mismo Si utiliza piezas o accesorios que no están indicados para su uso con este producto podría sufrir lesiones personales o dañar el ventilador ADVERTENCIA Para reducir el riesgo de lesiones personales no doble los soportes de las aspas borde o soporte de aspas al instalar los so...

Page 21: ...o existe ninguna otra garantía expresa o implícita Por la presente Fanimation niega todas las garantías implícitas que incluyen entre otras la comerciabilidad y la aptitud para determinado fin hasta donde la ley lo permita Algunos estados no permiten limitaciones sobre las garantías implícitas Fanimation no se hará responsable por daños accidentales resultantes o especiales derivados del uso o el ...

Page 22: ...1 Tornillo de intervalo 1 AVERTISSEMENT N i nstallez pas et n utilisez pas le ventilateur si l une de ses pièces est endommagée ou manquante Ce produit est conçu pour utiliser uniquement les pièces l accompagnant et ou les accessoires spécifiquement conçus pour ce produit par Fanimation La substitution de pièces ou d accessoires non conçus par Fanimation pour être utilisés avec ce produit peut pro...

Page 23: ... un flujo de aire óptimo Consulte en su tienda minorista de Fanimation para obtener accesorios de montaje opcionales Apague el ventilador cuando no se encuentre en la habitación Los ventiladores son para refrescar a la gente no a las habitaciones Si la habitación está vacía apague el ventilador de techo para ahorrar energía Su nuevo ventilador de techo requiere una línea de suministro eléctrico co...

Page 24: ...lice este ventilador con un controlador variable de pared Rheostat o un regulador de intensidad Si lo hiciera podría dañar la unidad del mando a distancia del ventilador de techo Éteindre l interrupteur mural ne suffit pas Pour éviter tout risque d électrocution assurez vous que l alimentation électrique est coupée au niveau du boîtier à fusibles principal avant d effectuer le câblage Le câblage d...

Page 25: ...ica y los tornillos estén bien asegurados a la estructura armada y que sean capaces de soportar una carga de al menos 15 9 kg 35 lb Si los tornillos no están correctamente colocados el ventilador podría caerse AVERTISSEMENT La boîte de sortie doit être solidement ancrée et acceptable pour supporter un ventilateur de 15 9 kg 35 livres au moins Le support de suspension doit reposer fermement contre ...

Page 26: ... plana Tornillos 2 suministrados con la caja de salida 5 Cuelgue la unidad del motor desde el soporte del techo usando el enganche del soporte del techo y el enganche para el cable desde la unidad del motor tal y como se muestra a continuación Figura 6 6 Asegúrese de que los cables de suministro eléctrico y el cable de conexión a tierra del soporte de suspensión hayan atravesado el unidad de sopor...

Page 27: ...ador hasta que las aspas estén instaladas Podría ocasionar ruidos y daños al motor Vérifiez que tous les raccordements sont bien serrés y compris la mise à la terre et qu aucun fil dénudé n est visible au niveau des capuchons de connexion Ne faites pas fonctionner le ventilateur avant d avoir installé les pales Du bruit et des dommages au moteur pourraient en résulter ADVERTENCIA AVERTISSEMENT x 6...

Page 28: ...e la motor está colocada y alineada con el techo vuelva a colocar el tornillos retirados previamente y asegure los tres tornillos Figura 1 Lengüeta ancha Muesca ancha Figura 1 Motor Unidad de soporte del ventilador Aspas Figura 1 Aditamentos utilizados X 12 Ne raccordez pas les pales du ventilateur tant que le ventilateur n est pas complètement installé L installation du ventilateur avec les pales...

Page 29: ... extraído y fije bien los tres tornillos Figura 2 3 Monte el la tapa de acero en la unidad del motor girándolo en el sentido de las agujas del reloj Figura 3 ubicado en la parte inferior de la unidad del motor Guárdelos para después y afloje levemente los otros dos tornillos Figura 1 Cubierta del cable del kit de iluminación NOTA Si desea instalar el kit de iluminación sáltese este al paso 4 Opció...

Page 30: ... kit de iluminación ATTENTION Pour réduire le risque d électrocution débranchez le circuit d alimentation électrique du ventilateur avant d installer le kit d éclairage 7 Instale la unidad LED en la ensamble del kit de iluminación usandos el tornillo previamente retirado y asegure los tres tronillos Figura 7 ATTENTION La source lumineuse est conçue pour cette application spécifique et peut surchau...

Page 31: ...nes que en el receptor Mueva los interruptores de código hasta colocar elcódigo de selección en la posición arriba o abajo Con un destornillador pequeño o con una lapicera no se incluye deslice firmemente hacia arriba o hacia abajo Figura 4 NOTA Los ajustes de fábricas vienen con todos los interruptores hacia arriba No utilice esta posición NOTA El mando a distancia incluido en este ventilador tie...

Page 32: ...sdel reloj Verano Izquierda Derecha Invierno Luz LED del indicador Velocidad del ventilador Botón Apaga el ventilador Velocidad del ventilado Enciende el ventilador y aumenta la velocidad Enciende el ventilador y disminuye la velocidad Botón de la lámpara Enciende o apaga la luz Pulse el botón enciende la luz y mantenga el regulador para aumentar o disminuir la intensidad de la luz y suéltelo cuan...

Page 33: ...o sólido variables Los controles de estado sólido no son recomendables Escoja un método de control alternativo 4 Ruido del motor provocado por el control de velocidad de estado sólido variable 1 Las aspas no están sujetas al ventilador 1 Asegúrese de que los tornillos que fijan los aspas al buje del motor del ventilador estén bien ajustados 1 Los tornillos que aseguran los aspas al buje del motor ...

Page 34: ...epuesto N de Ref 1 2 3 4 5 7 6 8 Cubierta del cable del kit de iluminación Tapa de acero Mano a distancia Receptor 9 10 Ensamble del kit de iluminación vidrio Unidad de luz LED Conectores de cables 4 Kit de cable de seguridad Bolsa de accesorios que contiene Bolsa de accesorios para el montaje de aspas que contiene Juego de aspas Unidad del motor Descripción Pieza N Unidad de soporte del ventilado...

Page 35: ...35 Modelo FPS8553 Ilustración del despiece NOTA La ilustración que se muestra no está hecha a escala y su c guración real y o terminación puede variar 1 2 3 10 9 8 4 5 6 7 10 10 Kwartet ...

Page 36: ...2020 12 V 01 Copyright 2020 Fanimation 10983 Bennett Parkway Zionsville IN 46077 Llame Sin Cargo al 888 567 2055 Desde fuera de los EE UU llame al 317 733 4113 www fanimation com FAX 866 482 5215 ...

Reviews: