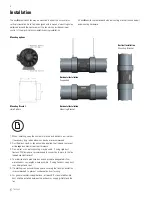
background image

4

fantech

Installation

The prio

Air

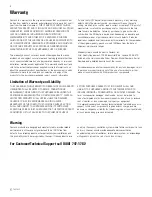
 ventilation fan may be mounted in either the horizontal or 

vertical orientation. Each fan is designed with a series of mounting holes, 
patterned around the center axis of the fan which provides optimum 
control of the electrical box orientation during installation. 

All prio

Air

 units come standard with a mounting bracket (shown below) 

and mounting hardware.

Mounting options

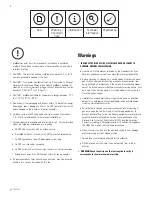
1. When installing, keep the number of elbows and bends to a minimum.  

If necessary, long radius elbows or bends are recommended.

2. Duct Sealant, caulk, or tape should be applied to all seams to prevent 

air leakage and maximize air performance.

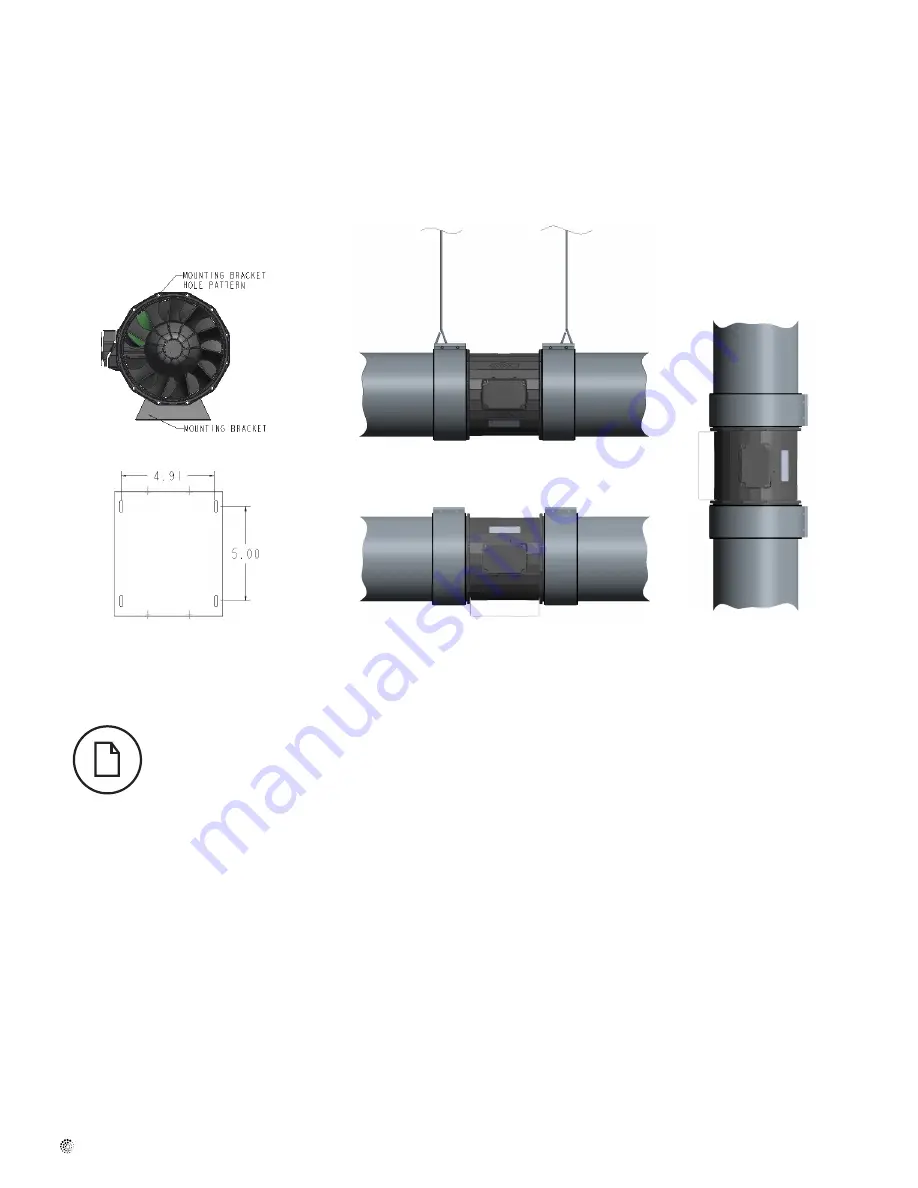
3. Flex, spiral, or snap lock ducting may be used.  If using rigid duct, 

Fantech FC clamps are recommended to connect duct work to the fan 
(see above illustrations).

4. To minimize static pressure losses and promote adequate airflow, 

minimize duct run lengths where possible.  If using flex duct, keep duct 
runs straight and taut.

5. If installing in an unconditioned space, covering the fan with insulation 

is recommended to prevent condensation from forming.

6. For general ventilation applications, at least 8 ft of insulated flexible 

duct shall be installed between the exhaust or supply grille(s) and the 
fan. 

Horizontal Installation

Suspended

Horizontal Installation

Mounting Bracket

Vertical Installation

Mounting Bracket

Mounting Bracket

Hole Pattern

Summary of Contents for prioAir 6

Page 1: ... Date 2015 05 13 United States 10048 Industrial Blvd Lenexa KS 66215 Tel 800 747 1762 Fax 800 487 9915 Canada 50 Kanalflakt Way Bouctouche NB E4S 3M5 Tel 800 565 3548 Fax 877 747 8116 prioAir Inline Duct Fan prioAir 6 prioAir 6 EC prioAir 8 prioAir 8 EC ...

Page 2: ...hazards 8 An appropriate duct termination device roof cap wall cap louvered shutters etc are to be used with this fan Warnings 1 TO REDUCE THE RISK OF FIRE ELECTRICAL SHOCK OR INJURY TO PERSONS OBSERVE THE FOLLOWING a Use this unit in the manner intended by the manufacturer If you have any questions contact your manufacturer s representative b Before servicing or cleaning unit switch power off at ...

Page 3: ... Dimensions Model A B C D E prioAir 6 16 3 16 5 7 8 8 1 4 7 3 8 1 5 8 prioAir 6 EC 16 3 16 5 7 8 8 1 4 7 3 8 1 5 8 prioAir 8 9 11 16 7 7 8 9 3 4 9 1 prioAir 8 EC 9 11 16 7 7 8 9 3 4 9 1 All dimensions in inches ...

Page 4: ... to prevent air leakage and maximize air performance 3 Flex spiral or snap lock ducting may be used If using rigid duct Fantech FC clamps are recommended to connect duct work to the fan see above illustrations 4 To minimize static pressure losses and promote adequate airflow minimize duct run lengths where possible If using flex duct keep duct runs straight and taut 5 If installing in an unconditi...

Page 5: ...rotective Conductor Red 10V Voltage Output 10V 1 1mA Electrically Isolated Yellow 10V PWM Controller Input 0 10V or PWM Electrically Isolated Blue GND GND Connection to the Controller Interface White Tacho Speed Output Open Collector 1 Impulse per revo lution electrically isolated Isink_max 10mA Motor side Control Options Maximum Speed Place Jumper Between Terminals 6 and 7 Adjustable Speed 10V n ...

Page 6: ...d Lenexa KS 66215 Included in the claim should be Order Number Model Numbers Serial Numbers and a detailed description of the issues Purchaser assumes all other responsibility for any loss damage or injury to persons or property arising out of the use of our products either alone or in combination with other products or components THE SOLE AND EXCLUSIVE REMEDY FOR BREACH OF ANY WARRANTY HEREUNDER ...

Page 7: ...7 fantech Notes ...

Page 8: ...Fantech reserves the right to make technical changes For updated documentation please refer to www fantech net Fantech ...

Reviews: