62
62
2
1
2
1
2
1
2
1
2
1
2
1
F1
15A 10A 10A
10A
10A 15A
F2
F3
F4
F5
F6
CHAPTER 15
ELECTRICAL DEVICES
WORKSHOP MANUAL
TL 250
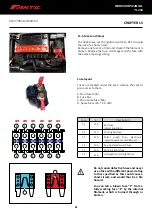
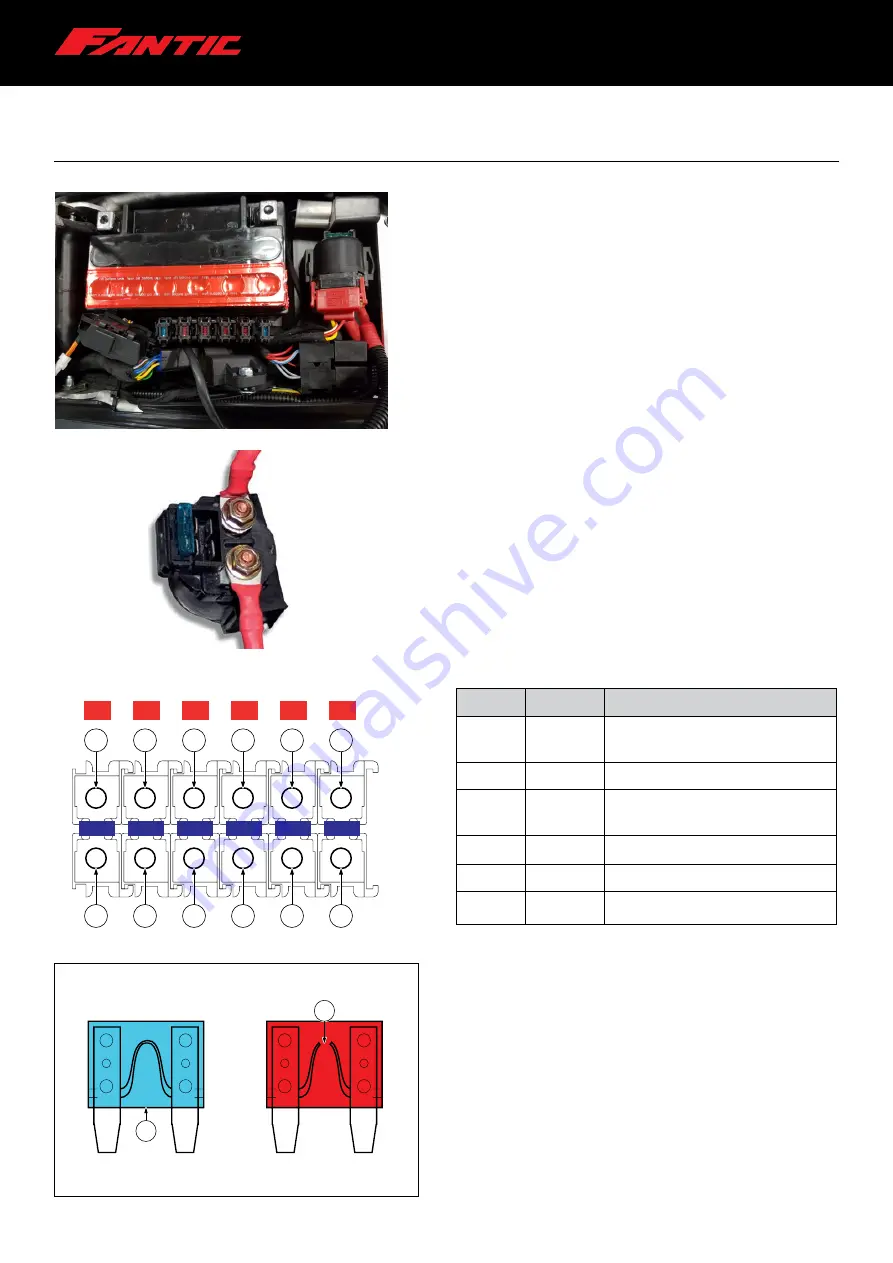
15.6 Fuses and relays
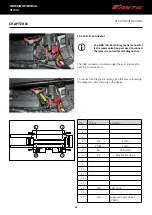
To check fuses, set the ignition switch to OFF to avoid
the risk of a short-circuit.
Remove one fuse at a time and check if the filament is
broken. Replace the fuse, if damaged, with a fuse with
the same amperage rating.
Do not repair defective fuses and never
use a fuse with a different power rating
to that specified as this could cause a
short-circuit, and would thus be a fire
hazard.
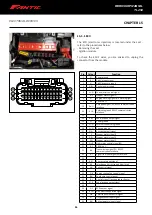
You can tell a blown fuse "F" from a
fully working fuse "E" by the internal
filament, which is burned through or
broken.
Fuse
A
Description
F1
15A
ECU fuse
(direct injection)
F2
10A
Cooling fan fuse
F3
10A
Petrol pump fuse, electronic
injection system and OBD port
F4
10A
Key-operated switch fuse
F5
10A
Running lights fuse
F6
15A
Headlight and tail light fuse
!
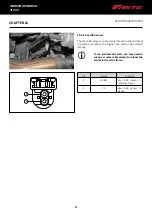
Fuse layout
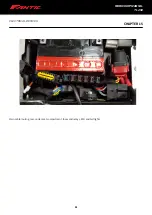
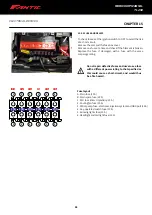
Fuses are located under the seat: remove the seat to
gain access to them.
A. Main fuse (30A)
B. Fuse box
C. Main spare fuse (30A)
D. Spare fuses (2A, 7.5A, 30A)
Summary of Contents for TL 250
Page 1: ...1 WORKSHOP MANUAL E N...
Page 3: ...WORKSHOP MANUAL TL 250...
Page 11: ...11 WORKSHOP MANUAL TL 250...
Page 30: ...30 WORKSHOP MANUAL TL 250 CHAPTER 6 DASHBOARD 39 GENERAL CONTENT AND CONSULTATION ENGLISH...
Page 49: ...49 49 WORKSHOP MANUAL TL 250...
Page 51: ...51 CHAPTER 15 ELECTRICAL DEVICES 51 WORKSHOP MANUAL TL 250...
Page 136: ...136 136 WORKSHOP MANUAL TL 250...


