6
6.2.2
Set Static IP
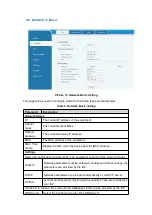
The following describes how to set a static IP address for the device.
IP address: 192.168.10.123
Subnet mask: 255.255.255.0
Device address: 192.168.10.1
Primary DNS address: 8.8.8.8
Secondary DNS address: 114*114*114*114
Step 1. Dial #*50 on the phone, input the static IP address 192*168*10*123 to be set after hearing
"Please input", and press # to end after inputting. After finishing, you can hear the prompt of
successful setting.
Step 2. Dial #*51 on the phone, input the device to be set 192*168*10*1 after hearing "Please input",
press # to end after inputting, and you can hear the prompt of successful setting after finishing;
Step 3. Dial #*52 on the phone, input the DNS 8*8*8*8*114*114*114*114 to be set after hearing
"Please input", and press # to end after inputting, and you can Hear the prompt of successful setting;
Step 4. Dial #*53 on the phone, input the subnet mask to be set 255*255*255*0 after hearing
"Please input", press # to end after inputting, and you can hear the setting successful hint;
Step 5. Dial #*100 on the phone, switch to static mode, and use the static IP address set
6.3 SIP Configurations
A line must be configured properly to be able to provide telephony service. The line configuration is
like a virtualized SIM card. Just like a SIM card on a mobile phone, it stores the service provider and
the account information used for registration and authentication. When the device is applied with the
configuration, it will register the device to the service provider with the server’s address and user’s
authentication as stored in the configurations.
The user can conduct line configuration on the interface of the phone or the webpage, and input the
corresponding information at the registered address, registered user name, registered password
and SIP user, display name and registered port respectively, which are provided by the SIP server
administrator.
WEB interface
:
After logging into the phone page, enter [
Line
] >> [
SIP
] and select
SIP Line
for
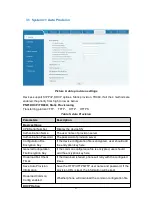
configuration, click apply to complete registration after configuration, as shown below:


