background image

Click on Reboot button.

A pop up window will show up, click on OK button to confirm your action.

You'll have to wait couple of seconds for the configuration to be updated. 

NOTE:

 Do not power

off your phone.

Auto provisioning process will start during phone reboot process, phone will pickup

appropriate configuration file from PBXware. If everything is done as above described, you
should have successfully registered your phone to PBXware. Dial *123 to verify registration.

Retrieved from "http://wiki.bicomsystems.com/Fanvil_H3"

Disclaimers - About Bicom Systems Wiki

Summary of Contents for H3

Page 1: ...troduction 2 Video Tutorial 3 Requirements 3 1 Identifying phone model 3 2 Phone firmware 3 3 DHCP server 3 4 PBXware version 4 Installation 4 1 Power adapter 4 2 Power over Ethernet PoE 4 3 Find the phone IP address 4 4 Reset to factory settings 5 Registering phone 5 1 Manual configuration 5 2 Auto Provisioning Introduction ...

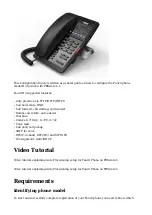
Page 2: ...rn auto answer Dial plan Codecs G 711A U G 729 G 722 Voice mail Call park call pickup SRTP for voice DTMF in band RFC2833 and SIP INFO IP assignment static DHCP Video Tutorial Video tutorial explaining Auto Provisioning setup for Fanvil Phone on PBXware 4 Video tutorial explaining Auto Provisioning setup for Fanvil Phone on PBXware 5 Requirements Identifying phone model To start and successfully c...

Page 3: ...tration interface with your username and password Please note factory default login details are username admin and password admin DHCP server Fully configured and operational DHCP server PBXware version PBXware version 4 1 3 0 In order to find out the PBXware version Login to PBXware Navigate to Settings About On the top of About page is a code similar to this one PBXware Edition Business Release ...

Page 4: ... or press hands free key input 111 button and the ip address will be recited Reset to factory settings This step is not required for brand new out of the box phones however if the phone has been already used then it is a must Open a new browser window and enter your phone IP address in order to access the phone web administration interface login screen Example http 192 168 1 22 Login to phone web ...

Page 5: ...P address in order to access the PBXware web administration login screen Example http 192 168 1 10 Login to PBXware with your e mail address and password UAD settings Navigate to Settings UAD Make sure Fanvil UAD is enabled To check the UAD status click on the edit icon corresponding to your Fanvil phone Make sure Status is set to Active Auto provisioning is set to No and DHCP is set to Yes Click ...

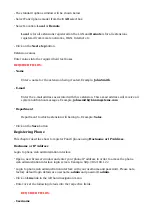
Page 6: ...ion messages Example john smith bicomsystems com Department Department to which extension will belong to Example Sales Click on the Save button Registering Phone This chapter describes how to register Fanvil phone using Hostname or IP Address Hostname or IP Address Login to phone web administration interface Open a new browser window and enter your phone IP address in order to access the phone web...

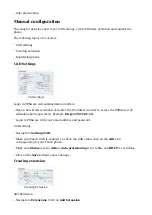
Page 7: ...ed SIP Proxy Server Address Enter the Hostname or IP Address of the PBXware Example for Hostname voip bicomsystems com Example for IP Address 192 168 1 10 Click on the Apply button If everything is done as above described you should have successfully registered your phone to PBXware Dial 123 to verify registration Auto Provisioning This chapter describes how to set UAD settings create PBXware exte...

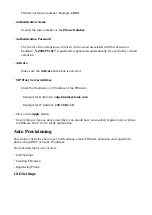
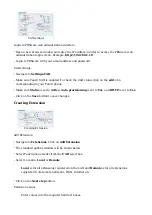
Page 8: ...anvil phone Make sure Status is set to Active Auto provisioning is set to Yes and DHCP is set to Yes Click on the Save button to save changes Creating Extension Creating Extension Add Extension Navigate to Extensions Click on Add Extension The standard options window will be shown below Select Fanvil phone model from the UAD select box Select Location Local or Remote Local is for all extensions re...

Page 9: ...P HTTP HTTPS Open a new browser window and enter your phone IP address e g http 192 168 1 22 Enter username and password and press Confirm button NOTE Factory default login details are username admin and password admin Click on Auto Provision in the navigation tab Enter Auto Provisioning username and password into Authentication Name and Authentication Password fields Make sure the Download Common...

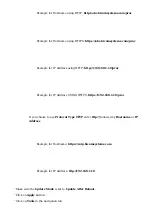
Page 10: ... 192 168 1 10 prov Example for IP Address USING HTTPS https 192 168 1 10 prov If you choose to use Protocol Type TFTP enter tftp followed by Hostname or IP Address Example for Hostname https voip bicomsystems com Example for IP Address tftp 192 168 1 10 Make sure the Update Mode is set to Update After Reboot Click on Apply button Click on Tools in the navigation tab ...

Page 11: ... not power off your phone Auto provisioning process will start during phone reboot process phone will pickup appropriate configuration file from PBXware If everything is done as above described you should have successfully registered your phone to PBXware Dial 123 to verify registration Retrieved from http wiki bicomsystems com Fanvil_H3 Disclaimers About Bicom Systems Wiki ...

Reviews: