background image

English

English

GB-9

GB-8

SETTING THE THERMOSTAT KNOB 

The refrigerator is controlled with a thermostat knob located inside the fridge, 

towards the upper right-hand corner. Turn the knob from the STOP (0) position 

towards the higher numbers for colder temperatures. The knob can be adjusted from 

setting 1 to 7. 
Higher settings on the knob (higher numbers) mean lower temperatures (colder) in 

all compartments of the appliance. 
Changes of the ambient temperature affect temperature in the interior of the 

appliance so choose a correct setting of the temperature control knob, depending on 

your ambient conditions. 
In the STOP (OFF) position the appliance does not operate (the cooling system is 

switched off), but power supply is not interrupted.
Set the thermostat knob to a middle position to achieve -18°C in the freezer 

compartment.

Please Note:

 If the appliance is switched off you must wait at least 5 minutes before 

restarting the appliance or re-inserting the plug into the wall outlet. This is to allow 

the protection device in the compressor to reset.
If the compressor fails to start correctly remove the plug and wait for 5 minutes 

before you try again then the compressor should restart normally.
The storage temperature may be affected by:
•  The room temperature
•  How often the door is opened
•  How much food is stored
•  Position of the appliance
When you set the correct temperature, all these factors mentioned above shall be 

taken into account.

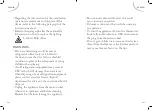
TEMPERATURE INDICATE

In order to help you get the correct adjustment of your device, it is equipped with a 

temperature gauge placed in the coldest area.
For the proper storage of food in your refrigerator and in particular in the coldest 

area, make sure that “OK” appears in the temperature indicator.

The symbol on the left side indicates the location of the coldest area 

of your refrigerator. It defines the height of this area.

If “OK” is not displayed, the average temperature in this area will 

be very high. You ought to adjust the thermostat to a colder setting.

INSTALLATION

USE

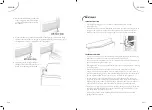
•  Position the appliance and allow it to stand for two to three hours before it is 

turned on for the first time to allow the system to settle. Do not position next to 

any heat source e.g. cooker, boiler or in direct sunlight etc.

•  Allow at least 10cm of space at the top and 10 cm of space on both sides of the 

appliance and between the back of the appliance and the wall for adequate air 

circulation. The appliance is not designed for recessed installation (“building in”).

•  Install on a good firm level surface, and any unevenness of the floor should be 

corrected prior to installation, slight unevenness can be overcome by adjusting the 

front feet.

• 

NOTE:

 If the appliance is positioned on a carpet, soft floor covering you should 

readjust the front feet once the appliance has had time to settle.

•  This appliance is designed to operate in ambient temperature between 16°C and 

38°C. If these temperatures are exceeded, i.e. colder or warmer, the appliance will 

not operate correctly. If the ambient temperatures are exceeded for long periods, 

the temperature in the freezer section will rise above -18°C and food spoilage may 

occur. 

•  Remove all packaging materials from the appliance. Wash the inside of the cabinet 

with lukewarm water and bicarbonate of soda (5ml to 0.5 liter of water). Dry the 

appliance thoroughly. 

•  When you use the freezer for the first time or after defrosting, set the thermostat 

control to the maximum position for at least 2 hours before introducing food to be 

stored, and then readjust to the normal position.  

•  If there is a power failure, do not open the door. Frozen food should not be affected 

if the failure lasts for less than 12 hours. If the failure is longer, then the food 

should be checked and either eaten immediately or cooked and then re-frozen. 

Summary of Contents for R2135

Page 1: ...Imported by Import par CONFORAMA France SA 80 Boulevard du Mandinet Lognes 77432 Marne la Vall e Cedex 2 FRANCE R2135 R2135S...

Page 2: ...us recommandons de lire attentivement ce manuel d instructions et de le conserver pour toute r f rence ult rieure TABLE DES MATI RES MANUEL D UTILISATION INSTRUCTIONS DE SECURITE FR 2 CARACTERISTIQUES...

Page 3: ...circuit de r frig ration MISE EN GARDE Ne pas utiliser d appareils lectriques l int rieur du compartiment de stockage des denr es moins qu ils ne soient du type recommand par le fabricant Cet apparei...

Page 4: ...ateur ou d un vieux r frig rateur comportant une serrure sur la porte veillez ce que celle ci soit d sactiv e afin d viter que des enfants ne risquent de se retrouver enferm s l int rieur en jouant Le...

Page 5: ...R frig rant R600a 29g Dimension L x P x H 478 x 502 x 1290 mm Poids 32kg Type d installation Pose libre CARACTERISTIQUES TECHNIQUE 1 Calcul e sur la base du r sultat obtenu pour 24 heures dans des co...

Page 6: ...et le cas ch ant consommez les imm diatement ou faites les cuire avant de les recongeler REGLAGE DU THERMOSTAT Le r frig rateur est command par un bouton de thermostat situ en haut Pour r gler le r f...

Page 7: ...cong lateur le plus rapidement possible avant d avoir eu le temps de se d congeler et de se g ter Les instructions de conservation des fabricants figurant sur les emballages des produits surgel s doi...

Page 8: ...orte du compartiment de r frig ration 3 Retirez ensuite la charni re inf rieure 4 Retirez la vis de la charni re inf rieure et le remonter la position du miroir 5 Enlevez la but e de porte du r frig r...

Page 9: ...roit o ils pourraient compromettre l tanch it du joint de la porte Cela aurait pour cons quence de permettre une entr e d air constante et donc de faire marcher le compresseur en permanence Les fines...

Page 10: ...ctions des tiquettes Choisissez des aliments frais de bonne qualit et assurez vous qu ils sont bien propres avant de les congeler Emballez tous les aliments dans des sacs pour aliment de qualit en pol...

Page 11: ...our obtenir des conseils sur la m thode de traitement appropri e SAFETY INSTRUCTIONS GB 2 TECHNICAL INFORMATION GB 6 DESCRIPTION OF THE DEVICE GB 7 INSTALLATION GB 8 USE GB 8 REVERSE DOOR GB 12 MAINTE...

Page 12: ...this appliance Do not use with a programmer timer separate remote control system or any other device that switches on automatically WARNING fill the ice maker with potable water only SAFETY INSTRUCTIO...

Page 13: ...ollowing paragraph of the instruction manual Refer to the paragraph after the manual for information on how to replace the lighting Caution Risk of fire WARNINGS If you are discarding an old freezer o...

Page 14: ...r 33L Defrost Refrigerator automatic Freezer manual Autonomy 18h Freezing capacity 2 0kg 24h Climate class Ambient range ST 16 C to 38 C Noise 41dB Rated voltage and frequency Input power 220V 240V 50...

Page 15: ...n of the coldest area of your refrigerator It defines the height of this area If OK is not displayed the average temperature in this area will be very high You ought to adjust the thermostat to a cold...

Page 16: ...osition of the thermostat gradually and wait at least 12 hours before re checking NOTE after charging the device for fresh food or after repeated or prolonged door openings it is normal that the inscr...

Page 17: ...gerating compartment to the gun of the hinge while taking care of the alignment of the door compared to the refrigerator REVERSE DOOR Follow the following stages to reverse the door from its initial p...

Page 18: ...n the freezer is empty and it should be carried out as quickly as possible An increase in temperature of frozen food packages during defrosting will shorten the storage life Provided that the contents...

Page 19: ...ry thoroughly Wash all removable parts in the same way and reassemble Reconnect the appliance to the mains supply and leave for 2 to 3 hours on setting number 7 before introducing the food back into t...

Page 20: ...ires that old household electrical appliances must not be disposed of in the normal unsorted municipal waste stream Old appliances must be collected separately in order to optimize the recovery and re...

Reviews: