background image


2


1. Warnings


1.


The information given in this document can be modified or extended in accordance without any 
prior notice.


2.


This product contains electronic parts, a battery, and a detachable strap; please keep it out of 
reach from young children for their own safety.


3.


To use the Care.UP©, you need to possess a smartphone with iOS (at least version 9) or Android 
(at least version 4.3) and Bluetooth 4.0, BLE or Bluetooth Smart.


4.


Do only use Care.UP© and Upp accessories. Third party equipment can damage your device!


5.


Before turning on your Care.UP© for the first time, please follow the 

2. Installation

 procedure below.


2. Installation


1.


Sign up 

via the website (

www.farasha

-

care.com

) or the app (Farasha

™, 

available in the Apple Store 

and Google Play). 

Please use a different email address than the one you provided to buy your 

Care.UP© to protect the anonymity of your data

.


2.


Make sure 

your phone is connected to Internet

.

 Sign in

 on your phone via the Farasha

™ 

app.


3.


Plug the watch to a plug socket

 and 

keep it plugged

 during the entire installation process (see 

3.1. 

Charger

). Please wait until 

your battery reaches 50%

 before launching the installation process.


4.


You need to keep your phone and your watch close to each other

 (less than 15 feet/5 meters). If 

you want to avoid issues to happen, keep your phone and your watch next to each other.


5.


Open the app, and accept to connect your account with the watch.

 Follow the instructions on the 

watch

.


6.


Enter the DID

 (see 

a. Installation

). During the installation update, 

do not unplug or move away your 

phone and your watch

 by more than 15 feet/5 meters. Wait for the watch and the phone to be suc-

cessfully intertwined.


You are now ready to use all the functionalities of your Care.UP©!


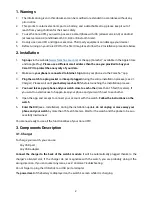
3. Components Description


3.1. Charger


To charge your watch, you can use:


Any USB port ;


Any USB adapter.


Connect the charger to the back of the watch

s module

. It will be automatically plugged thanks to the 

charger

s oriented slot; if the  charger do not magnetize with the watch, you are probably doing it the 

wrong direction. If you encounter any issue, see 

8. Common Troubleshooting

.


Do not forget to plug the USB stick to a USB port or adapter.


The 

power level

 of the battery is displayed on the watch

s screen while it is charging.


Summary of Contents for Care.UP

Page 1: ...User Guide August 2017...

Page 2: ...entire installation process see 3 1 Charger Please wait until your battery reaches 50 before launching the installation process 4 You need to keep your phone and your watch close to each other less th...

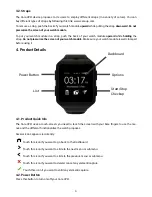
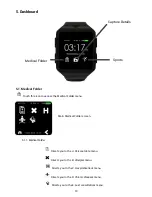
Page 3: ...odule is well clamped before using it 4 Product Details Dashboard Options Start Stop Checkup Power Button List 4 1 Product Quick Info The Care UP uses a touch screen you need to touch the screen with...

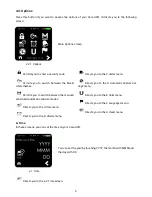
Page 4: ...he manual scheduled automatic capture modes Directs you to the A Time menu Directs you to the B Alarms menu Directs you to the C Alerts menu Directs you to the D Automatic Capture Set tings menu Direc...

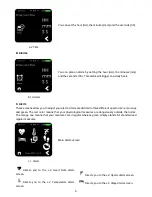
Page 5: ...divided in three different spectrums red orange and green The red color means that your physiological measures are dangerously outside the norms The orange one means that your measures are irregular w...

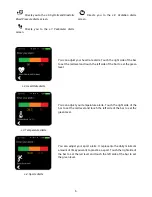
Page 6: ...left side of the bar to set the green level c 2 Heart Rate Alerts You can adjust your temperature alerts Touch the right side of the bar to set the red level and touch the left side of the bar to set...

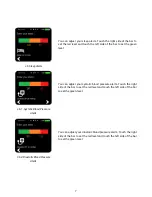
Page 7: ...r systolic blood pressure alerts Touch the right side of the bar to set the red level and touch the left side of the bar to set the green level c 6 1 Systolic Blood Pressure Alerts You can adjust your...

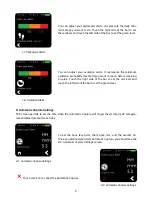
Page 8: ...Touch the right side of the bar to set the red level and touch the left side of the bar to set the green level c 8 Ovulation Alerts D Automatic Capture Settings This screen permits to set the time whe...

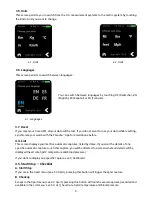
Page 9: ...a App for smartphone before 4 4 List This screen displays your last five automatic captures listed by dates If you want the details of one specific automatic capture touch this capture you will be dir...

Page 10: ...to access the Medical Folder menu 5 1 1 Medical Folder Main Medical Folder screen Directs you to the A Personal data menu Directs you to the B Allergies menu Directs you to the C Hospitalisations menu...

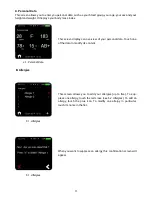
Page 11: ...an overview of your personal data Touch one of the data to modify its content B Allergies b 1 Allergies This screen allows you to add your allergies up to five To sup press one allergy touch the red c...

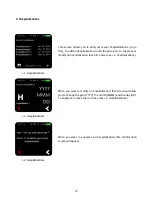
Page 12: ...modify an hospitalization touch its name see c 2 Hospitalizations c 3 Hospitalizations When you want to modify an hospitalization this screen will allow you to change the year YYYY the month MMM and...

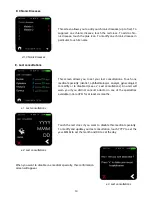
Page 13: ...lty dentist ophthalmologist analyst gynecologist to modify or to disable it see e 2 Last consultations An alert will warn you if you did not consult a doctor in one of the specialties available in Car...

Page 14: ...Directs you to the D Sleep menu Directs you to the E Blood Pressure menu Directs you to the F Pedometer menu Directs you to the G Drugs menu Directs you to the H Consultations menu Directs you to the...

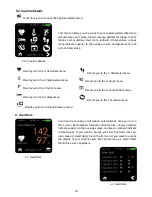
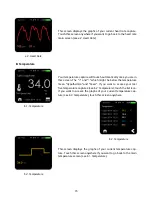
Page 15: ...The H and F which might be below the temperature mean Hypothermia and Fever If you want to access your last five temperature captures see b 2 Temperature touch the list icon If you want to access the...

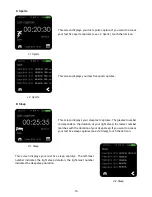
Page 16: ...This screen displays your sleep last captures The greatest number corresponds to the duration of your light sleep the lowest number matches with the duration of your deep sleep If you want to access...

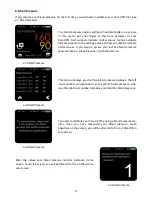
Page 17: ...ive blood pressure captures see e 2 Blood Pressure touch the list icon e 2 Blood Pressure This screen displays your last five blood pressure captures The left most number corresponds to your systolic...

Page 18: ...Care UP to calculate your blood pressure F Pedometer f 1 Pedometer This screen permits you to access your last pedometer capture Red numbers indicate that you are far below your daily objective orang...

Page 19: ...daily objective G Drugs g 1 Drugs This screen displays your next drug intake Three different hours are shown one for the morning one for midday and one for the evening If you want to suppress a drug t...

Page 20: ...tions If you want to modify it touch the name of the consultation you can change its name and the hour If you want to access all your con sultations up to five see h 2 Consultations touch the list ico...

Page 21: ...ccess the last five days ovulation data see i 2 Ovulation touch the list icon i 1 Ovulation i 2 Ovulation Enter the start of your regular menstruation by touching YYYY for the year MMM for the month a...

Page 22: ...R D team Make sure you have your smartphone with the Farasha App with you so you can collect your results and data A Competition This mode allows you to capture your performances during a competition...

Page 23: ...watch will propose you to send and save your data in your mobile app Touch the Save and Send blue text to send and save your data If you choose to do so please make sure your phone is next to your Ca...

Page 24: ...r minute pedometer and energy burned calories When a exercise is over your Care UP vibrates If you did not finish the exercise on time feel free to finish it before continuing on the next exercise of...

Page 25: ...ata in your mobile app Touch the Save and Send blue text to send and save your data If you choose to do so please make sure your phone is next to your Care UP no more than 15 feet 5 meters If you do n...

Page 26: ...Wait for the watch to be successfully updated 7 Features 7 1 Water Resistance The Care UP device is designed to be waterproof up to 30 feet ten meters deep 7 2 Battery The Care UP s battery is designe...

Page 27: ...a plug socket and see if anything changes Wait half an hour before powering up your Care UP If the problem persists please contact our customer service 8 3 Unable to charge Check if the plug socket is...

Reviews: