5
Navigator Menu
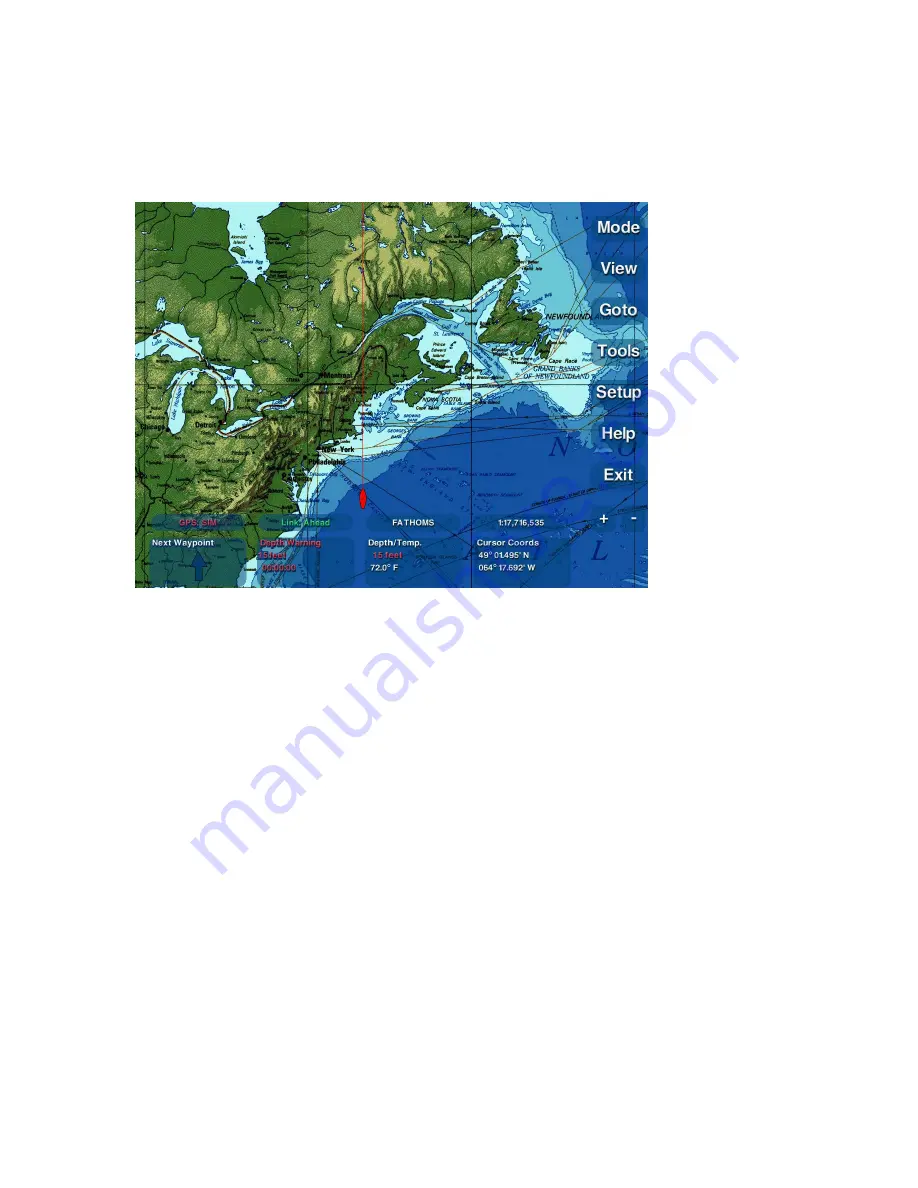
The first time you start up the Maestro Navigator or Chart Plotter window, the World
Chart is displayed by default.
The Navigator menu buttons are displayed down the right side of the screen and there
are 8 user-defined Data Windows along the bottom. Use these buttons as described
below and throughout this manual to access the various features and tools Maestro
Navigator has to offer.
x
Mode
- Choose between navigation chart maps, contour view and split screen
options
x
View
- Access to details and lists such as Charts, Marks, Tides and Currents,
etc.
x
Go To
- The first step in plotting a route. The
Go To
option is only available
when there is no active Route
x
Route
- Access to details and functions for the “active” Route. The
Route
option is only available when there is an active Route
x
Tools
- Access to the various Maestro Navigator tools and features, such as
Mark, Distance and Tracking tools
x
Setup
- Access to the tools for customizing Maestro display screens. Details
are described in the “Setup Chart Plotter” section of this manual.
x
Help
- Provides access to additional Faria supplied features, such as Chart
Symbols, Tides, Lights, etc
x
Exit
- To hide the Chart Plotter window and access other screens on the
computer, to exit from the Navigator software or shut down the computer
x
Plus/Minus
- The plus and minus buttons at the lower right of the Maestro
Navigator window let you go in for a closer view, or move back to see a larger
area of the Chart.
Summary of Contents for Maestro
Page 1: ...User s Manual TM IS0270 rev A ecr 8171 3 2010 ...
Page 2: ......
Page 8: ......
Page 50: ......
Page 68: ......
Page 86: ...Maestro Navigator 3 5 3 doc 82 ...
Page 90: ......
Page 94: ...Maestro Navigator 3 5 3 doc 90 ...
Page 122: ......
Page 140: ......
Page 142: ......


