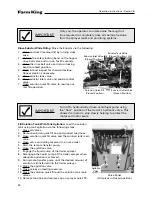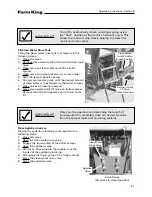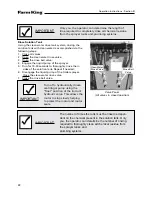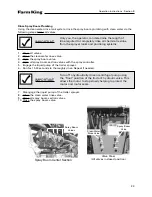
4. People who are allergic to any of the chemicals used must never be allowed in or near the
sprayer.
5. Always park the sprayer on a level surface, and lock the tractor brakes, or block the tires,
before making adjustments or repairs.
6. Before operating this equipment, thoroughly inspect the unit to ensure it is in good working
order.
7. Do not operate this unit if any defect or malfunction exists. Pay particular attention to safety
features such as safety chains.
8. Verify that the sprayer is securely hitched to the tractor and safety chains are in place.
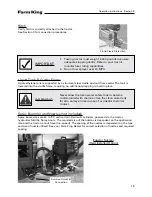
9. Always position the spray boom in cradles prior to disconnecting the trailer hitch from the
tractor.
10. Stopping distance increases as the square of the speed. For example: It will take twice
as much distance to stop a unit traveling 15 mph as one going 10 mph; and four times
the distance at 20 mph (more than eight times the distance at 25 mph)! Road surface will
influence stopping distance. Dry pavement is usually considerably better than gravel road.
Materials (such as ice, snow, water, oil or mud) on the surface can greatly increase stopping
distance.
Road slope has a significant impact on stopping distance and can greatly magnify the other
factors mentioned above. Under some downhill conditions stopping can be very difficult or
impossible.
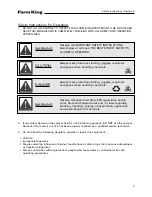
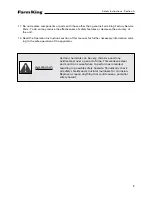
WARNING
Never disconnect the sprayer from the tractor hitch
while the spray boom wings are in the spray position.
This action will cause this sprayer to tip backwards with
a high probability of injury to the operator and damage
to the unit.
Safety Instructions - Section A
8
Summary of Contents for 1600
Page 1: ...Operator and Parts Manual 1600 High Clearance Sprayer 04 2010 SXL 26030 ...
Page 5: ...Safety Instruction Section A 5 ...
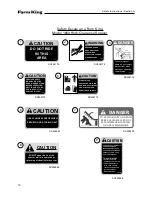
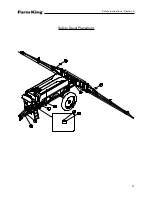
Page 11: ...Safety Decal Placement Safety Instructions Section A 11 ...
Page 12: ...Notes Safety Instructions Section A 12 ...
Page 13: ...Operation Instructions Section B 13 ...
Page 29: ...Connection Startup Section C 29 ...
Page 38: ...Connection Startup Section C Notes 38 ...
Page 39: ...Storage Section D 39 ...
Page 43: ...Maintenance Service Troubleshooting Section E 43 ...
Page 50: ...Maintenance Service Troubleshooting Section E Notes 50 ...
Page 51: ...Parts Schematics Section F 51 ...
Page 52: ...19 Description Decal Placement Parts Schematics Section F 52 ...
Page 54: ...Description Trailer Sprayer Light Kit Assembly Parts Schematics Section F 54 ...
Page 56: ...Description Frame Assembly Parts Schematics Section F 56 ...
Page 58: ...Description Drawbar Assembly Parts Schematics Section F 58 ...
Page 60: ...Description 10 Bolt Adjustable Axle Assembly Parts Schematics Section F 60 ...
Page 62: ...Description Cradle Assembly Parts Schematics Section F 62 ...
Page 64: ...Description Tank Spreader and Sight Gauge Parts Schematics Section F 64 ...
Page 66: ...Parts Schematics Section F Description Fold Over the Top Boom Center Section Assembly 66 ...
Page 68: ...Description Fold Boom Primary Section Assembly Parts Schematics Section F 68 ...
Page 70: ...Description Fold Boom Secondary Breakaway Assembly Parts Schematics Section F 70 ...
Page 72: ...Parts Schematics Section F Notes 72 ...
Page 74: ...Description Sprayer Hydraulic Routing Parts Schematics Section F 74 ...
Page 76: ...Description Fold Over The Top Boom Hydraulic Valve Breakdown Parts Schematics Section F 76 ...
Page 79: ...Parts Schematics Section F Notes 79 ...
Page 82: ...Description Spray Boom Cylinder Assembly Parts Schematics Section F 82 ...
Page 84: ...Description Boom Rephasing Cylinder Assembly Parts Schematics Section F 84 ...
Page 86: ...Description Pump Plumbing Parts Schematics Section F 86 ...
Page 88: ...Parts Schematics Section F Description Tank Plumbing 88 ...
Page 90: ...Description Raven Control Plumbing Parts Schematics Section F 90 ...
Page 93: ...Parts Schematics Section F Notes 93 ...
Page 94: ...Description Valve Mounting 94 Parts Schematics Section F ...
Page 96: ...Description Fold Over the Top Boom Plumbing Kit Parts Schematics Section F 96 ...
Page 98: ...Description Manual Fence Row Plumbing Parts Schematics Section F 98 ...
Page 100: ...Description Eductor Assembly Parts Schematics Section F 100 ...
Page 103: ...Warranty Section G 103 ...


