46
Assembly - High Speed Compact Disc
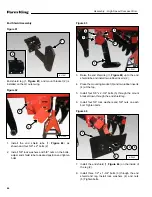
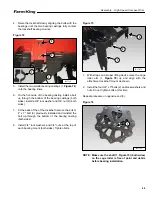
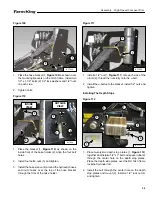
End Shield Assembly
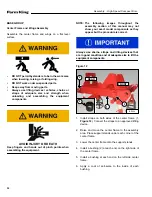
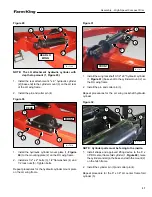
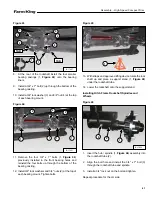
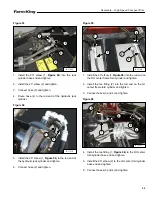
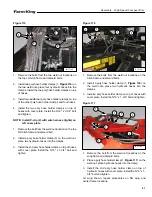
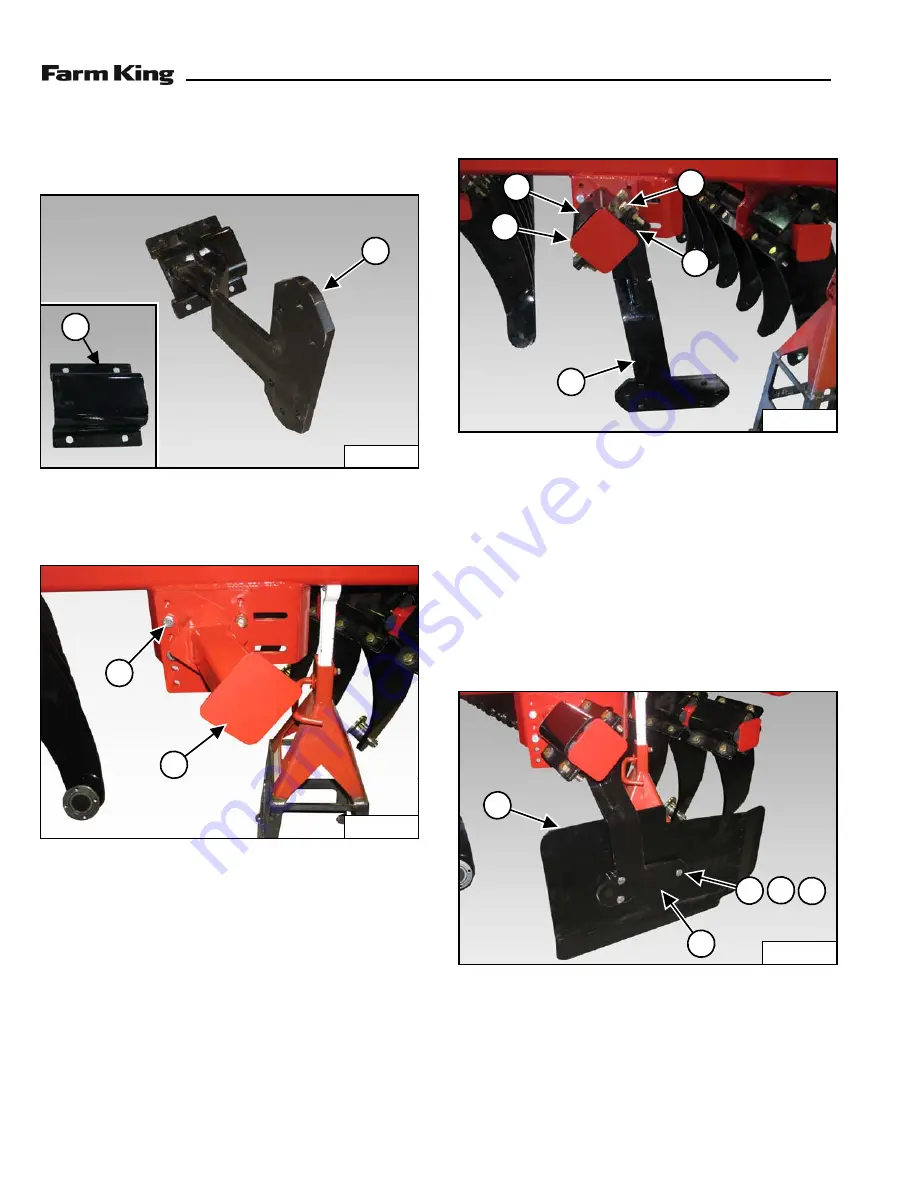
Figure 61
) and mount bracket (2) is
installed on the LH outer wing.
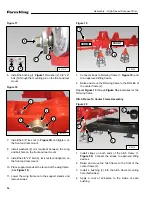
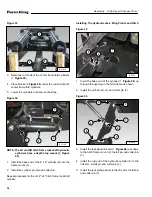
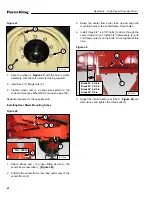
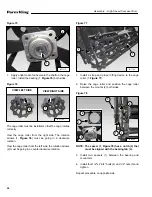
Figure 62
1.
Install the end shield tube (1,
shown and four 5/8" x 2" bolts (2)
2.
Install 5/8" lock washers and 5/8" nuts on the bolts,
adjust end shield tube to desired position and tighten
bolts.
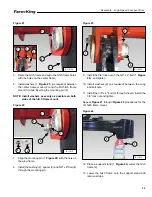
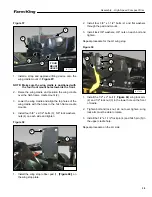
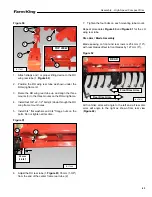
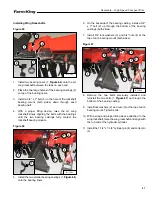
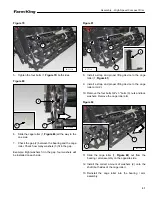
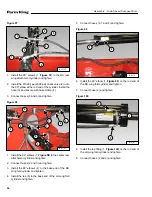
Figure 63
3.
Raise the end shield leg (1,
shield tube and install two rubber inserts (2).
4.
Place the mounting bracket (3) and two rubber inserts
(4) at the top.
5.
Install four 5/8" x 2-3/4" bolts (5) through the mount
bracket down through the end shield leg.
6.
Install four 5/8” lock washers and 5/8" nuts on each
bolt. Tighten bolts.
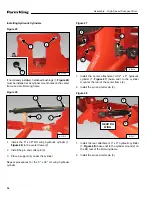
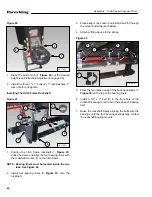
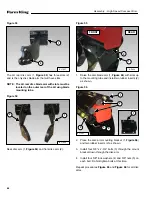
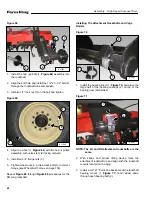
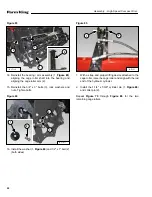
Figure 64
7.
Install the end shield (1,
the leg (2).
8.
Install three 1/2" x 1-3/4" bolts (3) through the end
shield and leg. Install lock washers (4) and nuts
(5).Tighten bolts.
B-17087
2
1
B-17089
2
1
B-17087
1
2
5
4
3
B-17090
1
2
3
4
5
Summary of Contents for HS8525
Page 2: ......
Page 4: ...4 Table of Contents High Speed Compact Disc ...
Page 6: ...Warranty Registration High Speed Compact Disc 6 ...
Page 10: ...10 Introduction High Speed Compact Disc ...
Page 14: ...14 Safety High Speed Compact Disc ...
Page 28: ...28 Safety High Speed Compact Disc ...
Page 30: ...30 Assembly High Speed Compact Disc ...
Page 74: ...74 Assembly High Speed Compact Disc ...
Page 76: ...76 Operation High Speed Compact Disc ...
Page 92: ...92 Maintenance High Speed Compact Disc ...
Page 102: ...102 Part Identification High Speed Compact Disc ...
Page 104: ...104 Part Identification High Speed Compact Disc WHEELS TIRES WINGS 3 1 4 5 2 88717299 ...
Page 152: ...152 Part Identification High Speed Compact Disc BLADES 2 1 3 88717644 ...
Page 154: ...154 Part Identification High Speed Compact Disc ...
Page 156: ...156 Specifications High Speed Compact Disc ...
Page 166: ...166 Specifications High Speed Compact Disc ...
Page 167: ...167 Warranty High Speed Compact Disc WARRANTY WARRANTY 169 ...
Page 168: ...168 Warranty High Speed Compact Disc ...
Page 171: ......

